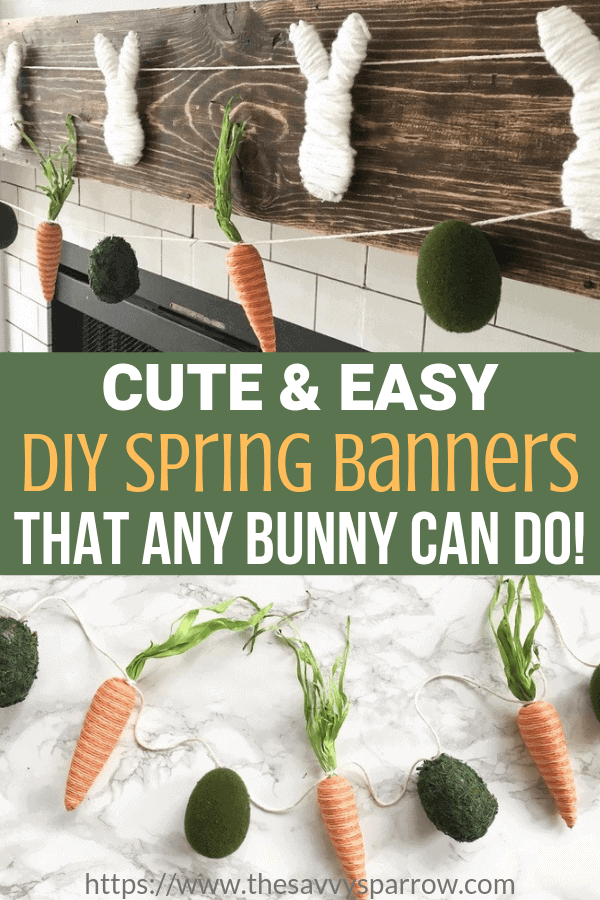
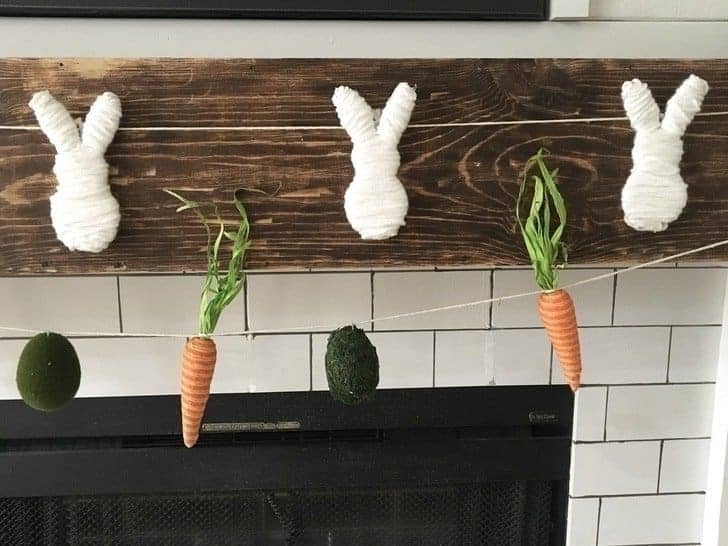
Now that we’ve brought our 90’s fireplace into this millennium, I’m loving being able to decorate it with DIY seasonal decor. It’s so fun to create a new vignette for each holiday to add some color to my living room decor. And these easy DIY Easter banners are the perfect way to dress up your Spring mantel without spending a fortune.
Even the craft-challenged Mamas out there will be able to recreate these fun DIY Easter banners in no time.
Just grab a few basic supplies and you’re good to go, even if you don’t know the difference between mod podge and hodge podge. 🙂
I chose to hang the two DIY Easter banners together because each one alone just didn’t have enough color and interest for me. But, I love the look of the banners layered like this:
The carrot and egg DIY Easter banner took me literally 5 minutes to create, so if you’re short on time, skip down to that super easy tutorial.
The yarn bunny Easter banner took a while longer, because it actually required some crafting. Not gonna lie… I felt a little like Martha Stewart. Or Bob Ross… “I think a cute little yarn bunny will live right here.”
Here’s how to make your own DIY Easter banners for your Spring mantel decor:
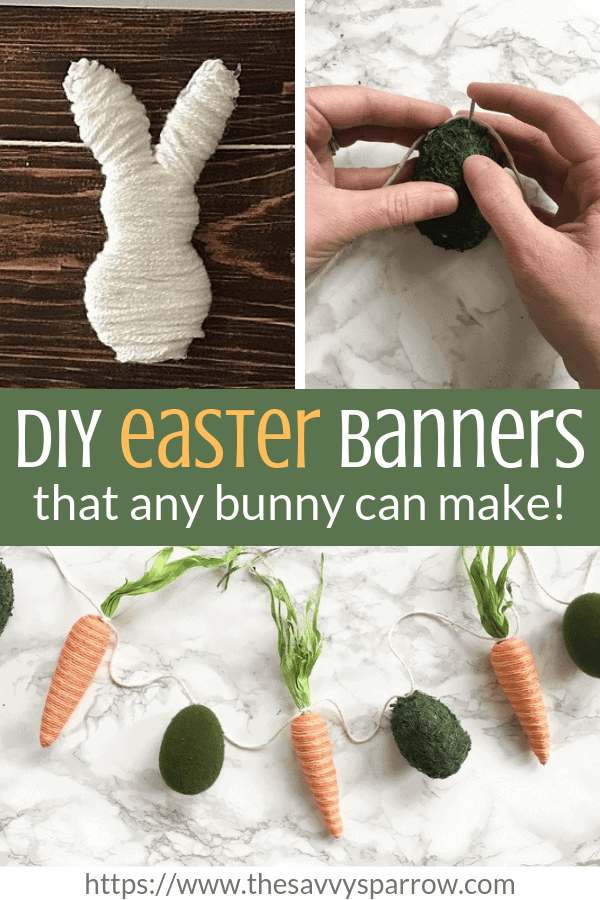
For the Yarn Bunny DIY Easter Banners:
*These super cute yarn bunnies were inspired by the yarn-wrapped cardboard hearts from Crafty Morning.
Step 1: Gather your supplies
- White Yarn
- Cardboard box (Amazon box or similar)
- Printable bunny template
- Scissors
- Hot glue gun and glue sticks
- Butcher’s twine
Step 2: Print out the FREE Easter bunny template
Click HERE to download and print my FREE bunny template.
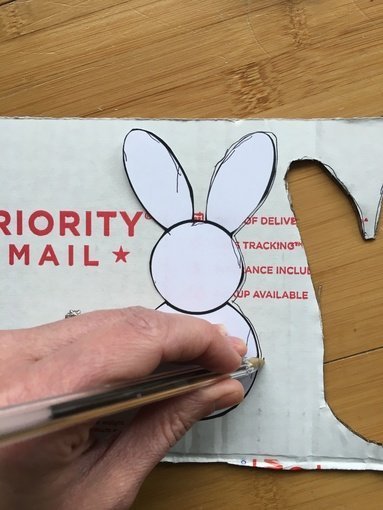
Step 3: Create cardboard bunnies
Trace the bunny template onto the cardboard box scraps and cut out.
Step 4: Wrap yarn around cardboard bunnies
Starting in the middle of the bunny, wrap white yarn fairly tightly around the cardboard horizontally. Continue to move down the bunny as you wrap.
Once you get towards the bottom of the bunny you will need to hot glue the yarn in place, or it will slide off the end of the circular shape.
When your bunny is completely covered in yarn, snip the yarn and hot glue the end to the back side of your bunny. Like so…
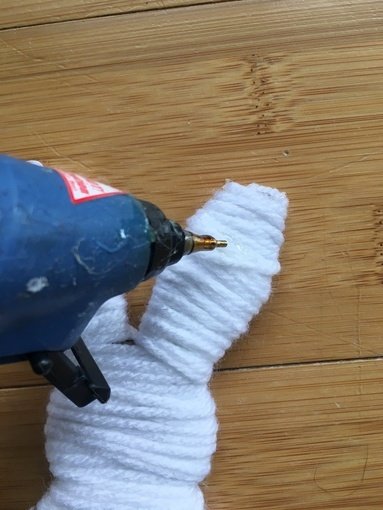
Please ignore the sorry state of my glue gun… it’s lived a long life. 🙂
Step 5: Attach your yarn bunnies to your DIY Easter banner
To attach your yarn bunnies to your butcher’s twine, knot a small loop of yarn through the back, top area of your bunny. Snip the ends so that the loop is not visible from the front of your DIY Easter banners.
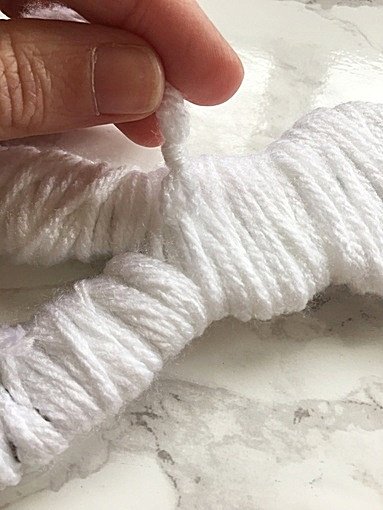
Then, run your butcher’s twine through the loop. This method will allow your bunnies to hang straight down. Once all of your bunnies are threaded onto the butcher’s twine, you can adjust the space between each.
Here’s a finished yarn bunny attached to the twine:
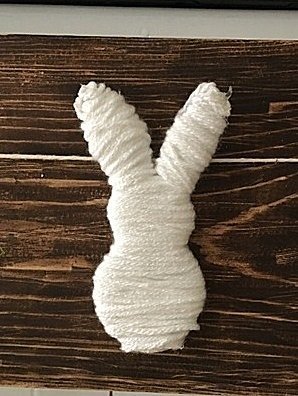
And you’re done with your first of these cute and easy DIY Easter banners!
Here’s how to create the next one:
For the Carrots and Eggs DIY Easter Banners:
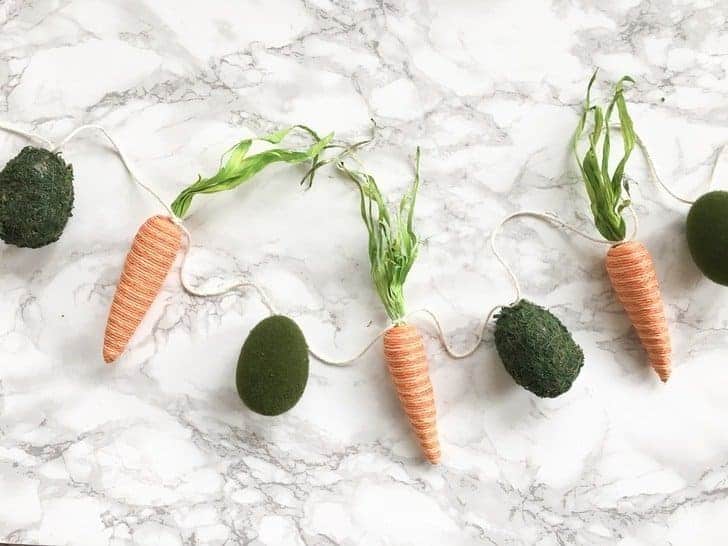
Step 1: Gather your supplies
- Moss covered eggs (mine came from Hobby Lobby)
- Carrot decorations (mine came from Hobby Lobby)
- Butcher’s twine
- Staples from a staple gun (you do not need the actual staple gun!)
Step 2: Attach carrots and eggs to your butcher’s twine
These carrots and eggs DIY spring banners couldn’t be easier! To attach your carrots, simply tie them onto the butcher twine. Attach the moss eggs to the twine by gently pushing a staple into the styrofoam egg, holding the twine in place.
It should look something like this:

And that’s it! Told you it was super easy.
Here’s how the two DIY Easter banners look hanging together on my snazzy new fireplace:
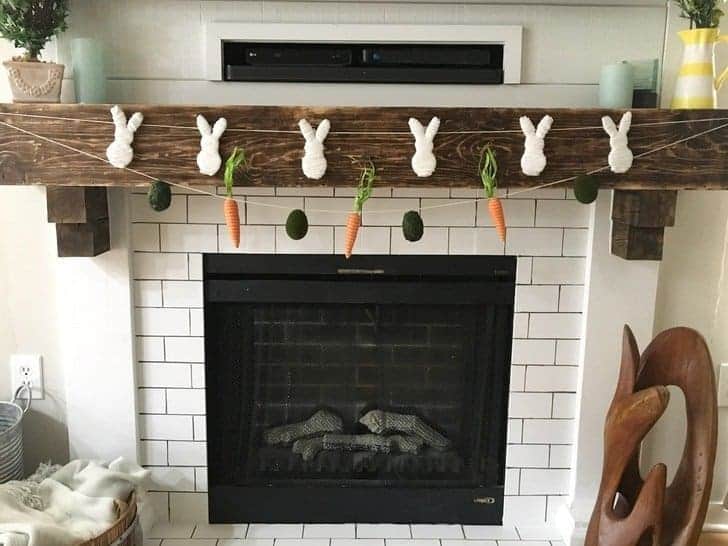
Love the finished product. I think even Martha would be proud! If you love this DIY banner, then check out this fun DIY tassel garland using old kids’ clothes!
And Happy Spring!