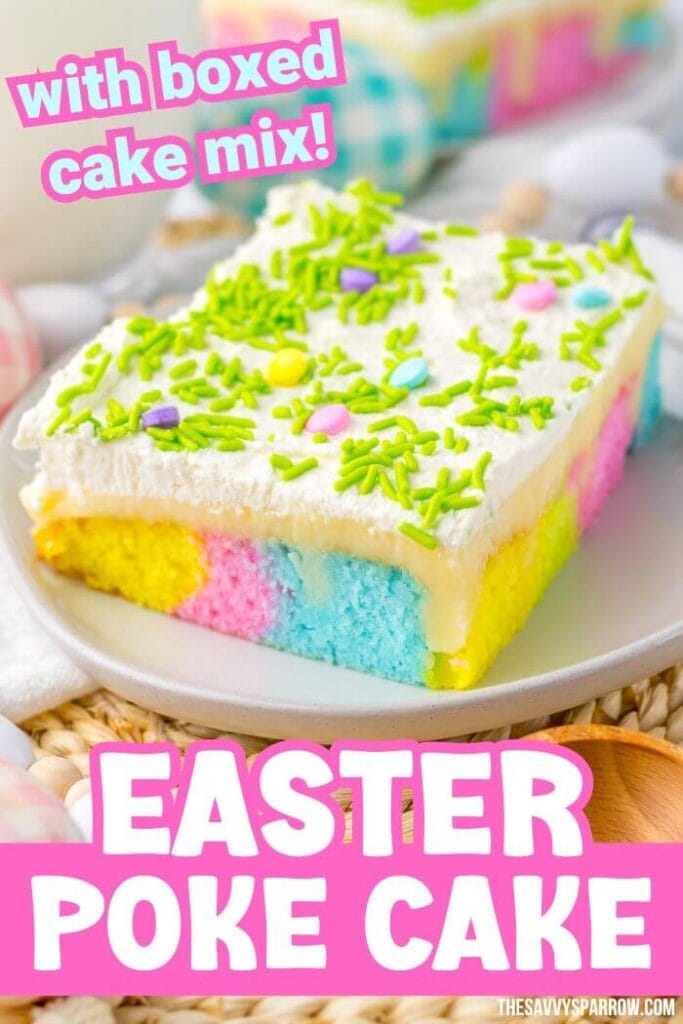
Easter Poke Cake is the ultimate Easter dessert, made with colored batter, an irresistible white chocolate pudding filling, and a sweet and creamy whipped topping! It’s fun, it’s delicious, and this Spring colored poke cake is easy to make!
Poke cake has become extremely popular in the last few years, and for good reason! It consists of a simple cake base that’s poked with holes and then filled with a variety of fillings that you can choose from for added flavor and moisture. In fact, I’ve even made Poke Cake Cupcakes with orange gelatin!
While this multi-colored Easter poke cake may look complicated to make, it’s actually a breeze! The extra step of coloring the cake batter makes this poke cake stand above the rest, just like these adorable colored Easter Blossom Sugar Cookies.
Top this beautiful Easter poke cake with pastel sprinkles and mini chocolate Easter eggs. It’s definitely going to impress your Easter dinner guests, and your kids will love this colorful poke cake dessert, too!

Why You’ll Love this Easter Poke Cake:
This Easter poke cake is a stunning and delicious cake made specifically with Easter celebrations in mind! Here’s why it’s a must-bake sweet treat this holiday:
- Vibrant. The brightly colored cake batter that’s on full display when serving slices to your friends and family adds a ton of fun and excitement!
- Simple ingredients. This recipe uses box cake mix and instant pudding for added convenience. The rest of the ingredients are likely to already be in your pantry and fridge.
- Easy swaps. Get creative by adding your favorite sprinkles and mini chocolate Easter eggs as a decorative topping, convert this cake to a gluten-free dessert, and select different food coloring for the cake batter.
- Moist and flavorful. In addition to being a beautiful cake, the white chocolate pudding mixture seeps throughout the entire cake, adding even more flavor and just the right amount of moisture.
What is a Poke Cake?
If you’ve never heard of a poke cake, then you’re in a for a treat (literally!). Poke cake is a fun dessert that has taken the baking world by storm over the past few years, thanks to its simplicity and deliciousness.
It starts with a baked cake – usually a basic flavor like vanilla or chocolate – poked all over with holes using the handle of a wooden spoon or a skewer. These holes serve as channels for a flavorful filling or sauce to seep into the cake, adding moisture and taste. The filling options are pretty much endless, ranging from fruit-flavored gelatin to creamy pudding or even a tangy glaze.
But one of the best things about poke cake is that it doesn’t require fancy ingredients or advanced baking skills. With just a few basic tools and ingredients, anyone can create a crowd-pleasing dessert that’s perfect for gatherings or special occasions, like Easter.
Ingredients for Easter Poke Cake
This poke cake consists of a colored cake, instant pudding filling, and a whipped topping. Here’s everything you need to make this scrumptious Easter poke cake:
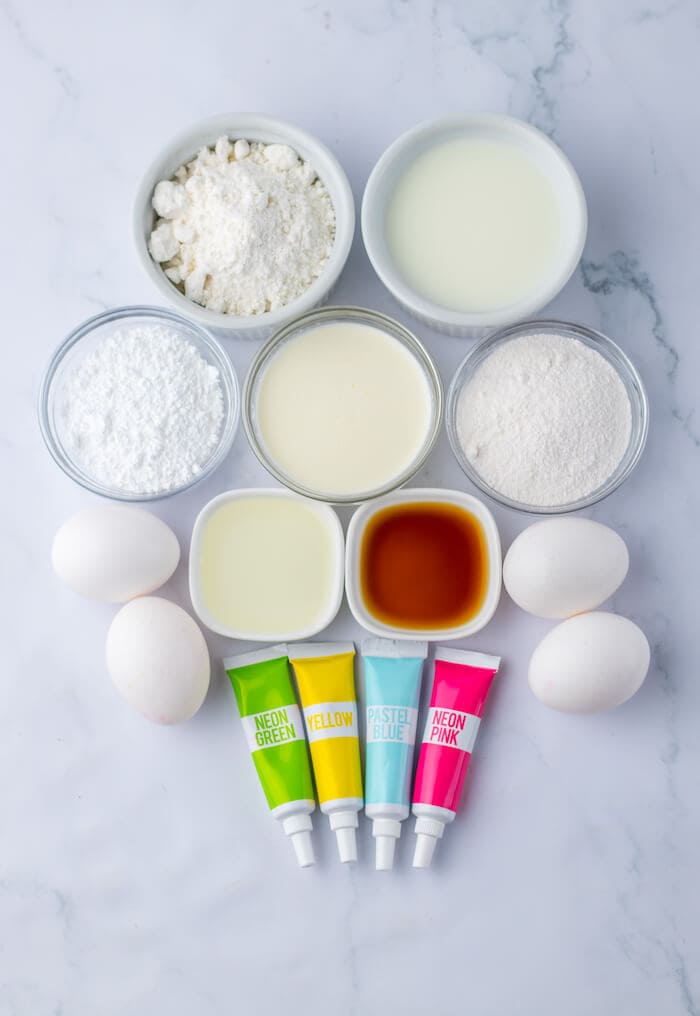
- White cake mix – Use your favorite brand of box cake mix. Vanilla cake mix can be used instead. In addition to the cake mix, make sure you have all of the other ingredients listed on the packaging, such as oil, eggs, and water.
- Instant white chocolate pudding – I’ve used 2 boxes of instant pudding. Cheesecake pudding is a great substitute for the white chocolate pudding also.
- Milk – Preferably whole milk, although almond milk or dairy-free milk will also work.
- Whipped topping – I’ve combined heavy cream, powdered sugar, and vanilla extract to make the whipped topping for this poke cake. You can create a sweeter tasting topping by adding more powdered sugar if you want.
- Food coloring – You’ll need pink, blue, green, and yellow food coloring to replicate the pretty color design in this Easter poke cake!
- Sprinkles – Add pastel sprinkles or mini Easter egg candies to the top of the whipped topping for extra holiday cheer! This is completely optional.
How to Make Easter Poke Cake
This Easter poke cake is no different than how you make a standard poke cake, except for the added step of coloring the batter for a pop of Spring color! Follow these straightforward steps for the best results:
Step 1: Preheat the Oven and Grease a Baking Dish
Preheat the oven to the temperature recommended on the box cake mix and spray a 9×13-inch baking dish with nonstick cooking spray. Set the dish aside.
Step 2: Make the Cake Batter
Make the cake batter as directed on the box in a medium bowl. Divide the batter into 4 bowls and add a few drops of food coloring to each bowl.
Stir with a spoon, making sure to clean the spoon or spatula between mixing the different bowls of colored batter so that there is no color-mixing. You should now have 4 bowls of batter, each of a different color, similar to the photo below:
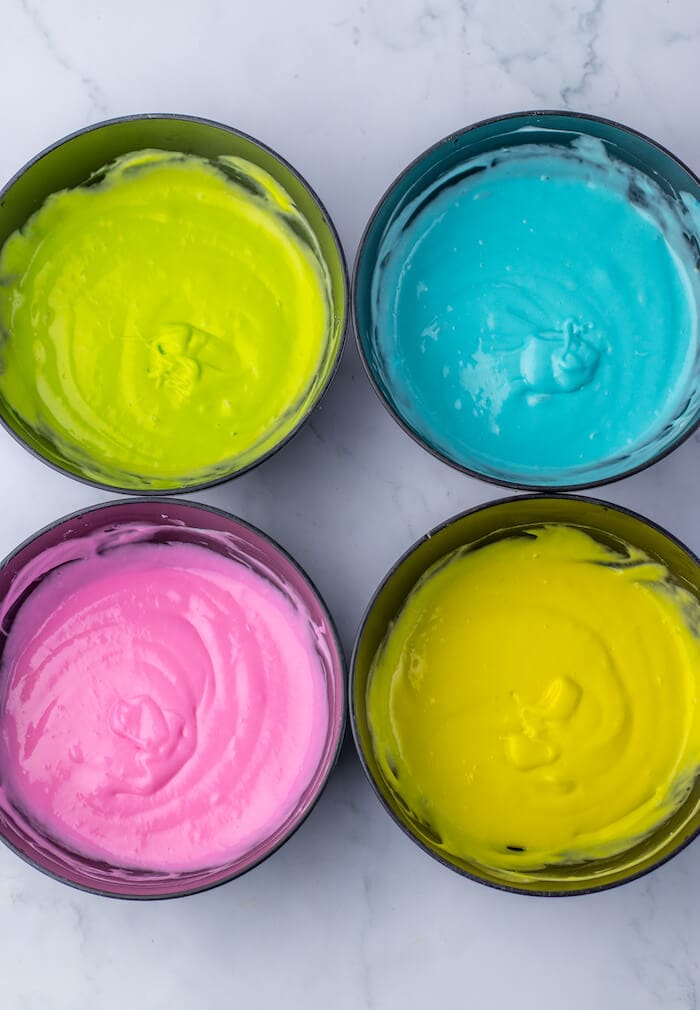
Tip: You can increase the intensity of the colored batter by adding more food coloring as you mix.
Step 3: Assemble the Batter in the Baking Dish
Scoop a spoonful of batter of each color and drop it into the prepared dish, repeating this one color at a time so that you end up with small drops of each color all over the dish like this:
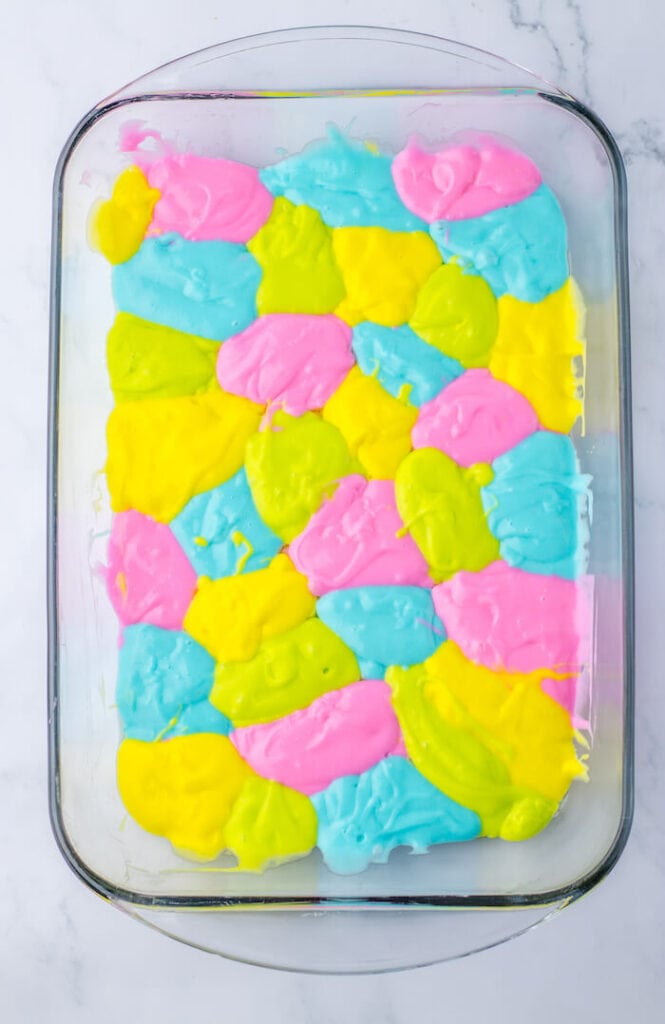
Tip: Work fast when adding the batter as the drops spread fast and you want to prevent the colors from mixing too much.
Once assembled, gently tap the bottom of the baking dish on the counter. Lightly swirl the colors with a toothpick without over-mixing the colors.
Step 4: Bake and Poke the Cake
Bake the cake for the time directed on the box cake mix. Once baked, allow the cake to sit for 10 minutes and then poke holes all over the top of the cake using the end of a wooden spoon or a large straw. The holes should be about an inch apart.
Let the cake completely cool before moving on to the next step.

Step 5: Fill the Cake with Pudding Mixture
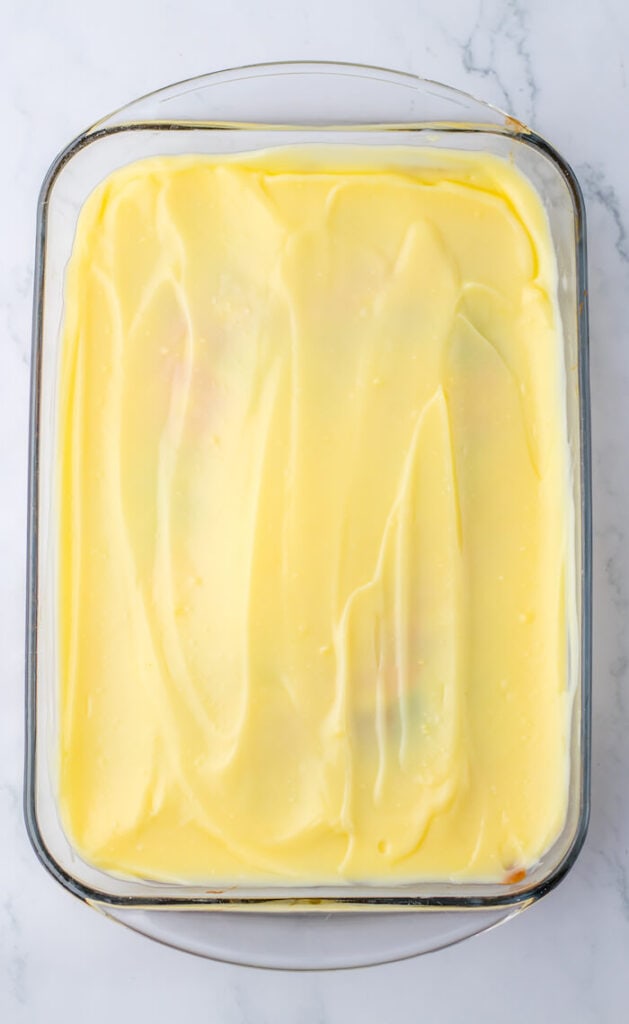
Combine the instant pudding mix with milk in a large bowl and whisk until fully dissolved and smooth. Pour the pudding all over the top of the cake, spreading it around the cake with a spatula to ensure the mixture seeps into the holes.
Spread any remaining pudding over the top of the cake and place the cake in the fridge to set for about 30-40 minutes.
Tip: Loosely cover the top of the baking dish when storing the cake in the fridge if there are strong odors from other refrigerated foods.
Step 6: Top the Cake and Serve
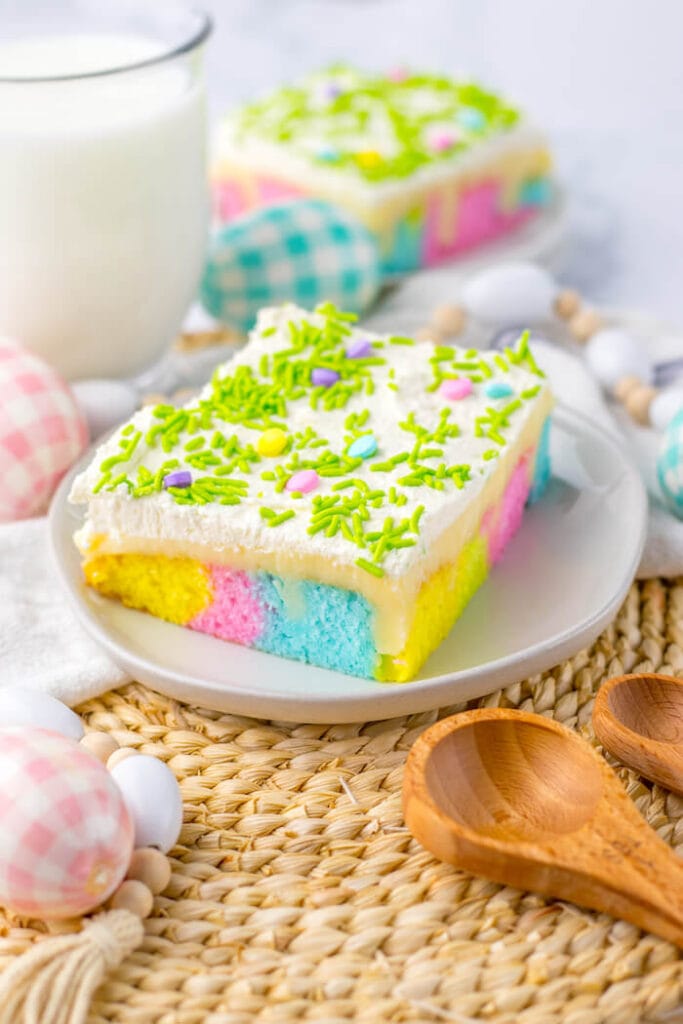
Make the whipped cream topping by beating the heavy cream and vanilla extract in a large bowl until soft peaks form. Next, add the powdered sugar and mix until stiff peaks form. This will take about 5-6 minutes.
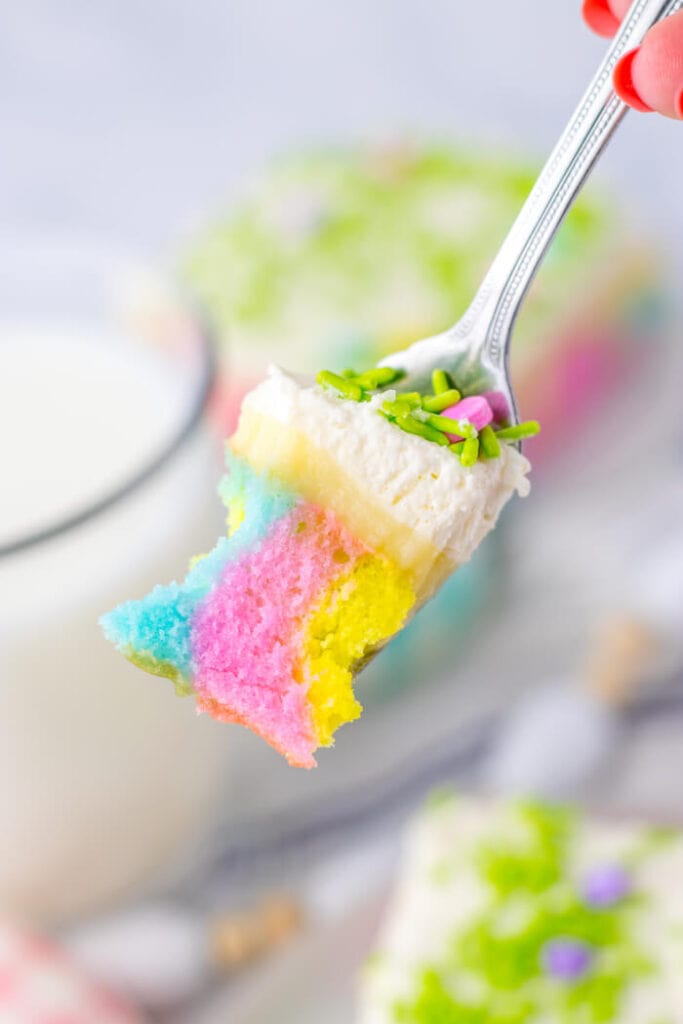
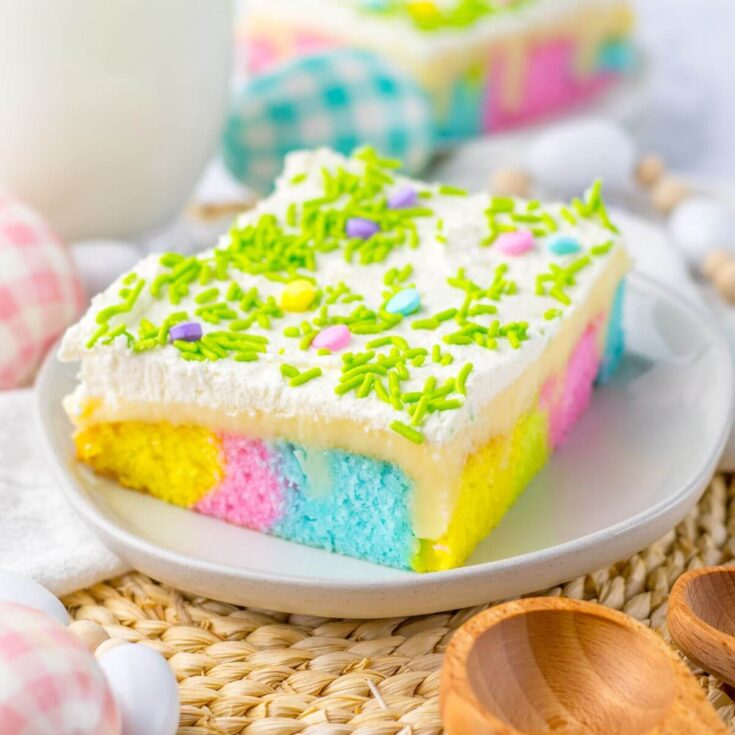
Spread the whipped topping over the set cake and decorate with Easter or Spring sprinkles for your festive Easter dessert. Slice and serve! And your beautiful Spring-colored poke cake slices should look something like this, with vibrant tie dye colors:
FAQs about Making Easter Poke Cake
Why is it called poke cake?
Poke cake gets its name from the holes that are ‘poked’ all over the top of the cake. These holes are then filled with a sweet mixture of some sort, such as pudding mix, caramel sauce, or condensed milk.
What is the best way to poke holes in a poke cake?
The end of a wooden spoon or a large straw are great for poking holes large enough to be filled with pudding mix. You could also use thick wooden skewers for slightly smaller holes, which would be ideal when filling the holes with something of a thinner or runnier consistency, such as syrup, sauce or condensed milk.
Why is my poke cake soggy?
Poke cake is supposed to be moist due to the moist filling that seeps throughout the cake. That said, the spacing of the holes is important. Holes that are placed too close together can make the cake fill up with too much filling, which is likely to make the cake soggy.
I’ve allowed for each hole to sit an inch apart which seems to be the perfect spacing for this Easter poke cake. The chocolate pudding flavor runs throughout the cake without the cake becoming a soggy mess.
It’s also a good idea to allow the filled cake to set in the fridge for at least 30 minutes so that the filling is less runny and the cake maintains structure.
How should I store this Easter Poke Cake?
Store leftover Easter poke cake in an airtight container in the fridge for 3-4 days. You can also freeze this poke cake for up to 3 months and thaw to serve again.
Other Easter Treats to Make
Easter Blossom Sugar Cookies – These adorable pastel Easter Blossom Sugar Cookies will add a pop of color to your Spring-time and Easter celebrations. The soft and chewy cookie bases are coated in pastel sanding sugar, topped with Hershey’s Hugs Kisses!

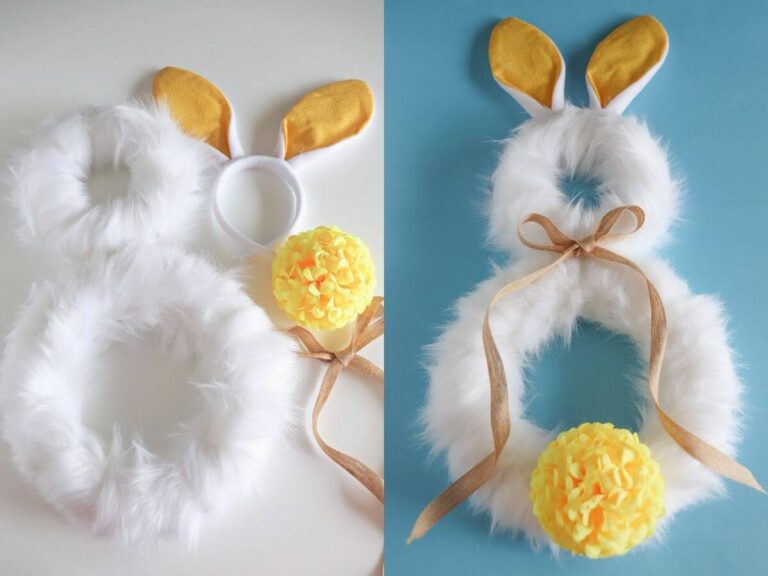
DIY Easter Bunny Bait – Attract the Easter bunny to your garden this year by sprinkling this edible Easter Bunny Bait on your lawn. Get the kids to help you assemble the bait in jars with cute printable tags that can be handed out to friends, family, and neighbors as holiday gifts!
Easter Poke Cake
Easter Poke Cake is the ultimate Easter dessert, made with colored batter, an irresistible white chocolate pudding filling, and a sweet and creamy whipped topping! It’s fun, it’s delicious, and this Spring colored poke cake is easy to make!
Ingredients
- 1 box white cake mix
- ingredients listed on the box of cake mix (eggs, oil, water, etc)
- 2 3.3oz boxes instant white chocolate pudding
- 3 1/2 cups milk
- 2 cups heavy cream
- 1/4 cup powdered sugar
- 1 teaspoon vanilla extract
- pink, blue, green, and yellow food coloring
Instructions
- Prep the oven and baking dish. Preheat the oven to the temperature stated on the boxed cake mix instructions. Spray a 9x13 baking dish with non-stick cooking spray. Set aside.
- Prepare the colored cake batter. Make the cake batter as directed on the box. Divide the batter into 4 bowls and add a few drops of food coloring to each bowl, taking care to not mix the colors. Tip: You can increase the intensity of the colored batter by adding more food coloring if needed.
- Assemble the colorful cake batter. Scoop a spoonful of batter of each color and drop it into the prepared dish, repeating this one color at a time so that you end up with small drops of each color all over the dish. Once assembled, gently tap the bottom of the baking dish on the counter. Lightly swirl the colors with a toothpick without over-mixing the colors.
- Bake the cake and poke holes. Bake the cake for the time directed on the box cake mix. Once baked, allow the cake to sit for 10 minutes to cool, and then poke holes all over the top of the cake using the end of a wooden spoon or a large straw. The holes should be about an inch apart. Let the cake cool completely.
- Make the pudding mix. Combine the instant pudding mix with milk in a large bowl and whisk until fully dissolved and smooth. Pour the pudding all over the top of the cake, spreading it around the cake with a spatula to ensure the mixture seeps into the holes. Place the cake in the refrigerator to set for 30-40 minutes.
- Make the whipped cream. Beat together heavy cream and vanilla extract in a large bowl until soft peaks form. Next, add the powdered sugar and mix until stiff peaks form. This will take about 5-6 minutes.
- Decorate the poke cake and serve. Spread the whipped topping over the set cake and decorate with Easter sprinkles. Slice and serve!
Notes
- When adding the spoonfuls of colored batter to the baking dish, the batter will spread out a bit. Work quickly so the colors don't mix too much.
- Use a different spoon of each different colored batter to prevent color mixing.
- Cheesecake pudding is a great substitute for the white chocolate pudding.
- Add more powdered sugar to the whipped cream topping if you like a sweeter topping.
- Store leftover poke cake in an airtight container in the fridge for up to 3-4 days.
Nutrition Information:
Yield:
12Serving Size:
1Amount Per Serving: Calories: 388Total Fat: 19gSaturated Fat: 11gTrans Fat: 1gUnsaturated Fat: 6gCholesterol: 51mgSodium: 406mgCarbohydrates: 50gFiber: 1gSugar: 31gProtein: 6g
Nutritional information is provided as a courtesy and is an estimate only. Different online calculators may calculate nutritional information differently. Also, the addition of optional ingredients and varying brands and products may change the information. For the most accurate data, you should calculate the nutritional information with the actual ingredients that you use.