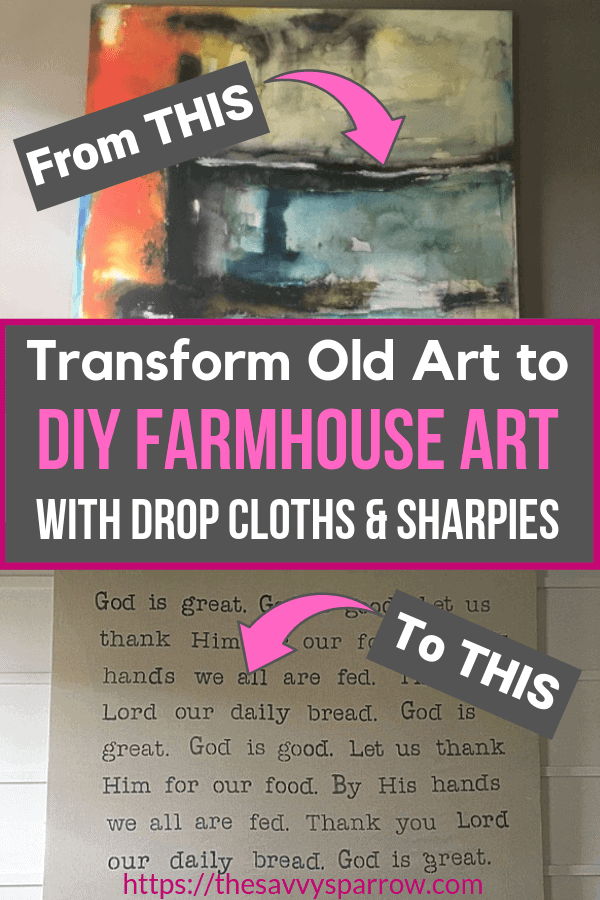
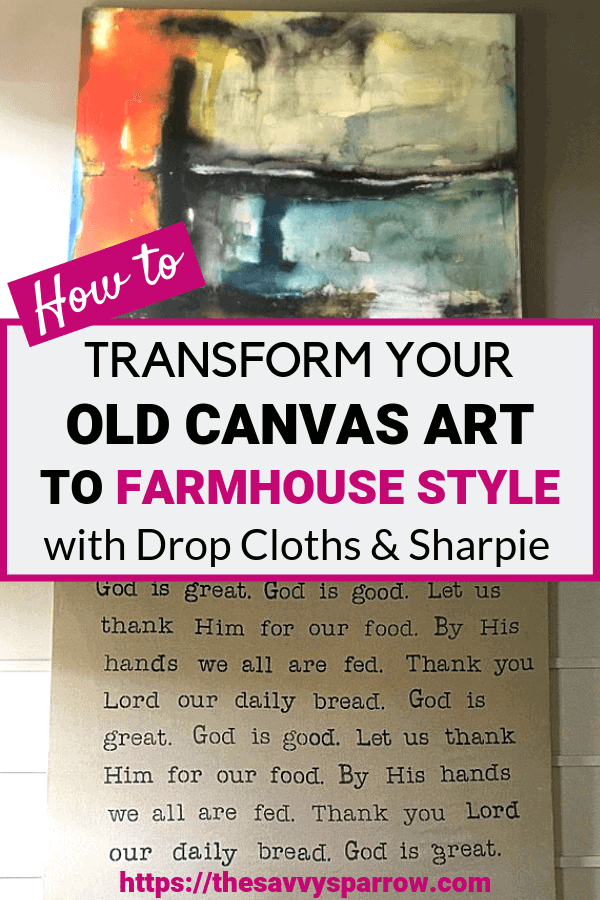
I am in LOVE with my new large DIY wall art! This large DIY wall art was made with a cheap drop cloth and an old canvas wall art piece that no longer fit our home decor style. Find out how we did it!
*This post contains affiliate links, which means I may earn a small commission from these links at no additional cost to you. Find out more here.
Our home decor style has slowly been drifting away from modern and abstract to fixer-upper farmhouse. Yes, I have been influenced by the super popular farmhouse home decor trend, and I LOVE roaming the aisles of Hobby Lobby for farmhouse decor inspiration.
But…
I have fixer-upper taste on a fixin’-ramen budget.
I find it incredibly difficult to dole out big bucks on home decor. And by “big bucks”, I mean $50+ on a piece of wall art that I could make myself for less than half of that. (Just like these giant DIY farmhouse wood signs that I made for less than $20, when Hobby Lobby was selling similar ones for $89.99.)
So, what did I do when this GIANT modern, abstract canvas art was sticking out like a sore thumb in the midst of burlap and galvanized metal?
I figured out a way to turn it into large DIY wall art using drop cloths.
Why the drop cloths, you ask? Why not just paint over it?
Well, the canvas art was a wedding present, and it was rather pricey, so we didn’t want to completely scrap it. Plus, we didn’t have the room to put it in storage.
And, we didn’t want to paint over it because, who knows, we may want to go back to the modern aesthetic after the farmhouse trend runs its course. Like, maybe when Chip and Joanna retire and stop creating so many darn drool-worthy, shiplapped spaces.
And don’t get me started on shiplap.
I am absolutely LOVING all things shiplap. But, remember… ramen home decor budget. And the real-deal shiplap is expensive!
So, on a whim we tried the “sharpie shiplap” that you’ve probably seen floating around Pinterest…. I have one word… disaster.
I will never again try to use a Sharpie marker to draw straight lines on my walls. Never. Again.
I actually meant to take pictures of my faux shiplap faux-pas. But, I was in such a rush to paint over it that I forgot. And that’s probably a good thing. No photographic evidence that could cause you to doubt my DIY home decor abilities. 🙂
Instead, we created a “reverse shiplap” using cheap 1 x 2s and lots of caulk. I’ll be sure to share the how-to for that in a later post.
But back to my large DIY wall art using drop cloths…
Here’s how I repurposed my canvas wall art:
How to Make Large DIY Wall Art Using Drop Cloths
Step 1: Gather Your Supplies
To make this easy large DIY wall art you will need:
- A drop cloth – This is the one I used and highly recommend!
- Stencils – Mine are retired from Stampin’ Up. They are 3″ typewriter-font letters. You may be able to find some for sale on ebay, or head to Amazon for something similar, like this highly-rated beautiful 4″ letter stencil set.
- Sharpie markers – I used 3 fine tip Sharpies in the Slate Gray color.
- Level and/or Yardstick – I found it easiest to use a 4 foot level to make sure that my lines were straight.
- Staple gun and staples
- White banner paper – If you are covering an existing canvas art piece
- Lumber, screws, and brackets – If you are building a frame from scratch. Go here for an easy tutorial on how to make a 48″ x 72″ frame for canvas art.
- Newspaper to cover your work surface
Step 2: Iron Your Drop Cloth
Your drop cloth will probably be slightly wrinkled when you take it out of the package. We just ironed it on a medium heat setting before starting.
Step 3: Cover and Prep Your Work Surface
Be sure to lay newspaper down before you begin to ensure that your Sharpie does not bleed through and damage your work surface.
I found it easiest to work on my foyer floor, because it was flat (no tile grout lines) and large enough that I could spread out my large drop cloth.
I also used painter’s tape to tape the drop cloth to the floor. This allowed me to lay down right on top of it while I was stenciling, without it bunching up on me.
Step 4: Decide on a Quote/Prayer/Scripture
This is the prayer that we say every night before dinner, so it has a special meaning for our family. And since it was for my large DIY wall art for the dining room, I thought that it was perfectly fitting.
I decided to repeat the prayer because I did not want a lot of empty space on my finished large DIY wall art. I also considered just stenciling the prayer once and aligning it to the left side, but the canvas that we covered was so large (48″ x 72″) that I was afraid it would look empty if I did it that way.
Step 5: Mark Off Your Finished Frame Size (or if you’re not covering an existing canvas, build your frame)
I started with a drop cloth that was several feet larger than the canvas art that I needed to cover.
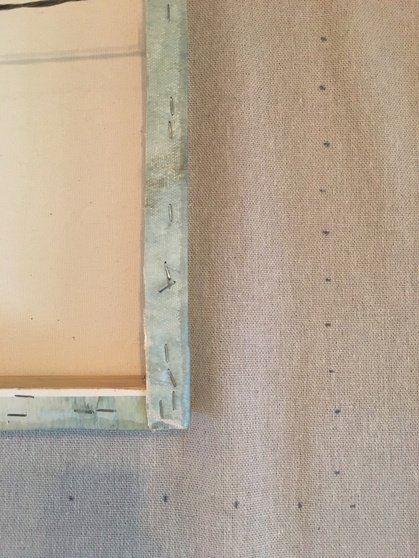
To make sure that I knew where to stencil my letters, I first laid my canvas frame down on my drop cloth, and then lightly dotted a line a few inches around the border of the canvas.
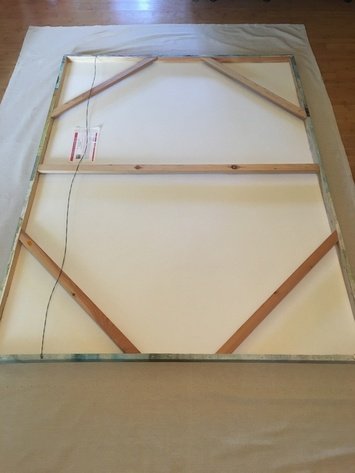
Be sure that you leave enough space to stretch the finished drop cloth around your frame… Don’t start your letters right inside your dotted line, or they may run off the side of your frame after you stretch it.
Step 6: Stencil Your Letters Using Sharpie Markers
To start, I measured down from the top of the drop cloth on the left side, middle, and right sides to make sure that I got my first line of words straight. Then I laid my yardstick down to use as a guide.
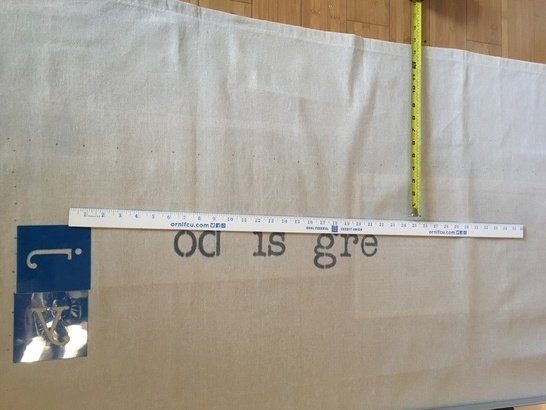
For each consecutive line, I used my 4 foot level as a spacer. I pushed my individual letter stencils right up against the bottom of the level to make sure that they were straight. I found this method to be much easier than measuring down from the top for each line of text.
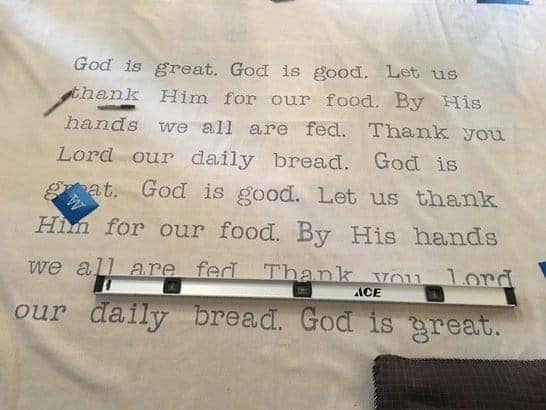
If you are using a fresh, new Sharpie be sure to use very light pressure. A new Sharpie is juicy and may bleed a bit on the drop cloth. As the Sharpie dries out, you will find that you need to use a heavier pressure and it will not bleed. If you look closely at my finished large DIY wall art, you can tell when I switched to a new Sharpie.
Step 7: Cover Your Old Canvas with Banner Paper
Since our old canvas had lots of bright colors, we needed to put something in between it and the drop cloth so that you couldn’t see the old artwork underneath. I used the large rolls of white banner paper that you can buy at Hobby Lobby (with a 40% off coupon!).
We used painter’s tape to tape the white banner paper to the back side of the frame, like this:
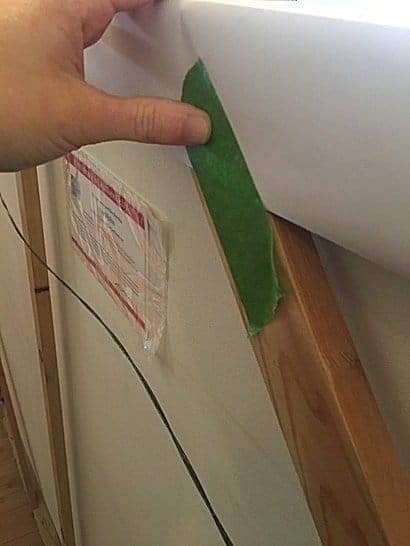
If you’re not covering an existing piece of art, then you can skip this step and just staple your drop cloth directly to your wood frame.
Step 8: Staple Your Drop Cloth to Your Canvas Frame
To be honest, this step was very much trial-and-error for us.
We started by stapling the drop cloth to the middle of the top, and then to the top left and top right, smoothing out the drop cloth as we went. The staple gun was not quite strong enough to push the staples all the way into the frame, so we had to hammer them the rest of the way in.
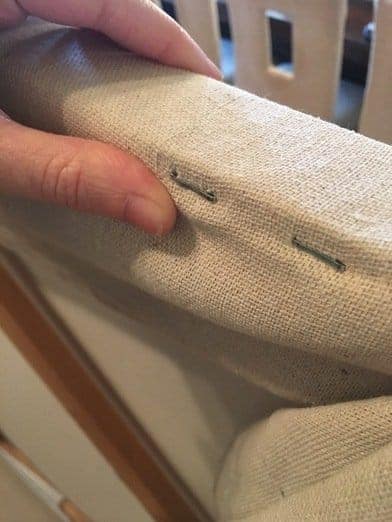
Then, we pulled the drop cloth tight and stapled the bottom side.
Finally, we stapled the left side and then the right side, pulling the drop cloth tight each time.
TIP – You will definitely need two people to stretch your drop cloth, especially if your finished DIY wall art is very large like ours. Be sure to stretch your fabric and then have one person step back and take a look at it before stapling it into place.
Step 9: Hang Your Large DIY Wall Art and Enjoy!
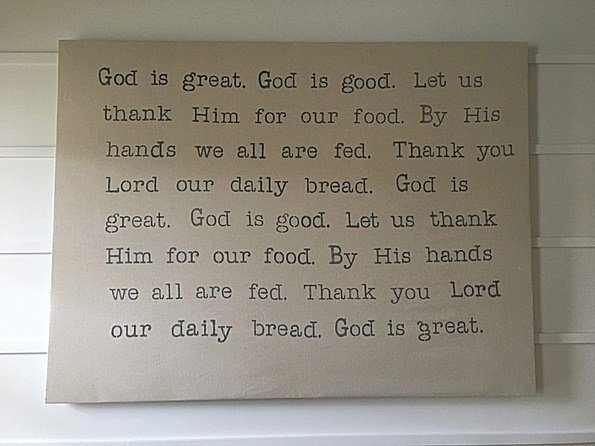
I could not be happier with how my large DIY wall art turned out! Who would have guessed that a cheap drop cloth and a few Sharpie markers would look so nice!
If you have a large canvas art piece that no longer fits your home decor, but you’re also afraid of commitment and don’t want to just paint over it, then try this easy large DIY wall art!
Stencil on the words to the first dance song from your wedding and hang it in your bedroom. Or, show your sense of humor and stencil on an incredibly inappropriate “potty talk” quote from your two year old and hang it in your guest bath.
This technique can be used to cover any size canvas with any quote or saying. Perfect for your personalized farmhouse home decor!
And, if you loved this DIY farmhouse home decor tutorial, check out these other posts:
- Cheap and Easy DIY Farmhouse Wood Signs – A Step-by-Step DIY Tutorial!
- How to Paint Faux Subway Tile – A DIY Fireplace Makeover
- DIY: Turn a Blank Wall into a Mudroom

Comments & Reviews
This is the answer to my prayers!
I am a professional photographer and have a TON of LARGE canvases laying around in my barn. I love them and don’t want to trash them, but haven’t wanted to paint over them either. So this is a fantastic idea.
Thank you for the inspiration.
Hi Delanae! That’s awesome! I was in the same boat… This huge canvas was a wedding gift so I didn’t want to just get rid of it, and it’s really too large to store, so this was the perfect solution! Glad you enjoyed the post! 🙂
Amy,
Thank you for sharing these great projects and breaking them down. I feel so empowered to build and create! You (and your hubbie) ROCK! We’re headed to Home Depot now. 😁
Awww, thanks Barbara! Glad we’ve inspired you! This large farmhouse stenciled sign is one of my favorite DIYs ever. 🙂