


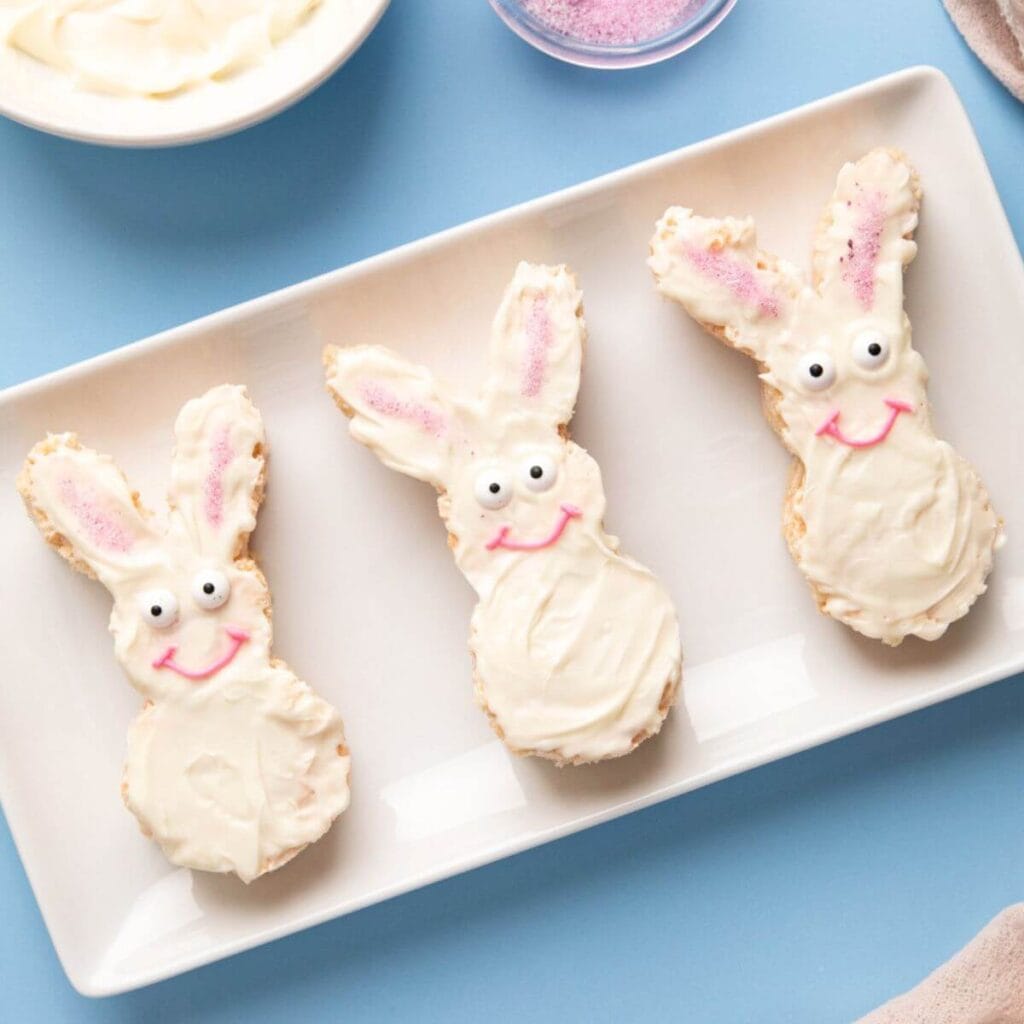
These easy Easter Bunny Rice Krispie treats are the perfect spring treats for kids, and you can make them without a bunny-shaped cookie cutter! Loaded with extra marshmallows and decorated with white chocolate to look like bunnies, these sweet Easter Rice Krispies Treats will be a hit at your Spring festivities!
Making Bunny Rice Krispie Treats (without a cookie cutter!)
So, I have to give my husband the culinary credit (again!). These adorable Easter bunny Rice Krispies treats were his idea.
We have a whole drawerful of sprinkles left over from both of our daughters’ birthday parties. So when I told him I wanted to make some Rice Krispies treats for Easter, he suggested that we use the pink sanding sugar to fill in the ears for our cute bunny cereal treats… The only problem was, we didn’t have a bunny cookie cutter.
So I scoured Kroger, Michael’s, and Hobby Lobby, but I still couldn’t find a bunny-shaped cutter that I liked. The ears on all of them were just too short or too narrow to use for his genius pink sugar idea.
So, we tried a paper template, and it was a huge success! So much so that I’m already brainstorming more shaped Rice Krispies treats that I can make for other holidays!
Ingredients and Notes
These Easter treats start off with our favorite Rice Krispies treats recipe, loaded with extra marshmallows of course! Here’s a look at the simple list of ingredients:
- Rice Krispies cereal – You will need a 12 ounce box of the classic rice cereal.
- unsalted butter – Make sure that it’s unsalted, so your Easter bunny treats aren’t too salty.
- mini marshmallows – We use 2 bags of marshmallows – one gets mixed in with the melted butter, and one bag gets mixed with the rice cereal. I like the combination of whole marshmallows mixed in with the treats instead melting all of them down.
- vanilla extract
- white candy melts
- vegetable oil (optional) – If you find that the candy melts are too thick, you can add a small amount of vegetable oil or shortening to help thin it out a bit.
- decorations – You will need pink sanding sugar, candy eyes, and a small amount of pink icing in a piping bag to decorate the Easter bunny cereal treats.
*You will also need the printable bunny template (if you don’t have a bunny shaped cookie cutter). We used a bunny template that I already had from when I made my cute DIY Easter banners. (You can print the bunny template HERE).
How to Make Easter Bunny Rice Krispies Treats
These cute Easter bunny Rice Krispies treats start with normal cereal treats pressed into a large sheet tray. Here’s a look at the steps to decorate your adorable bunny treats! Complete instructions are provided in the recipe card at the end of this post.
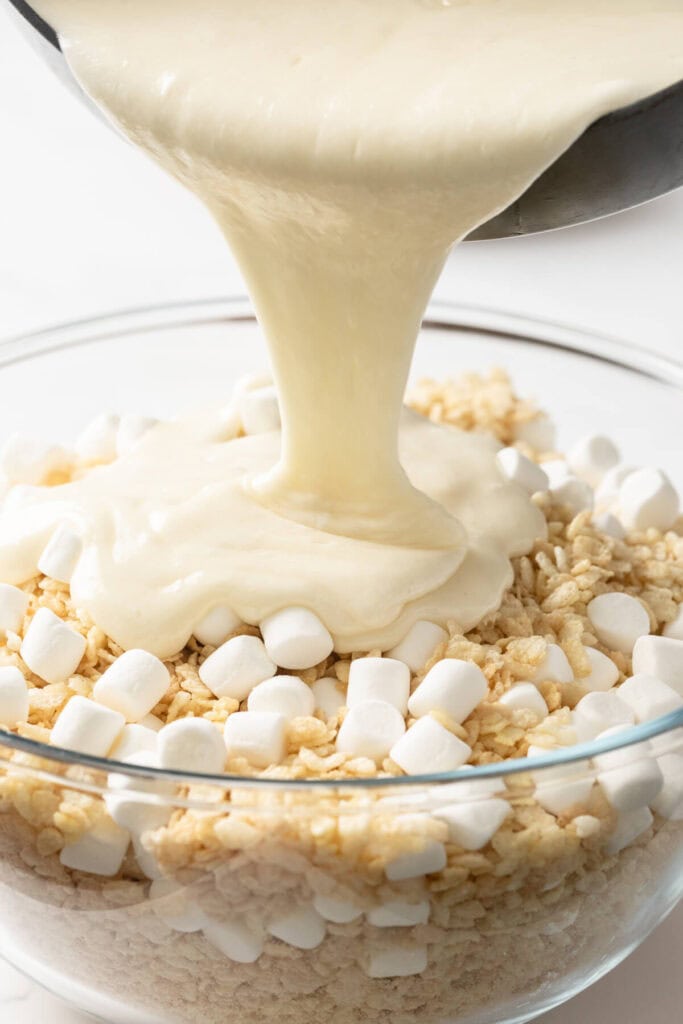
Step 1: Make the Rice Krispies Treats mix. Start by making the melted butter, marshmallow, vanilla extract, and rice cereal mixture – just as you would for normal rice krispie treats.
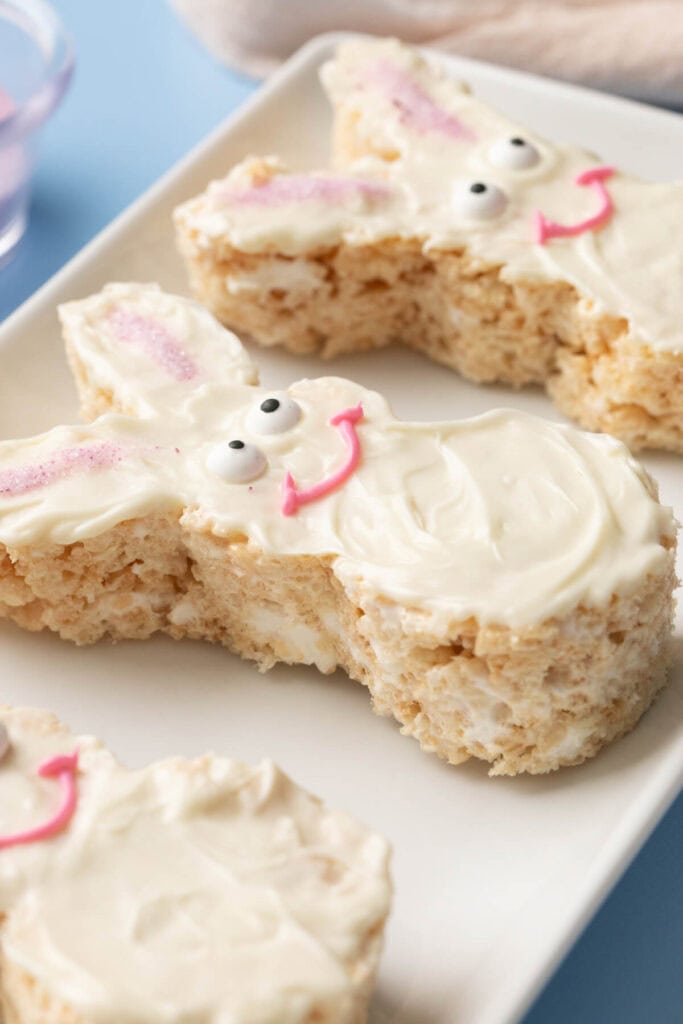
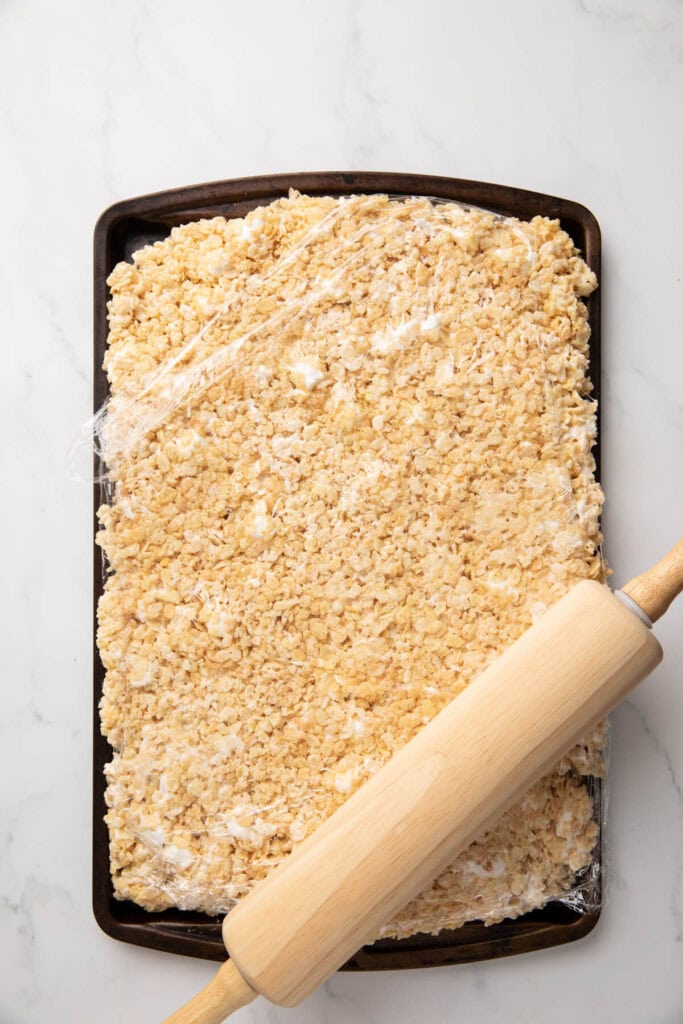
Step 2: Flatten the Rice Krispies treats in a large sheet tray. Spread the cereal treats mixture onto a large sheet pan and press down to flatten. The Rice Krispies Treats will be sticky, so use a rubber spatula to flatten them down, or cover with plastic wrap and use a rolling pin to flatten. The treats should be about 3/4 to 1 inch thick, depending on the size of your sheet tray. *Our tray was 11″ x 17″.
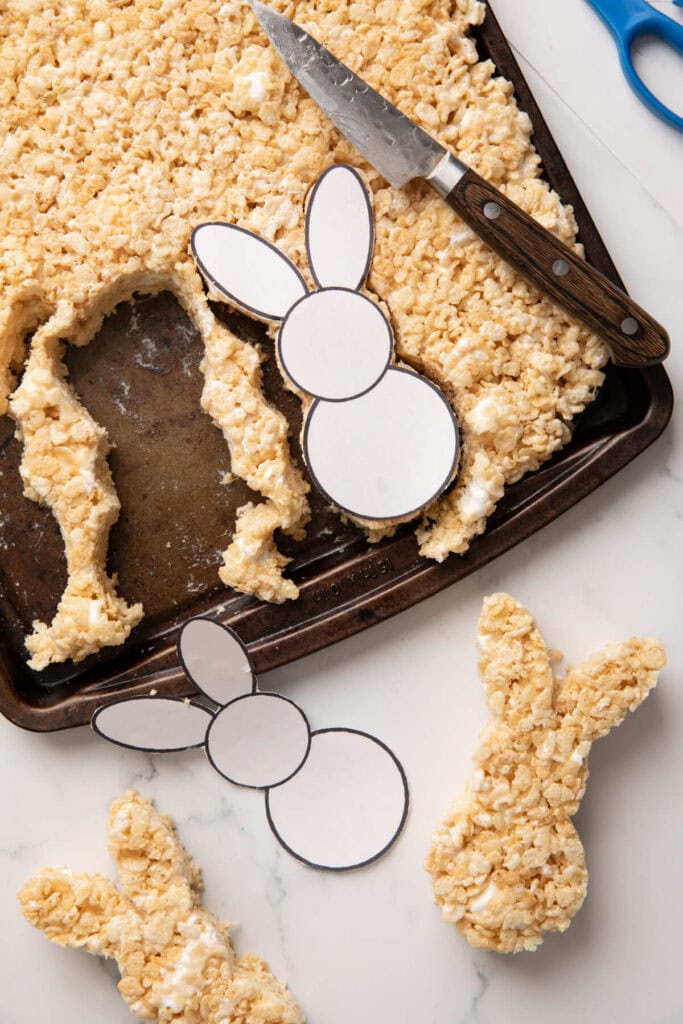
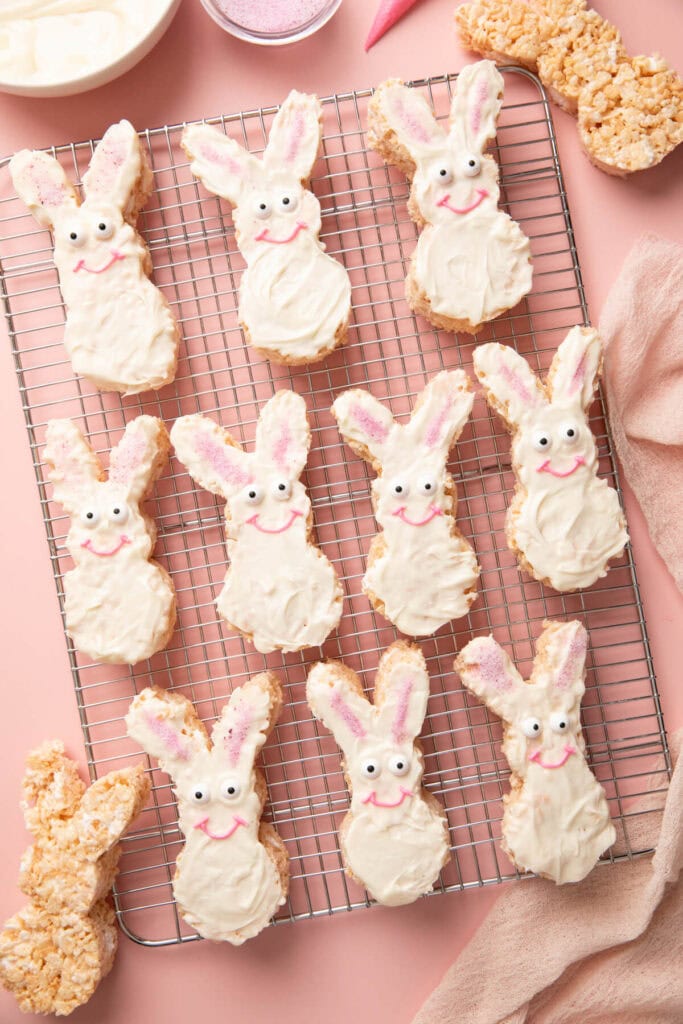
Step 3: Cut out the bunny shapes. Cut out the printable paper bunny template. Press the paper bunny on top of the cereal treats, starting in the corner. Use a paring knife to carefully cut around the paper bunny. *To remove the bunny from the sheet tray, we found it easiest to gently tear away the treats from around the bunny. Then, use your fingers to gently shape any jagged edges back in place.
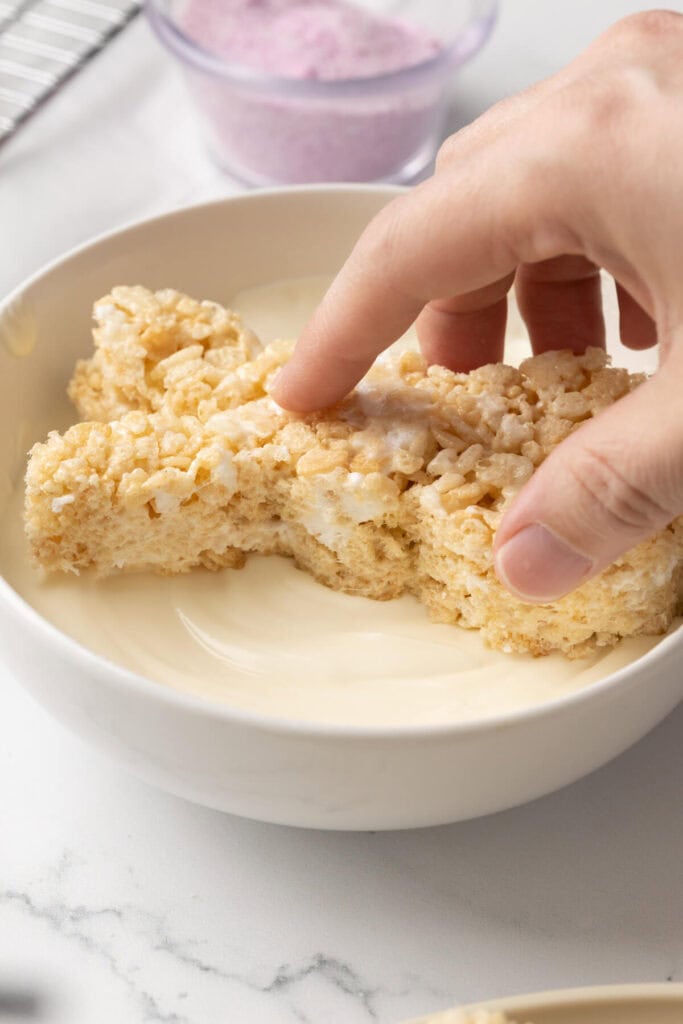
Step 4: Dip the bunny rice krispie treats in white chocolate. Melt the white candy melts according to package instructions, adding about 1/2 a tablespoon of vegetable oil as needed if the chocolate is too thick. Then dip the bunnies in the melted white chocolate.
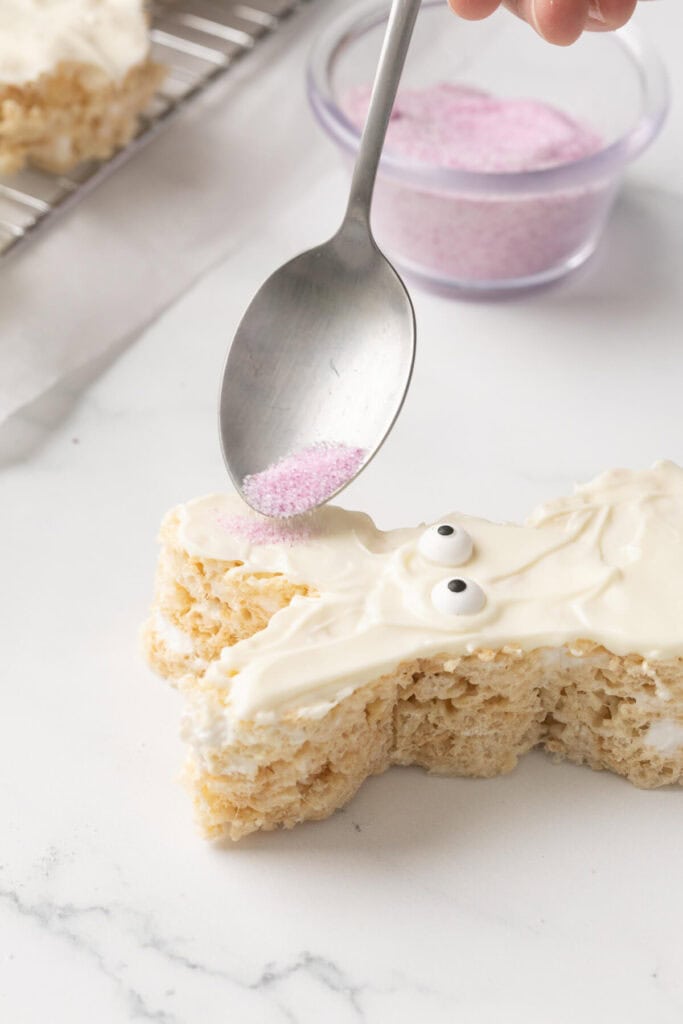
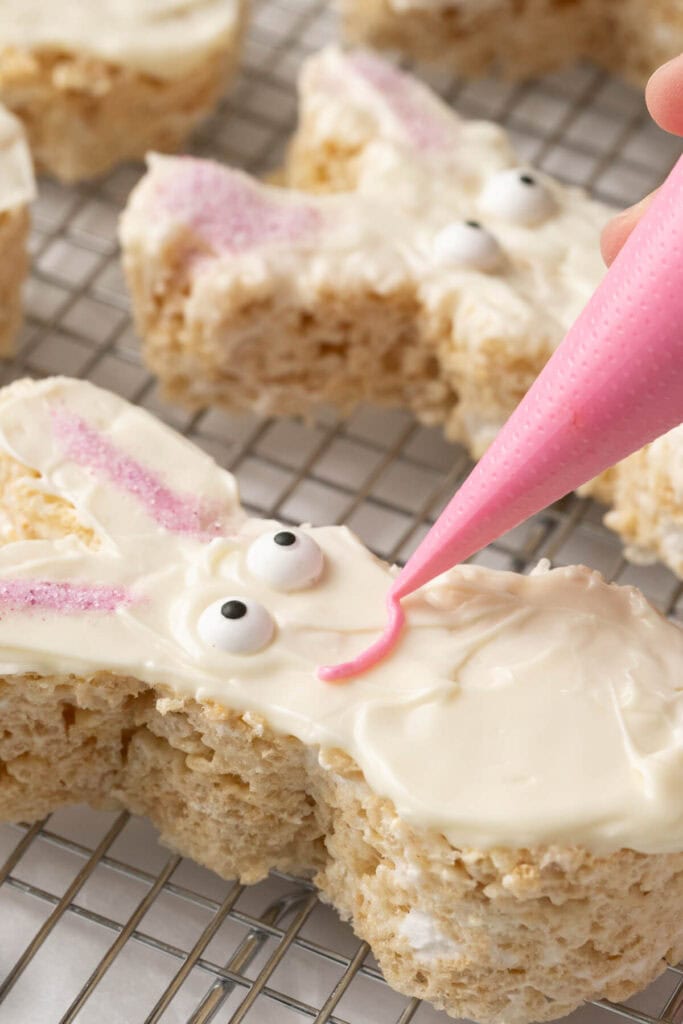
Step 5: Add pink sugar to the ears. Use a spoon to carefully spoon some pink sanding sugar in a line in the middle of each bunny ear. Work quickly to add the sugar before the white chocolate starts to harden.
Step 6: Add the Easter bunny eyes and smile. While the chocolate is still wet, place two candy eyes on the bunny face. Then add a small amount of pink icing to a piping bag. Pipe a small pink smile onto each Easter bunny Rice Krispie treat.
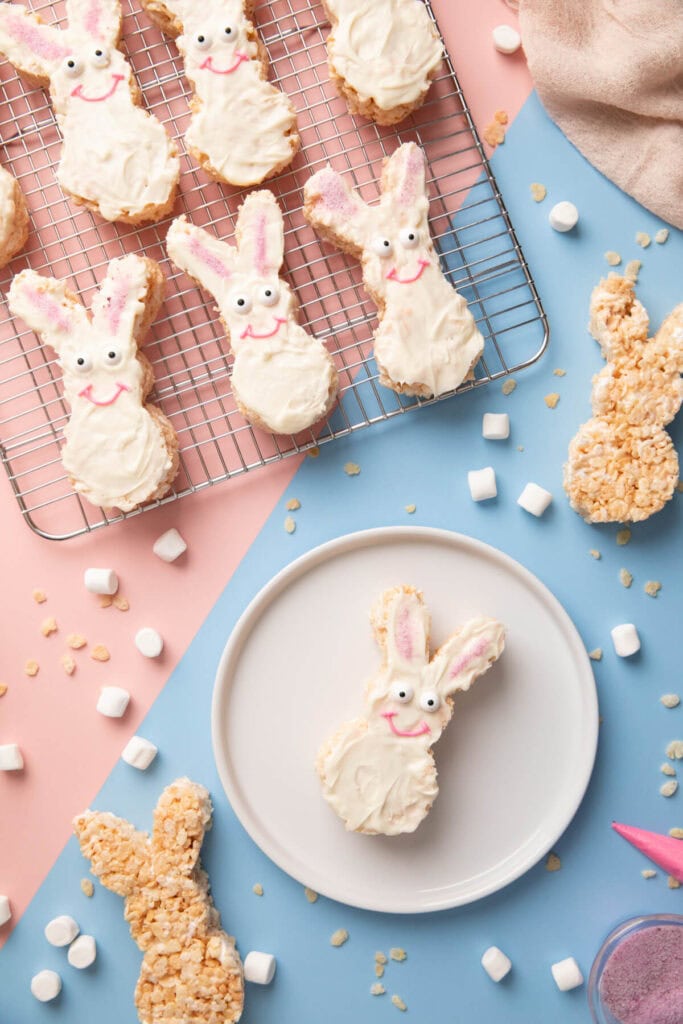
And then your adorable bunny treats are done! You can serve them for dessert at your Easter egg hunt, wrap up a treat in a cellophane bag and add it to your neighbor’s “You’ve Been Egged” basket, or take the treats to your kids’ Spring classroom parties at school!
No matter who you share these Easter Rice Krispies Treats with, they’re sure to be a hit!

Easter Bunny Rice Krispies Treats
Equipment
- bunny shaped cookie cutter or printable bunny template
Ingredients
- 12 oz box Rice Krispies cereal
- 1 stick unsalted butter
- 2 10 oz bags mini marshmallows
- 1 tablespoon vanilla extract
- 1 bag white candy melts
- pink sugar
- 24 candy eyeball decorations
- pink icing (*see notes)
Instructions
- Heat one stick butter in a large non-stick pot over medium low heat until melted.
- Mix one and a half bags of mini marshmallows and the vanilla extract into the pot with the melted butter, stirring constantly until marshmallows are melted. Then remove from the heat.
- Pour entire box of Rice Krispies and remaining half bag of marshmallows into a large bowl and toss together briefly.
- Pour marshmallow/butter mixture over Rice Krispies and carefully fold until well combined.
- Spread cereal treats mixture onto a large sheet pan (about 11" x 17") and press down to flatten. Treats will be sticky, so use a rubber spatula to flatten, or cover with plastic wrap and use a rolling pin to flatten out into a thin even layer. Then allow the rice krispies treats to cool completely.
- Starting in one corner of the tray, cut out bunny shapes using the template or cookie cutter. For the paper template, simply press the bunny shape on top of the cereal treats and use a paring knife to carefully cut around the bunny. Continue until all bunnies are cut out. *See notes.
- Melt white candy melts in a large bowl according to package instructions. Then use a spatula to spread the white chocolate over the top of each bunny. *If needed, you can add about ½ tablespoon of vegetable oil to thin the melted candy out a bit.
- While still wet, sprinkle pink sugar onto insides of ears, and apply candy eyeballs.
- Once the white chocolate has hardened, use pink icing to pipe a smile onto each bunny face.
Notes
- For the pink icing smiles – You can a small amount of canned frosting and add a few drops of red food coloring for an easy pink icing. Then add to a piping bag for the pink smiles.
- To use the paper bunny template – Just print the template on regular printer paper, and cut out the bunny shape. Press it onto the top of your Rice Krispies treats, and use a pairing knife to carefully cut around the edges. After you are done cutting, carefully take the bunny out. We found that it was easiest to gently tear away the treats from around the bunny. Then, use your fingers to gently shape any jagged edges.
The nutrition facts provided are calculated using a third-party tool and are estimates only. Actual nutritional content may vary based on the ingredients and brands you use, as well as portion sizes. For accurate results, please consult a registered dietitian or nutritionist.
If you loved these easy Easter treats, then check out some of my other yummy Easter ideas:
- 52 Cute Easter Cookies to Make this Spring – A huge roundup of some of the best Easter cookies to make with your kids!
- Peeps S’mores Dip – The perfect Easter party dip, especially for the Peeps lovers in your life!
- Easter Poke Cake – A beautiful tie-dye Spring cake to make for your Easter dinner!
Pinterest User? Do us a favor and PIN this to your board for Easter ideas. This is a GREAT way to support us!


We loved making these little bunnies! We were a little worried they would turn out a little too sweet but they were perfect. Definitely saving this recipe for the future.