
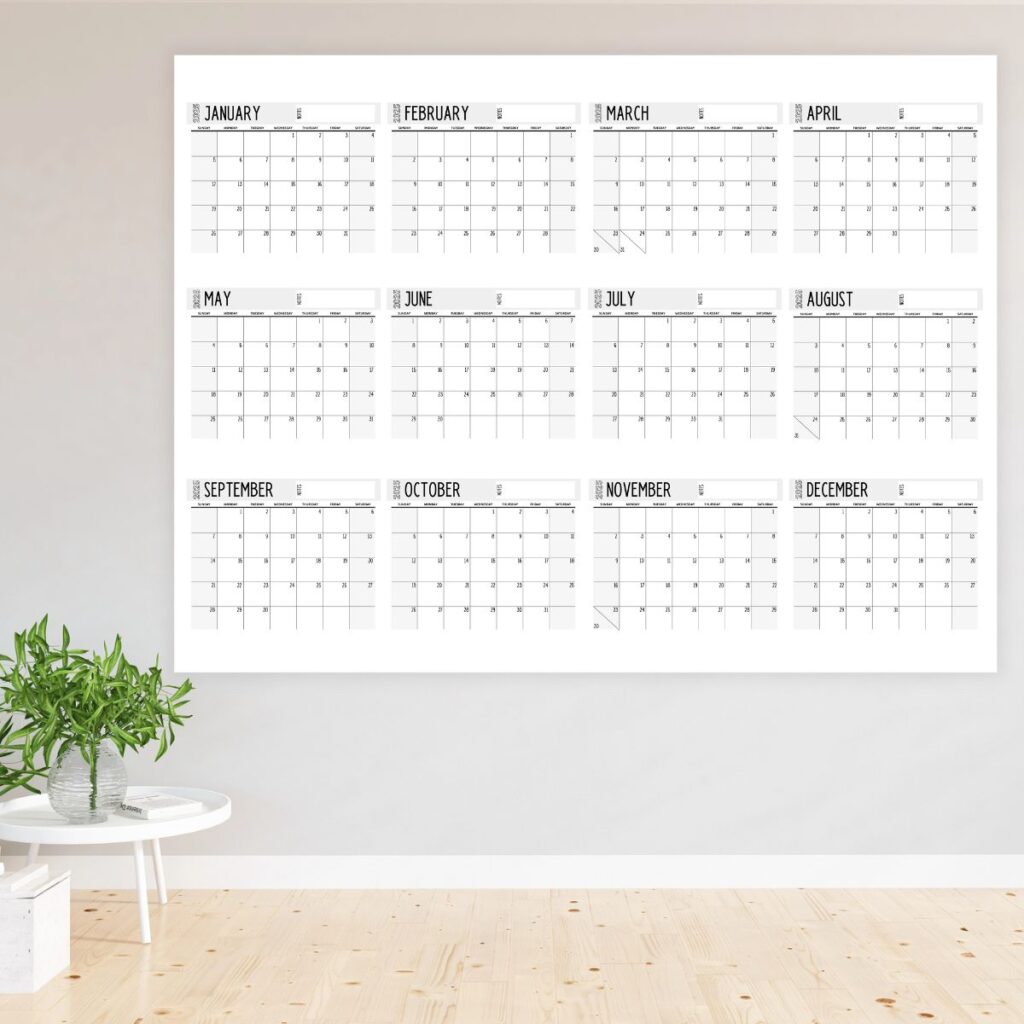
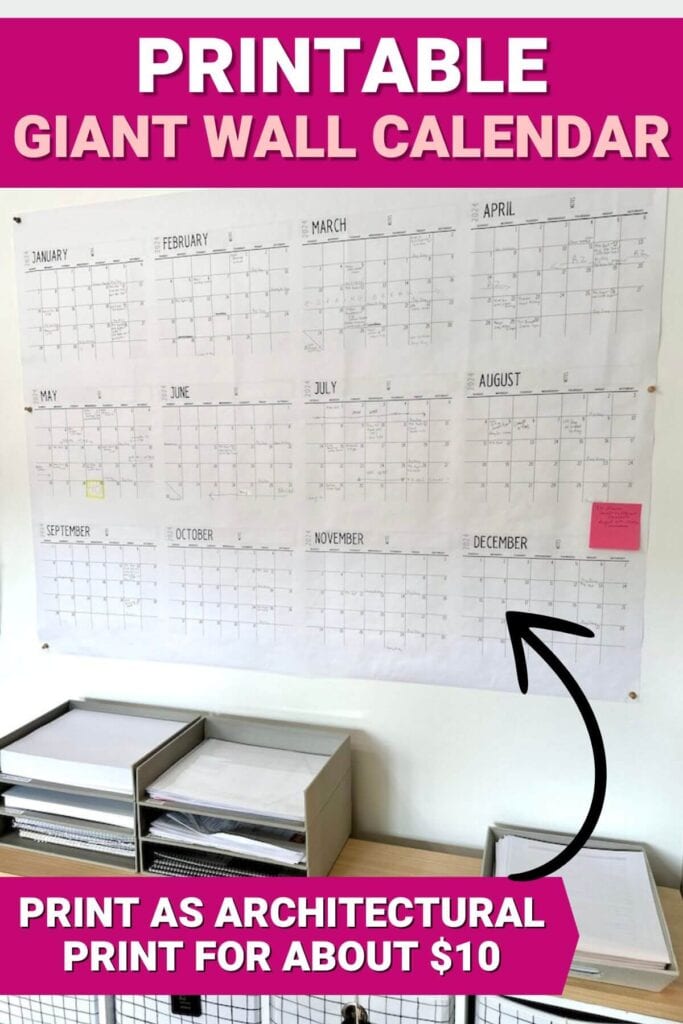
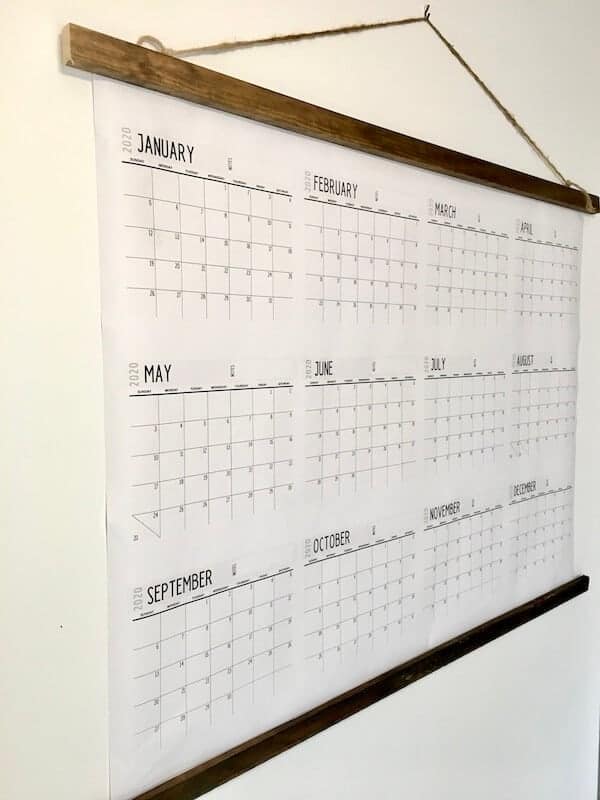
This printable 2026 Giant Wall Calendar is SO easy to make, and it lets you see all 12 months at the same time… great so you can plan ahead! Grab the 2026 yearly calendar printable and a few supplies, and you’ll have your DIY large wall calendar done in no time!
I’ve been on the hunt for the perfect large wall calendar for my new home office for quite some time now. But every one that I found was either too small for my liking, or it only showed one month at a time.
And since my husband and I are both self-employed, and I essentially manage two businesses from my home, I really wanted to be able to plan ahead and easily see the ENTIRE year of stuff to do and taxes to pay all at once. So I finally broke down and decided to create my own DIY Large Wall Calendar, and I am absolutely THRILLED with the result!
And the best part about this giant home office or family command center calendar is that it takes less than 10 minutes to make and hang on the wall – and that’s including uploading the PDF to the Kinko’s website and ordering the large print!
If you’re a super busy Momma and like to plan ahead, too, then you may benefit from a giant wall calendar just like mine. Here’s how to make your own wall calendar to keep up with birthdays, doctor appointments, and anything else you want to see at a glance:
And be sure to check out my free printable perpetual birthday calendar next – a GREAT way to keep track of birthdays and anniversaries for ALL of your friends and family members!
Printing the Giant Wall Calendar PDF
You can find the 2026 version of the printable 12 month calendar that I used HERE!
You will need to print out your large wall calendar at an office supply store or specialty printer. Just tell the printer that you want an architecture/engineer print in 36″H x 48″W. I got mine printed at FedEx Kinko’s for $9.00, and I was actually able to complete the whole order online.
You can upload your wall calendar PDF and choose these print settings, if you’re using FedEx Kinko’s:
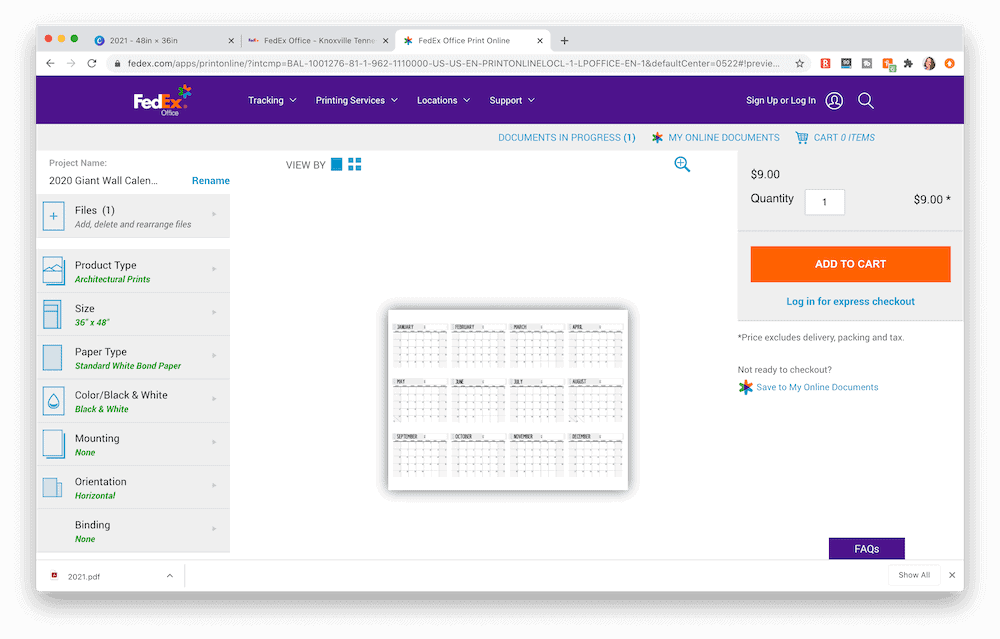
- Product Type – Architectural Prints
- Size – 36″ x 48″
- Paper Type – Standard White Bond Paper
- Color/Black & White – Black & White
- Mounting – None
- Orientation – Horizontal
You can also get your large 12 month wall calendar printed at Staples.
Click HERE to get the Printable Large 12 Month Wall Calendar!
How to Hang the Giant Calendar on the Wall
Push pins
You have a few options when it comes to how to hang the yearly calendar PDF. The easiest is with push pins, but this method will leave very small holes in your wall. *This is the method that I prefer because of how quick and easy it is!
I just push one push pin into the top corner of the printed calendar, then use my hand to smooth and straighten the paper calendar, and push another pin into the top center. Smooth it out again, working towards the other corner, and then push another pin into the calendar, holding it in place on the wall.
*Full disclaimer – I usually have my husband help so that I make sure it is perfectly level.
Build a quick “frame”
The other option, and what I did for the first few years of using this giant wall calendar printable in my home office, is to build a quick two-sided frame. All it takes is some eye hooks, two 1″ x 2″ trim boards (stained or painted with your preferred color), a staple gun, and some jute twine or rope.
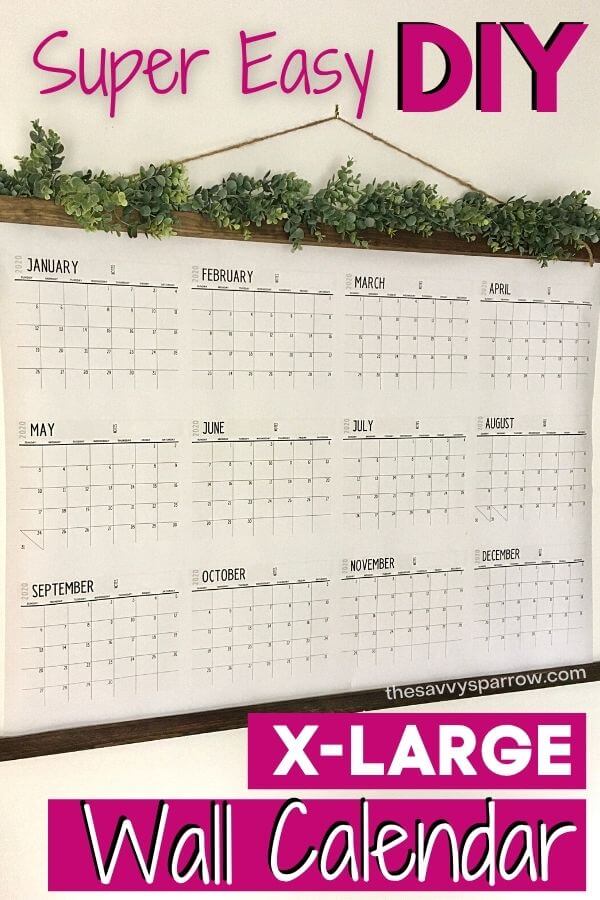
This option is also very simple, and then your calendar will look more like a piece of DIY wall art!
Then, to hang the “frame” and calendar on the wall, you’ll only need one picture hanger hook for the top. I also found it easiest to add two small Command velcro strips behind the two ends of the bottom trim board so that it hung on the wall flat and straight.
Just follow these steps to make the simple two-sided frame:
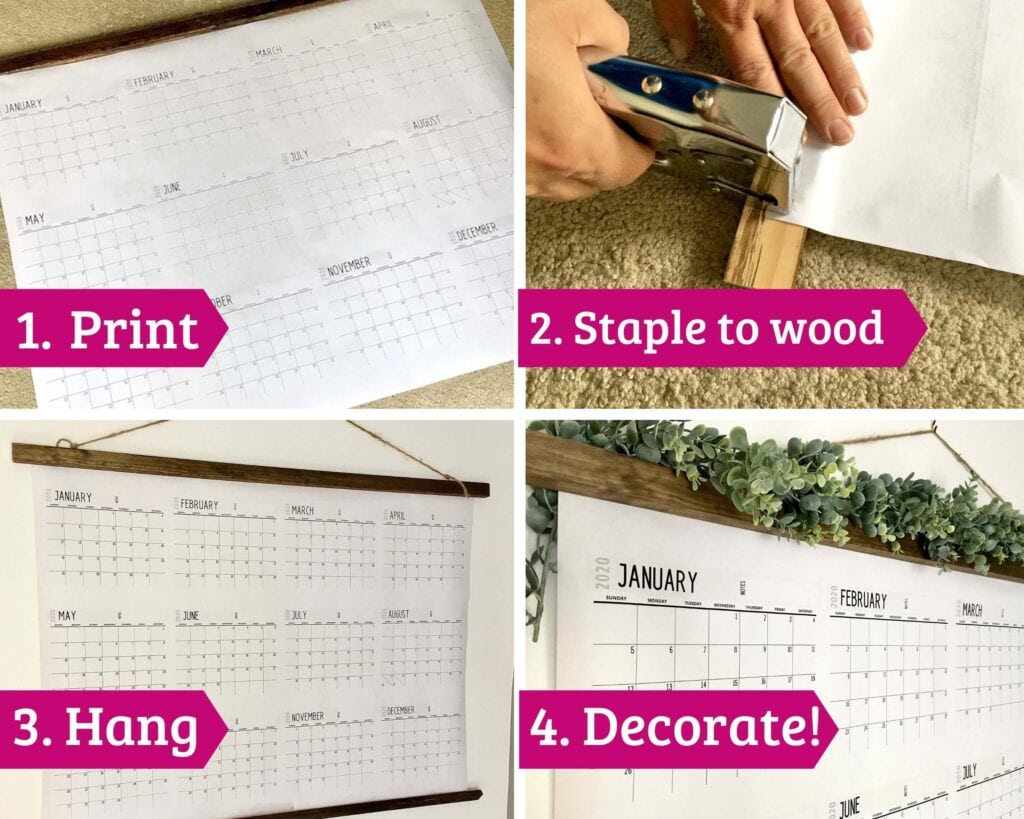
- Cut, sand, and stain the 1″ x 2″ trim boards. You may be able to get Home Depot to cut the boards for you if you don’t own any power tools.
- Screw small eye screws to the two top ends of the frame. This is where you will thread the jute twine through to use as the hanger.
- Flip your top board over so that it’s laying face down, and lay the top of your calendar face down on top of it. Then, make sure that the calendar is level and in line with the trim board and staple it in place. *You may need to hammer the staples in to the board so that they go in completely. Repeat for the bottom board.
- After your calendar is stapled to the top and bottom boards, thread your jute rope or twine through the eye screws and tie it off to make a hanger. Then, just hang your giant calendar on the wall and you’re done!
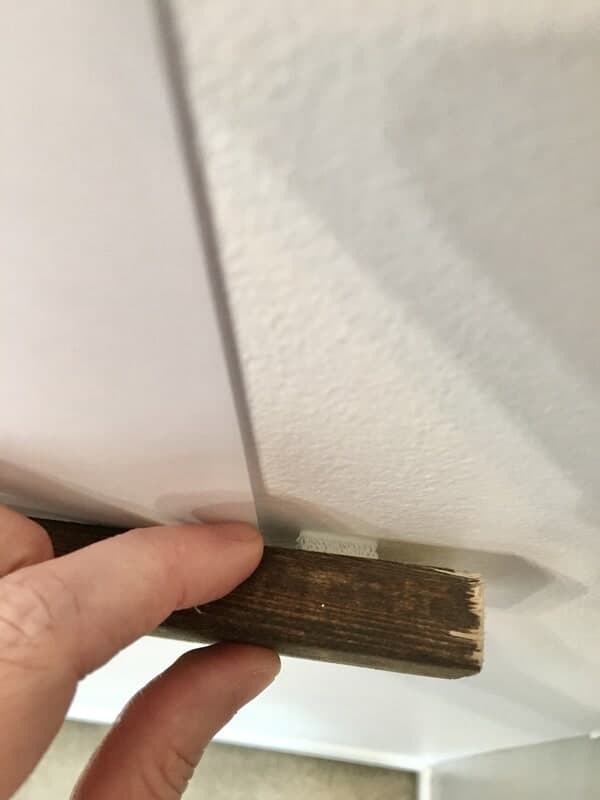
If you find that the bottom board of your 12 month giant calendar is leaning out from the wall a bit, then you can take two small velcro-style command strips and attach them to either side of the wood, like this:
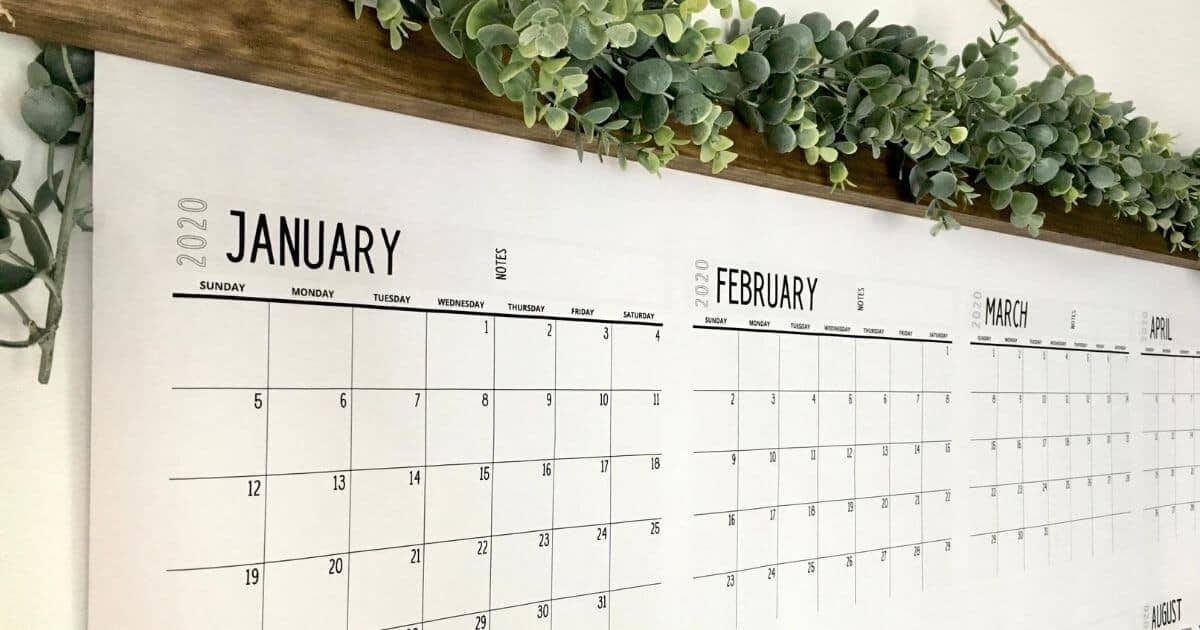
You can also add your own wood bead tassels, burlap ribbon, or greenery garland to decorate the top of your giant wall calendar like I did:
Changing Out Your Giant Wall Calendar at the End of the Year
This giant wall calendar is one of my most popular products in my SHOP, and I make a new yearly version every single year because I use it myself! So when the new year rolls around, simply head over to my shop to purchase the updated yearly calendar.
Then, if you’re using the push pin method to hang it on the wall, simply swap out the calendar printable and push the pins back in. Or, if you’re using the simple frame method to hang it, you can just rip off the outdated calendar and staple the new one to the 1″ x 2″ boards that you already have done. It takes less than 10 minutes to swap out the calendar at the end of the year, and then you’ve got a whole new calendar for about $16 to last you all year long!
This DIY Large Wall Calendar has already been a HUGE help to keep me organized! I love that I can just glance over at it while I’m working in my office and easily see the important stuff that I have going on next month. And, as an added bonus, it takes up a lot of space on a large blank wall that I just didn’t want to spend a ton of money decorating!
So if you’re in the market for a large wall calendar that lets you see all 12 months at the same time, then I hope I’ve inspired you to try this easy DIY!
Happy nesting!


When will the 2025 calendar be ready for purchase?
Hi Vicki! I will be working on that in the next 2 weeks, and I will need to “test print” my own copy, then it will be listed in the shop. Definitely done by mid-November. 🙂
Will you have 2024 available for purchase?
Yes, I will be creating the 2024 calendar soon. 🙂
Absolutely wonderful idea! I was looking to buy from Amazon or somewhere, but couldn’t find anything i liked. I’m using it to organize my work and home schedules.
Please make the exact same calendar available for 2024 and 2025 years. I’d like to buy them now in advance. Thank you.
Hi, I bought & downloaded your 2023 calendar, but I realized that what I really needed was an academic school year calendar from July 2023 – June 2024. Is this something that you could make and I could purchase?
Hi Amy ! your posts are always helpful and so much creative !! thank you !! Elisa