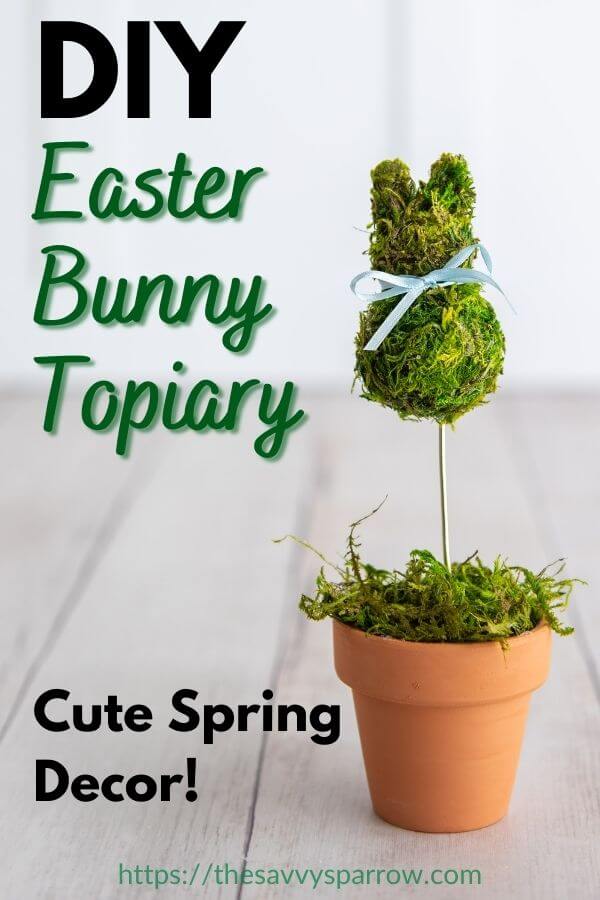
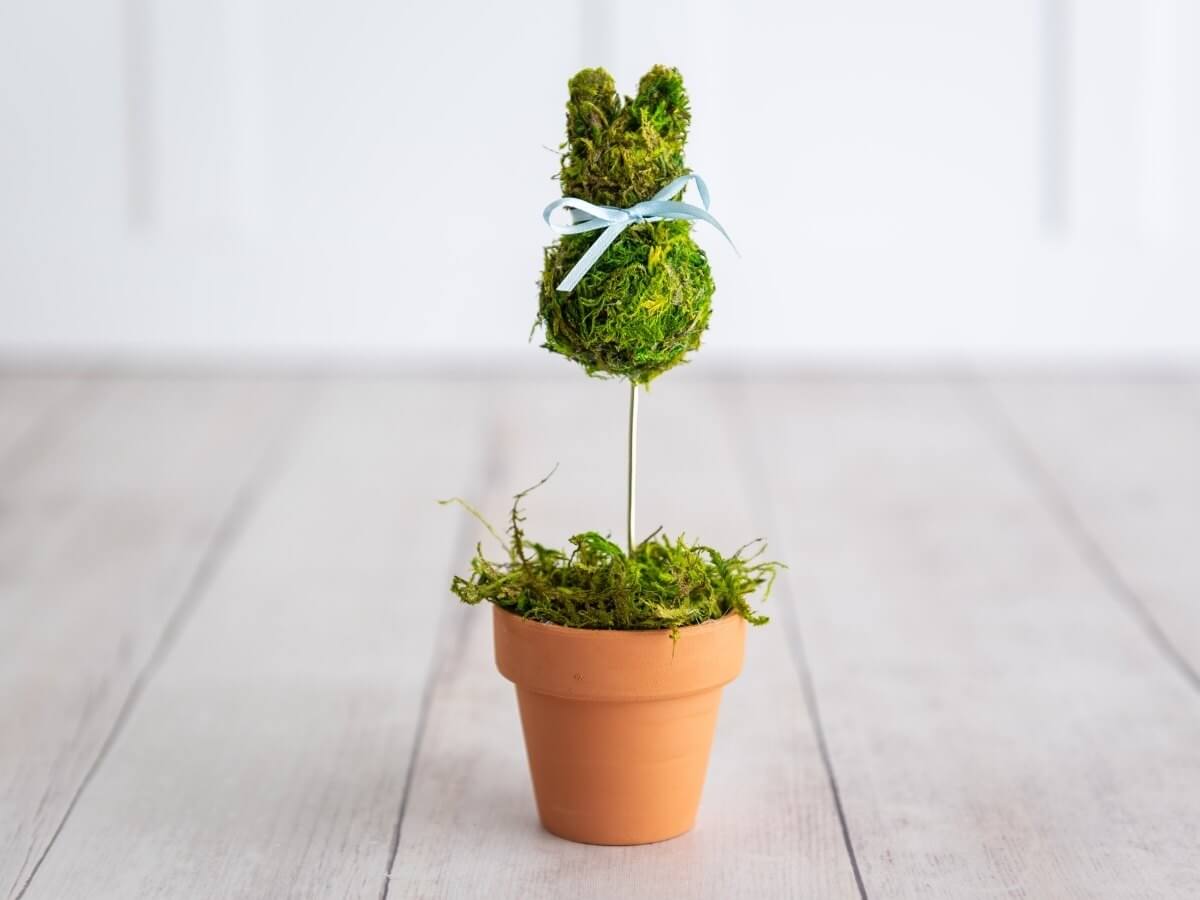
Looking for cute Easter crafts to make and use in your Spring decor? This mini bunny topiary is so adorable, and you can make it in just a few simple steps!
If you’re a fan of making your own seasonal decor for different holidays, then you’re in for a treat today!
This super cute moss bunny topiary is perfect to display on your fireplace mantel or entry table as DIY Easter decor. Here’s how to make it:
Bunny Topiary Supplies
Here’s everything you need to make these cute moss Easter bunny topiaries:
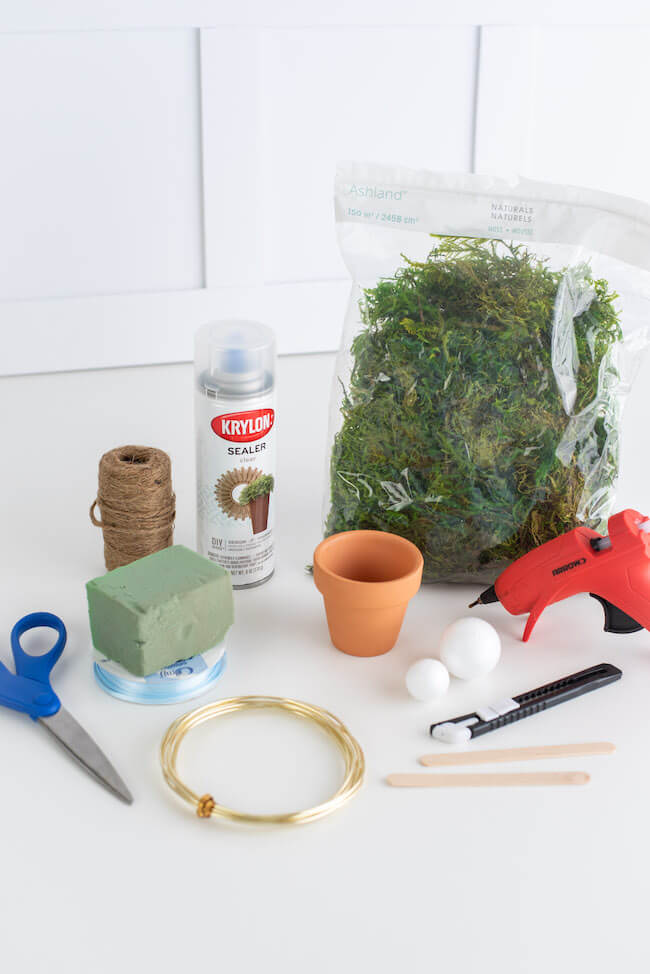
- Moss – You can find the bags of natural, green-colored moss at most craft stores
- Floral foam – Enough to fit inside your mini pots
- Mini terra-cotta pots – Mine are 2″
- Styrofoam balls – one size 1.5” and one size 0.8”
- Exacto knife
- Floral wire
- Hot glue gun and glue sticks
- Popsicle sticks
- Scissors
- Ribbon or twine
How to Make a Mini Moss Bunny Topiary
Here’s how to make your own Easter bunny topiary to display in your home, gift to the Easter dinner hostess, or sell at craft fairs:
Step 1: Make the bunny shaped base for your topiary decor.
First, you need a base to cover with moss. The bunny base on this Easter topiary is made with styrofoam balls and popsicle sticks.
Start by breaking off two ends of a popsicle stick, so that you have two pieces, each with one rounded, finished edge. The two stick pieces should each be about 0.75″ long.
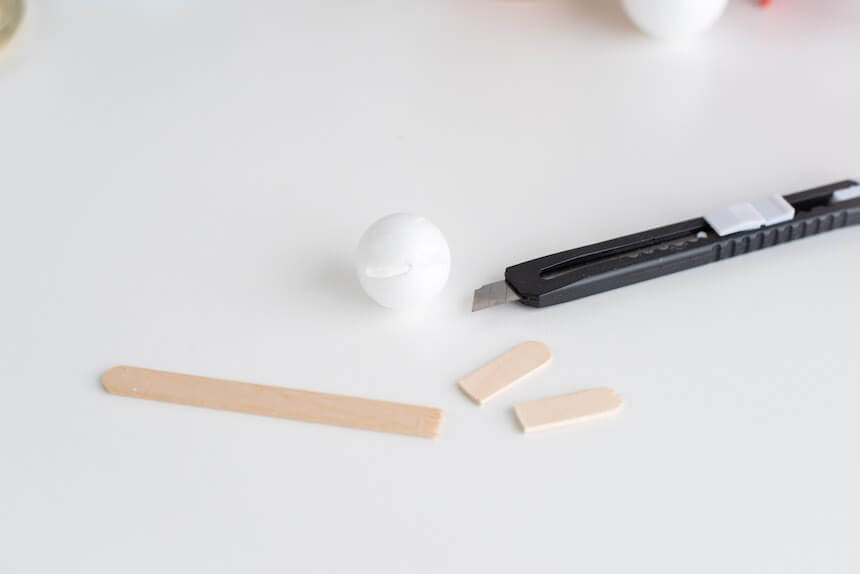
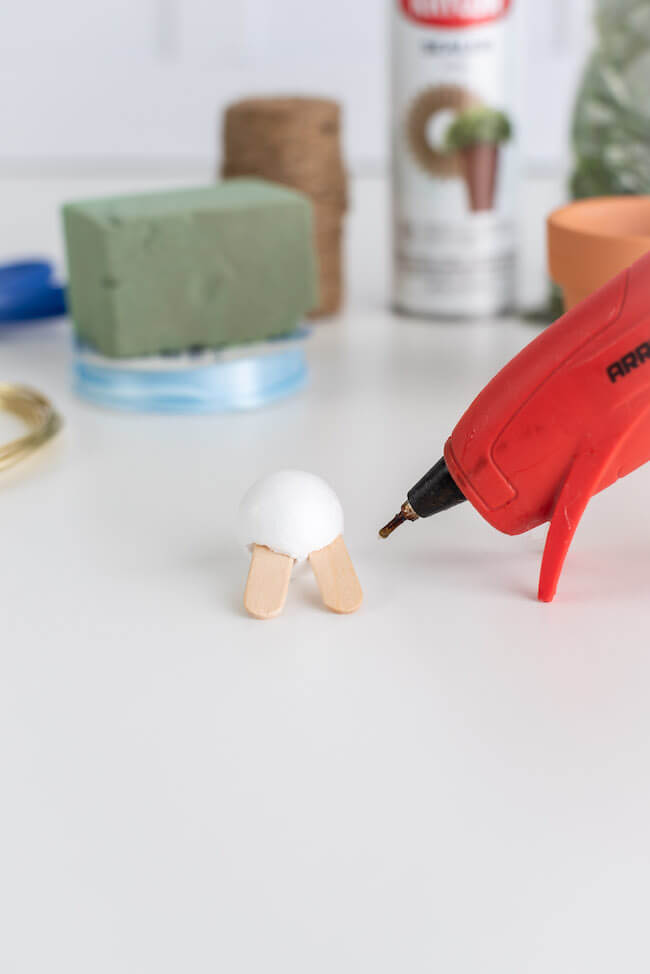
Then, use an exacto knife to carefully cut two small slits in the 0.8″ styrofoam ball for the bunny’s ears. The two slits should be long enough for the popsicle sticks to sit inside, like a small channel.
Hot glue the two broken pieces of popsicle sticks, one stick into each channel, with the rounded edge sticking out (like the shape of a bunny ear).
Then your bunny’s head is done, and it’s time to move on to the body.
To make the bunny’s body, first poke the floral wire through the bottom of the 1.5” styrofoam ball and up through the top of the ball. Then, carefully poke the wire through the bottom of the 0.8” ball (bunny’s head) without going all the way through to the top.
Here’s what it should look like at this point:
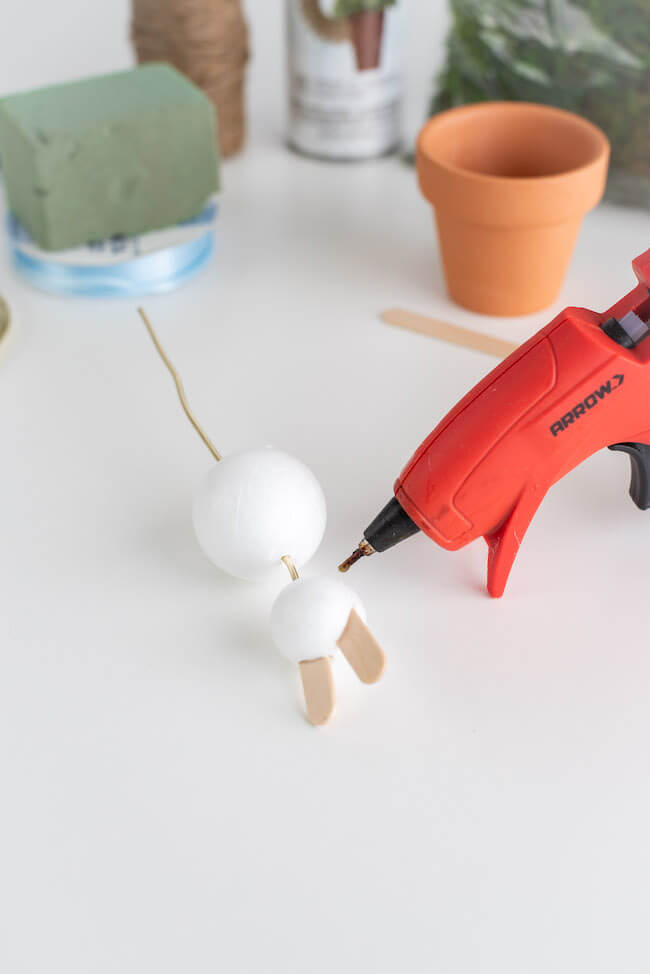
Then, add some hot glue as extra reinforcement to connect the bunny head to the body and make your topiary stronger.
Finish your body shape by cutting off about 4″ of floral wire to use as the stand for your bunny topiary. Insert it into the base of the bunny shape, and add more hot glue around the hole where you inserted the wire for extra support.
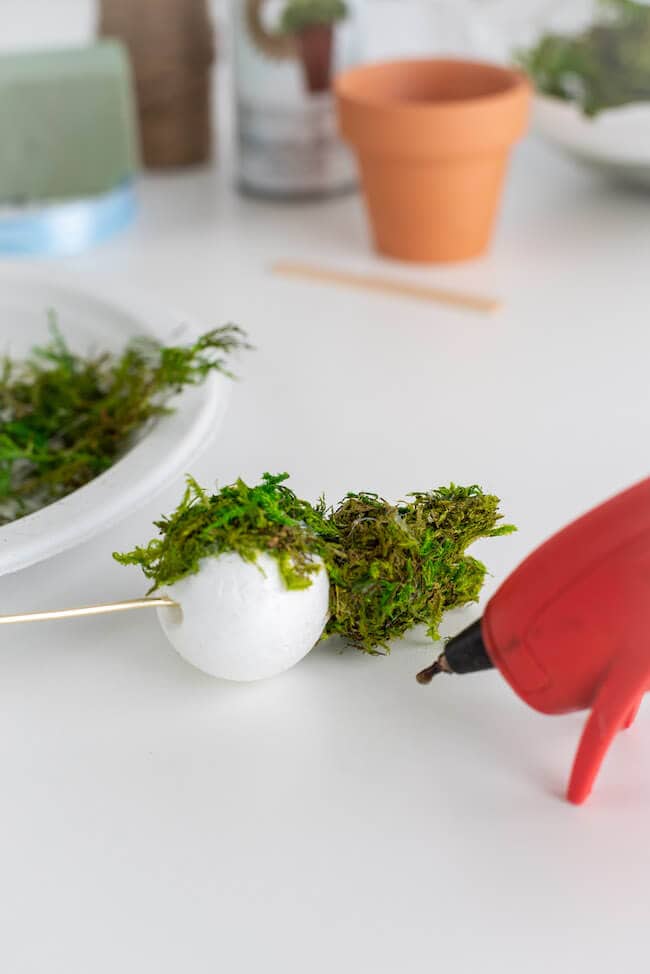
Step 2: Cover the bunny shape with moss.
Next, it’s time to actually make your bunny look like a topiary with some greenery! Use hot glue and work in small sections to glue the moss all over the bunny shape. Make sure to layer the moss thick enough so that the Easter bunny is completely covered, and you don’t see any white styrofoam peeking through.
*TIP – It helps to have your moss already pulled apart and ready on a plate for you.
Step 3: Add the moss bunny into a flower pot to make the Easter topiary.
Next, cut the floral foam to the correct size to fit inside your pot like this:
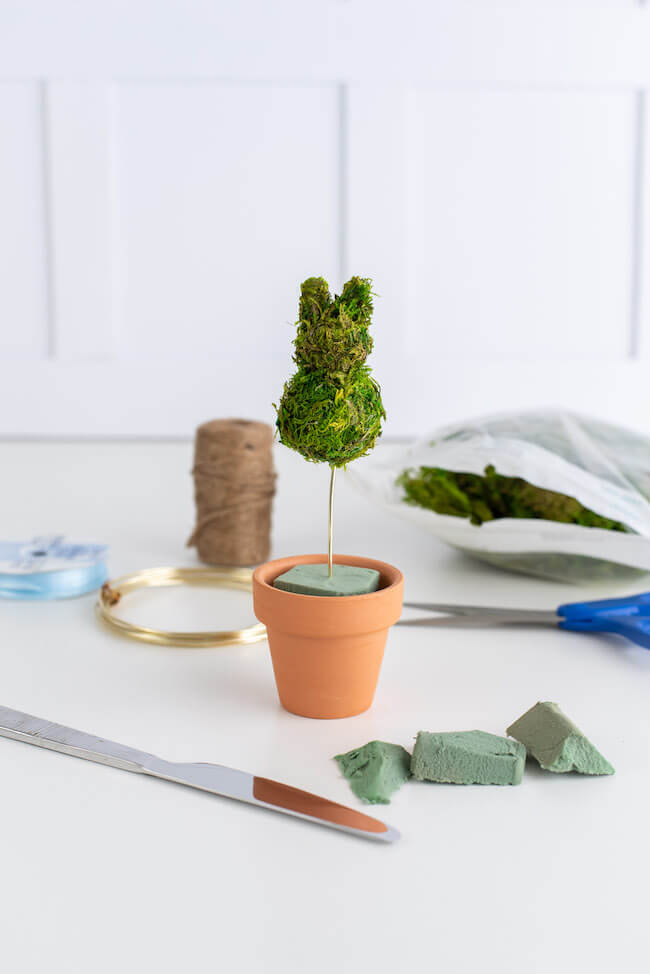
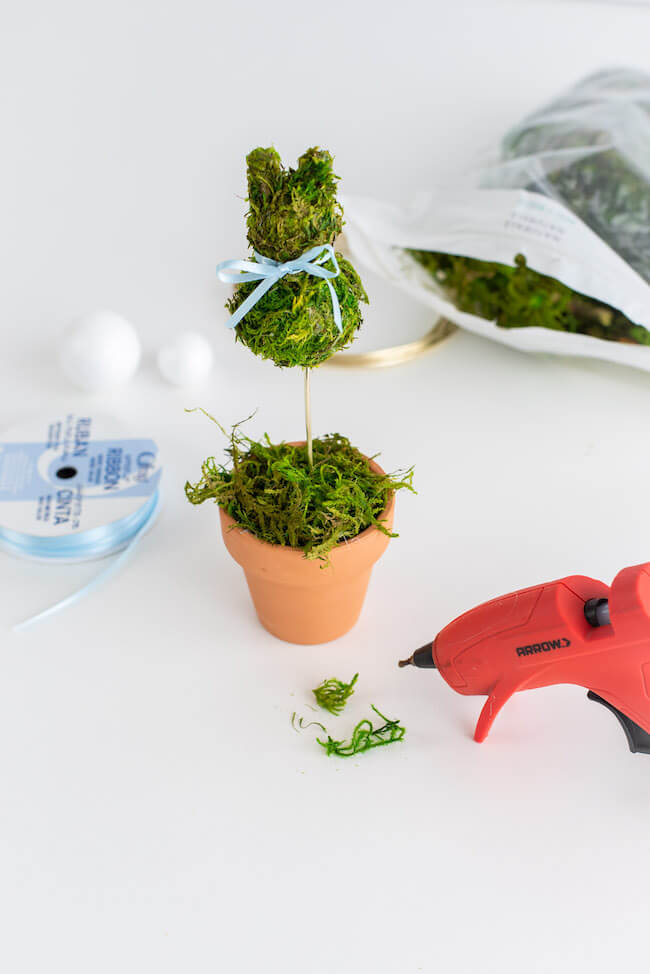
Insert the wire “stem” of your moss bunny into the foam, and then hot glue some moss on top of the foam to completely cover it.
Step 4: Add a bow to your mini bunny topiary craft.
As a finishing touch, tie a small ribbon or twine bow around the bunny’s neck for a pop of color and character.
Then, your cute Easter topiary is ready to display with your other spring decor! So cute, right?!
Other DIY Easter Decor Ideas
Want to make some other cute Easter decor crafts? Check out these ideas:
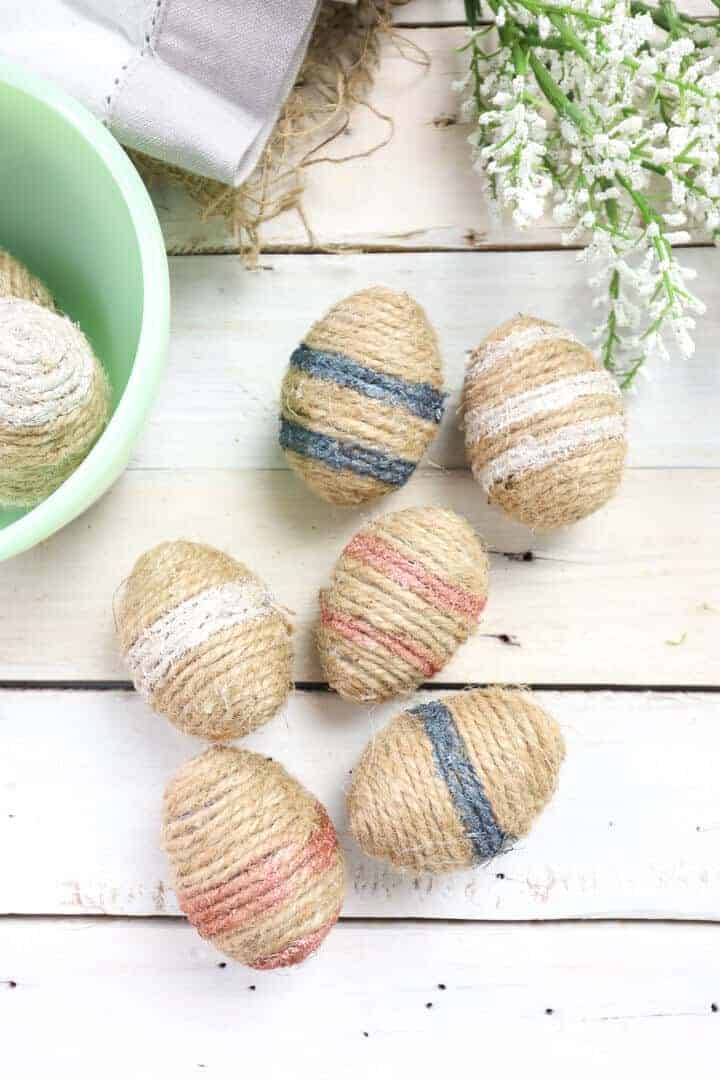
DIY Twine Easter Eggs – These easy Easter egg crafts are made with cheap plastic eggs, twine, and paint. Perfect to use as vase fillers, or display a few under an Easter cloche.
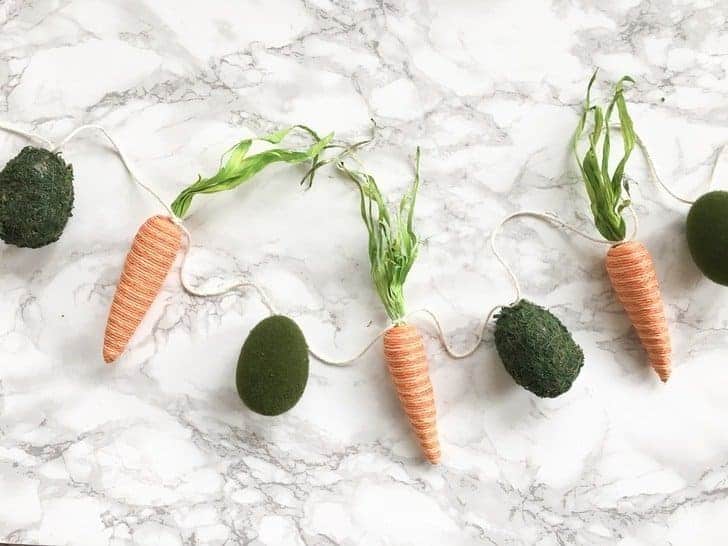
Easy DIY Easter Garlands – These DIY spring garlands are so easy to make that any bunny can do it (see what I did there!). Just use store-bought Easter decorations like moss covered eggs and twine carrots, and string them on some twine for super easy banners to hang across your fireplace mantel or entry table.
Or, check out this post from The Pioneer Woman for 60 cute DIY Easter decor ideas!
And don’t forget to PIN this post for later: