
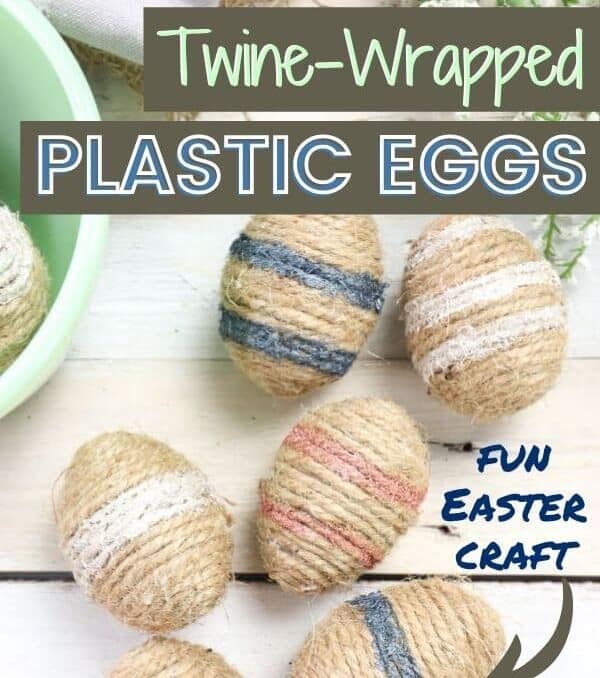
These twine wrapped Easter eggs make the sweetest DIY Easter decor to add to a centerpiece or a farmhouse style tiered tray. Learn how to transform plastic eggs to cute Easter egg decor with twine and hot glue.
Easter is right around the corner so I just started pulling out my Easter and spring decor, and I immediately realized that my spring home decor collection is seriously lacking.
I do have this cute Yarn Wrapped Easter Garland and this easy DIY Dollar Tree Easter Egg garland that I made last year, but that’s pretty much it. So I was really in need of something to fill the long wooden centerpiece box that my husband built for me.
And what better to use in an Easter centerpiece than Easter eggs?
Plus, these cute twine wrapped Easter eggs are a great way to use up your extra plastic eggs! Heres’ how to make these cute Easter egg decorations:

Supplies Needed

- plastic eggs – You can use all of the same sizes of eggs or do a mix of larger and smaller eggs.
- Scotch tape
- twine
- scissors
- hot glue gun and glue sticks
- acrylic paint of your choice – I used Americana Decor Metallics in the colors Pewter, Pearl, and Rose Gold.
- paintbrush – I used a 1/2″ flat paintbrush and it worked well. You’ll need a fine-tipped brush to be able to paint thinner stripes on your DIY twine Easter eggs.
How to Make Twine Wrapped Easter Egg Decorations
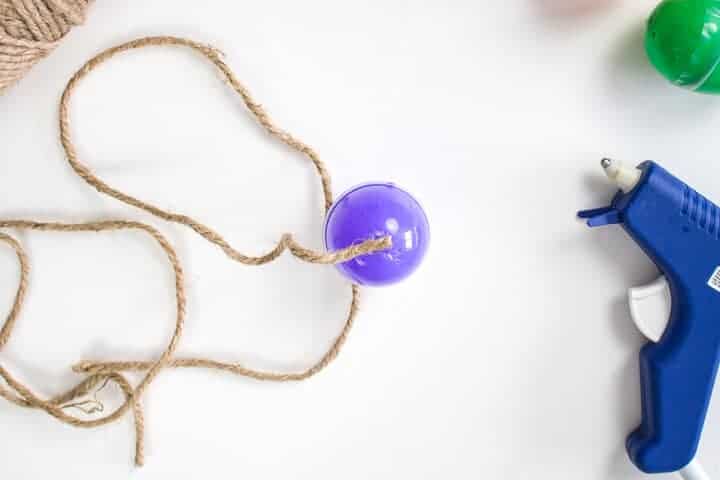
- First, apply a piece of Scotch tape to the seams of your plastic eggs so they don’t pop open.
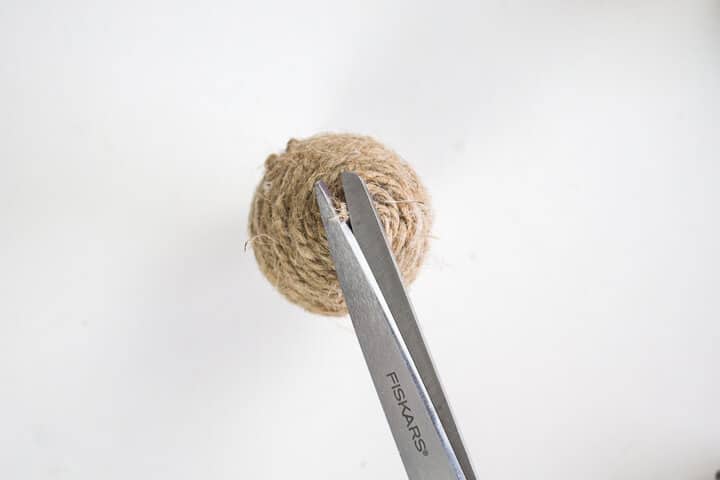
- Then, start out by placing a small dot of hot glue on the bottom of one plastic egg. Carefully press the end of the twine into the glue and hold it in place until the glue sets.
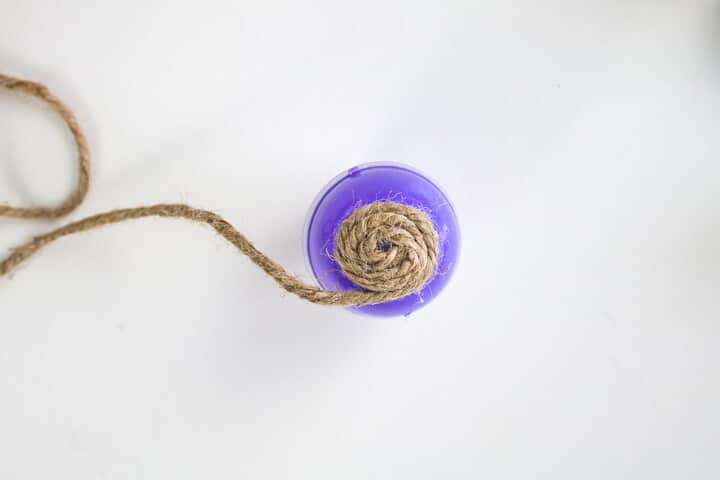
- Apply another dab of hot glue next to the end of the twine, and carefully wrap the twine around. Continue applying the hot glue next to the twine that has already been glued down, and wrap the twine in the glue. It’s best to work in small sections and press the twine into the glue each time to ensure a good bond.
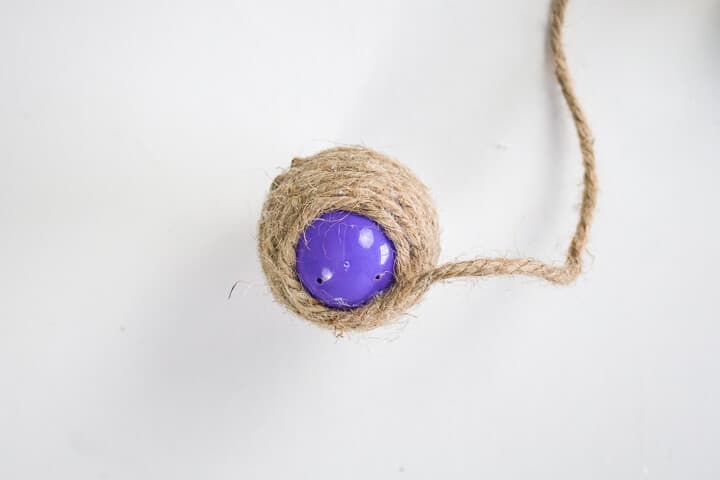
- Continue to move down the egg, making sure that you keep the twine in a nice tight coil to completely cover the plastic egg underneath.
- When your plastic egg is completely wrapped in twine, cut the twine to the length needed and glue it in place at the top.
- Continue gluing twine on to all of your plastic eggs.
- Dip the tip of your paintbrush into your choice of acrylic paint, and paint random stripes on to the twine wrapped eggs. You can choose to do one single color of stripes on each egg, or paint multiple colors of stripes on each. Also, vary the thickness and number of painted stripes on each egg for a cool, random look.
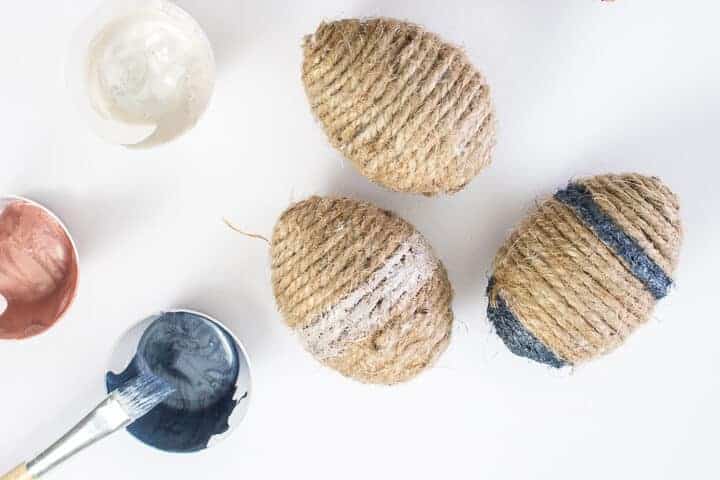
Don’t these twine wrapped eggs look so cute?! These will be PERFECT in the Easter centerpiece on my dining table.

What are some of your favorite ways to decorate for Easter? Have you made any Easter decor projects that you’re absolutely in love with? Leave me a comment down below!
And be sure to check out some of my other Easter and Spring ideas:
- Easter Bunny Money for Easy Egg Fillers – Printable Coupons!
- DIY Square Wreath for Your Front Porch Decor
- DIY Easter Banners for Your Spring Mantel Decor
Or hop over to The Idea Room for more fun plastic Easter egg crafts.


these are so cute. I will definitely be making them.