
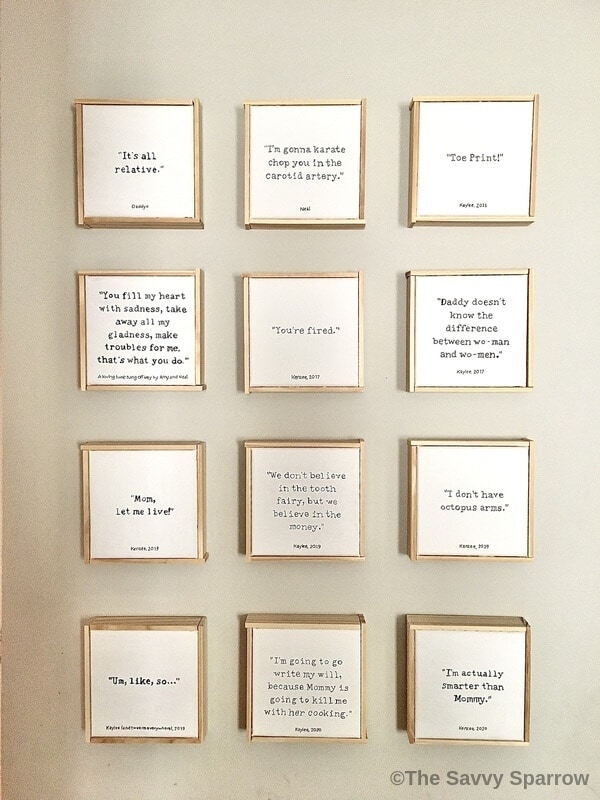
Want easy DIY wall art ideas? Then you’re in the right spot! Find out how to make DIY Quote Wall Art using canvas and paint sticks to display funny quotes from your kids.
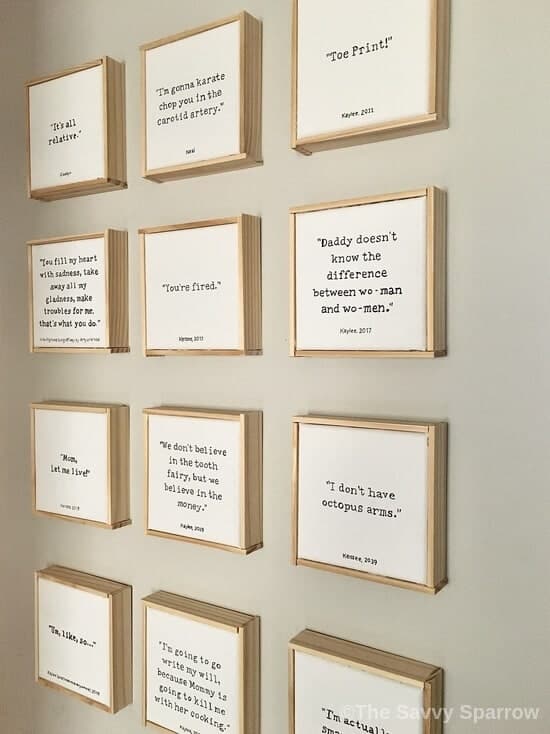
Kids say the darnedest things, am I right?!
If you’re a parent then I’m sure you’ve got a laundry list of hand-to-forhead, “doh” moments from when your kids opened up their mouths and something bonkers came out.
And maybe other family members have off-the-wall quotes that are worthy of being framed and hung on the wall…
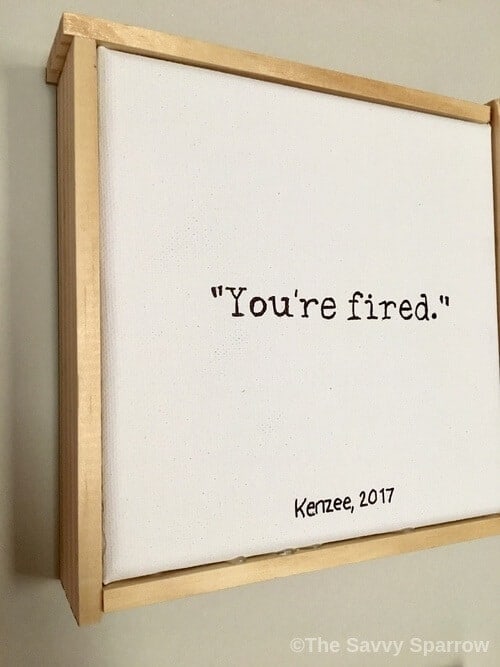
Like when your 5 year old fires you as her Mom… yup, it happened to me…
Or when your husband totally botches the lyrics to the song from your first dance at your wedding, and it just sticks and becomes your own little inside joke.
But, do you actually remember all of those funny quotes from your kids and crazy husband?
Well, today I’m sharing a way to memorialize all of those quotes from your kids in easy DIY quote wall art!
I failed miserably at keeping up with my girls’ baby books, so I guess this is a cute and easy way to make up for that, PLUS add some cool DIY wall art to my decor! Win-win!
*This post contains affiliate links, which means if you click a link and make a purchase I earn a commission at no additional cost to you. Read my full disclosure here.
How to Make Your Own DIY Quote Wall Art
Step 1: Gather Your Supplies
Here are the supplies you need to make your own DIY quote wall art on canvases:
6″ x 6″ canvases
These are the canvases that I used (affiliate) and they worked perfectly for this project! These 6″ x 6″ canvases would also be great for kids to paint their own masterpieces and then hang in a collage on the wall.
21″ Paint Sticks
I got my paint sticks from Home Depot. They come in a 3 pack for 98 cents, and they are GREAT for making small signs and other crafts because the wood is straight and smooth.
They do come with a ruler printed on one side, but I just made sure that the white ink was on the inside and bottom of the finished frames.
Carbon Paper and Stylus
This is the carbon paper and stylus pack that I have (affiliate), and I LOVE it! It comes in a pack of 200 sheets, and you can do multiple projects from just one sheet of paper!
I’ve used this carbon paper to make these DIY Farmhouse Signs on Canvas and my DIY Scroll Sign!
Black Permanent Markers
I tried 3 different brands and point sizes for this project, and with the thinness of the font that I chose to use, the Ultra Fine Sharpie Markers like these (affiliate) worked the BEST by far!
Glue gun and glue sticks
Clamp
I used this Irwin 2 inch clamp (affiliate) and it was the perfect size for this project.
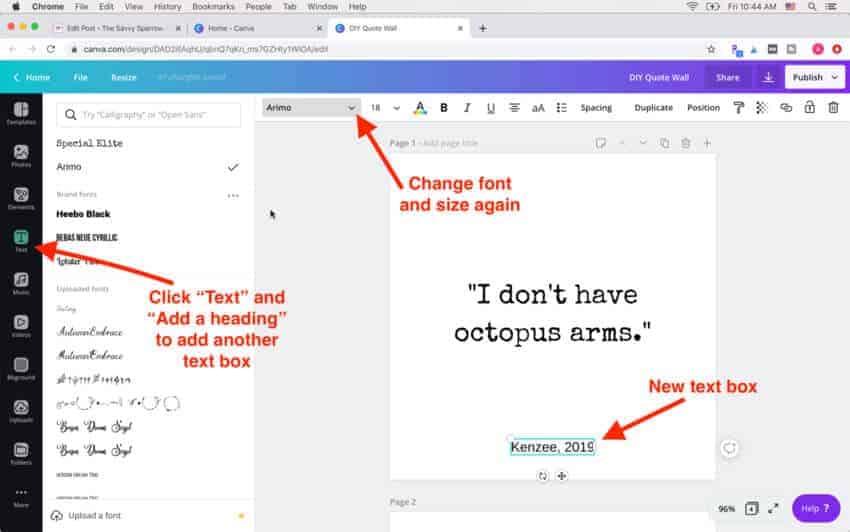
Computer and printer to make your own DIY Quote Wall Art
Don’t worry! I’ll show you how to use my FAVORITE computer design program to make your own printable sign templates. And, the computer program is completely FREE!
Make DIY Quote Wall Art with Picture Frames instead of Canvas:
If you’re not so crafty, you can also make your own DIY Quote Wall Art by simply printing out your quotes on card stock and then framing them in 6″ x 6″ gallery frames!
I seriously considered just buying these square picture frames (affiliate) and framing the quotes to hang in a collage on the wall, but I ultimately decided to do the canvases because they were cheaper.
Step 2: Create your DIY Quote Wall Art in Canva
If you’ve never used a template to make DIY signs, then prepare to have your mind blown!
I have used printable sign templates like the ones used in this project to make DIY scroll signs, DIY wood signs, and DIY farmhouse signs on canvas!
And the great thing about sign templates is that you can make professional-looking, perfect DIY signs even if you have ugly handwriting and you don’t own a vinyl cutting machine like a Cricut!
Step 3: Cut your carbon paper and your sign template down to size
You want to be sure to cut your carbon paper and template to just a little bit smaller than the size of your canvas. I didn’t do this on my first canvas, and the paper hanging off the edge wrinkled up a bit and caused my tracing to be crooked.
Then, I had to paint over it with white acrylic paint and start fresh.
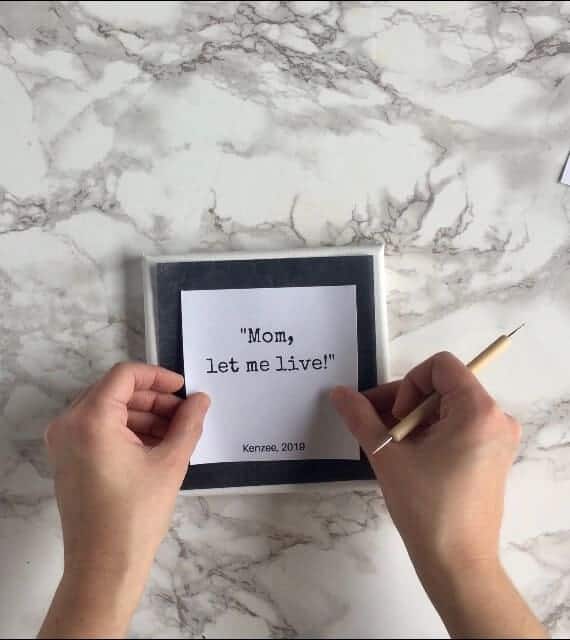
Step 4: Use carbon paper to trace your DIY quote art on your canvas
This is the carbon paper pack that I use (affiliate)… it’s super affordable and it comes with a pack of 5 different styluses that are perfect for this DIY quote wall art!
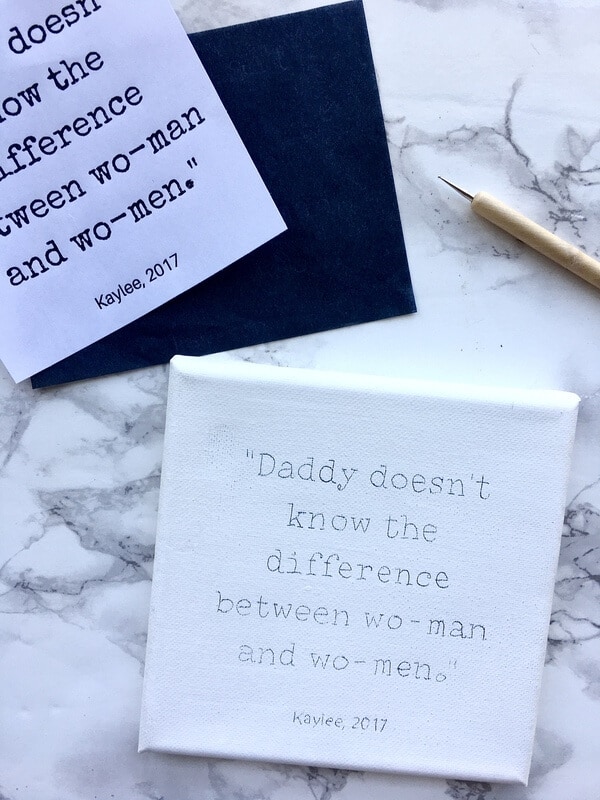
Once you have your quote templates printed out, then it’s super EASY to get the lettering transferred to your canvas using the carbon paper tracing technique.
I’ve got a GREAT video explaining how to use carbon paper to transfer lettering for DIY signs on this post: DIY Scroll Signs with Printable Sign Templates
Go check out that video, transfer your quote template to your canvas, and head back here to finish your DIY quote wall art!
Step 5: Trace over the outline of your quote art with black permanent marker
As I mentioned earlier, the Ultra Fine black Sharpie markers worked best for the font that I chose. If you are doing a larger sign with a larger font, then I recommend the Dollar Tree permanent markers with the regular point (like a regular Sharpie).
Step 6: Cut paint sticks to size
The paint sticks that I recommend for this project are 21″ long, and one side has an indented handle.
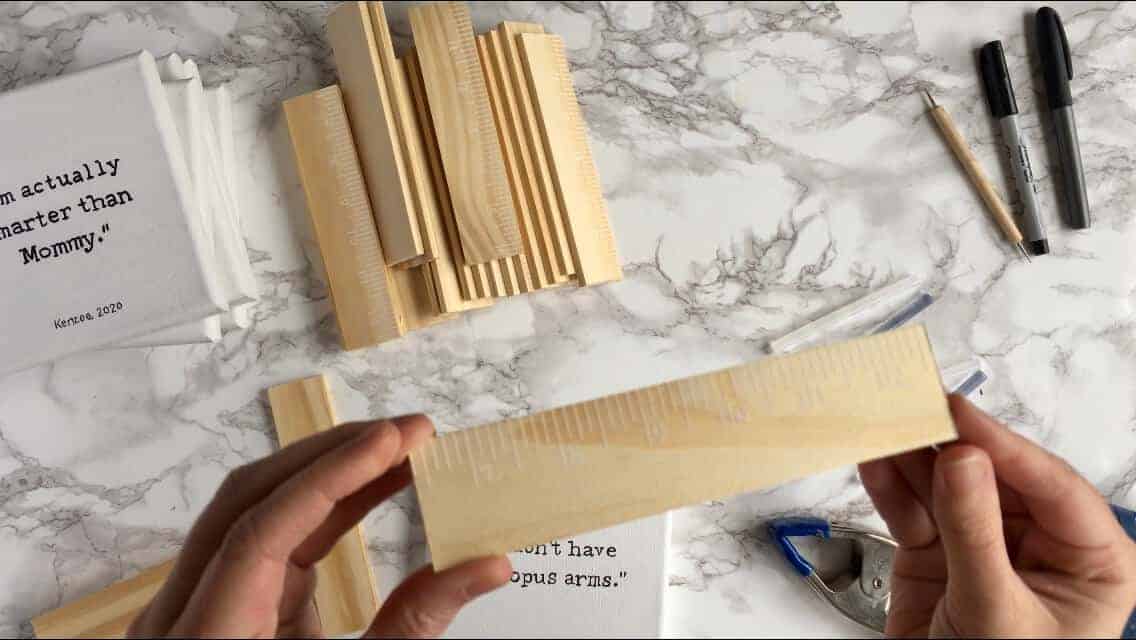
We used a table saw to cut them to 6 1/4″, though we actually should have cut them just a hair shorter to avoid having to sand down the edges later.
You can tell from this photo that some of the paint sticks extend longer than our finished frames:
Step 7: Hot glue paint sticks to sides of canvas to make a frame
I just ran a line of hot glue down one side of the canvas at a time. Be sure to not get the hot glue too close to the front edge of the canvas so that it isn’t visible on your finished quote art.
I used clamps like these (affiliate) to hold the paint stick in place for a few seconds while I was hot gluing the next side. Looks like this:

Then, I just moved the clamp around to hold each stick in place while I was applying glue to the next side.
The whole process of gluing the frames together was actually VERY quick!
Keep in mind though… you may need to go back and hot glue the back inside of some of your frame pieces.
After I hung my DIY Quote Wall Art on the wall, I noticed that some of the frames seemed to be loose. So, I just ran a strip of hot glue down the seam where the paint stick meets the edge of the canvas (on the backside hidden from view), and then it was much sturdier.
Step 8: Hang your DIY Quote Wall Art on your wall and Enjoy!
I just used regular push pins to hang my DIY quote wall art. The 6″ square canvases are very light, and the push pins can be easily moved without doing too much damage to the wall.
I used a yard stick to find the center of the wall where I was hanging my quote art, and I pushed the first push pin in there. Then, I found the center points of the space to the left and right of the center push pin.
Hanging the DIY quote wall art was SUPER quick with this method!
Want to see how I made this DIY Quote Wall Art from start to finish? Check out the video below:
Hope you enjoyed this easy DIY wall art! Be sure to check out some of my other DIY decor ideas and…
Happy Nesting!


This quote wall is adorable! I have an empty wall in my kitchen I would love to do this on! We are painting our kitchen cabinets but this would totally finish up the space. Thanks so much for sharing!!!