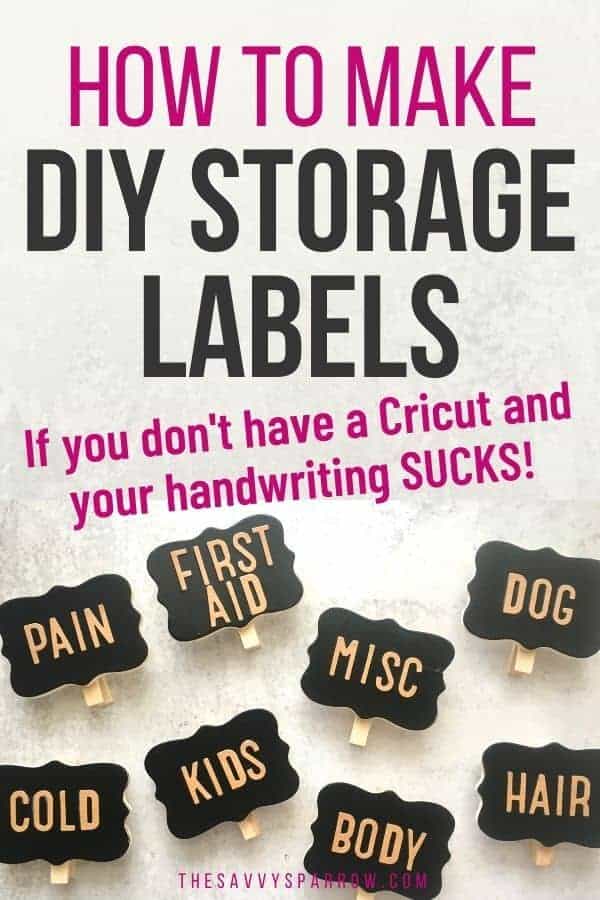
Want to know how to make cute DIY Basket Labels even if you don’t own a vinyl cutting machine? You can make your own storage bin labels in just a few simple steps… Hello, cute and super organized spaces!
Labels, and tags, and organization perfection… oh my!
If scrolling through Pinterest or Instagram, gushing over the countless pictures of perfectly organized spaces with the cutest DIY basket labels sounds like your typical Saturday night, then this is the project for you!
Yes, cute and perfectly written storage labels are possible! Even if you don’t own a Cricut and your handwriting is crap! (No shame in crappy handwriting… I tried to make two chalkboard labels with a paint pen and my own chicken scratch writing and they went straight in the trash can!).
I used my super cute DIY storage labels when I was organizing my medicine cabinet recently, but these chalkboard labels would also work GREAT for laundry room storage bins, playroom toy bins, or pantry organization bins!
So let’s get straight to this easy DIY organization project, so that you can start labeling ALL. THE. THINGS…
Supplies for DIY Chalkboard Labels for Baskets
You can make your own cute storage labels for baskets and bins for just a few dollars… MUCH cheaper than investing a bunch of money and time into a Cricut!
*This post contains affiliate links, which means if you click a link and make a purchase, I earn a commission at no additional cost to you. Read my full disclosure here.
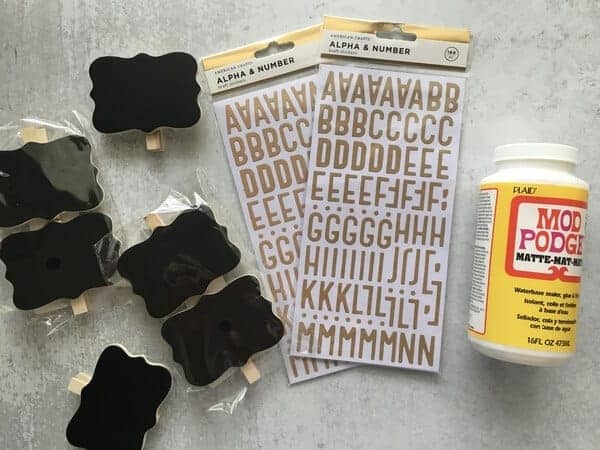
Here are the supplies you need to make your own DIY Basket Labels exactly like mine:
Chalkboard Labels with Clothespins
The chalkboard labels that I used are from Michael’s, and they came in a 2 pack for 99 cents. BUT, if you don’t have a Michael’s nearby, here are some similar chalkboard clothespin labels from Amazon (affiliate) – and these are actually CHEAPER than the ones that I used!
Of course you can make your own chalkboard labels with wood plaques, clothespins, and chalkboard paint, but by the time you buy all of the supplies to make them, it’s probably cheaper AND easier to just buy the pre-made ones.
Letter Stickers
Search your favorite craft store for scrapbook letter stickers in the size that you need. I used these Kraft Letter Stickers from Target, and they worked perfectly for my project!
Mod Podge
I used Matte Mod Podge, because I wanted my DIY basket labels to look more rustic and farmhouse. But, if you want more of a glam look, you could also use the Gloss or Sparkle variety of Mod Podge.
Paintbrush
You will need a basic paintbrush or foam brush to apply your Mod Podge to your DIY storage basket labels.
How to make DIY Basket Labels without Vinyl
Step 1: Apply letter stickers to your DIY Basket Labels
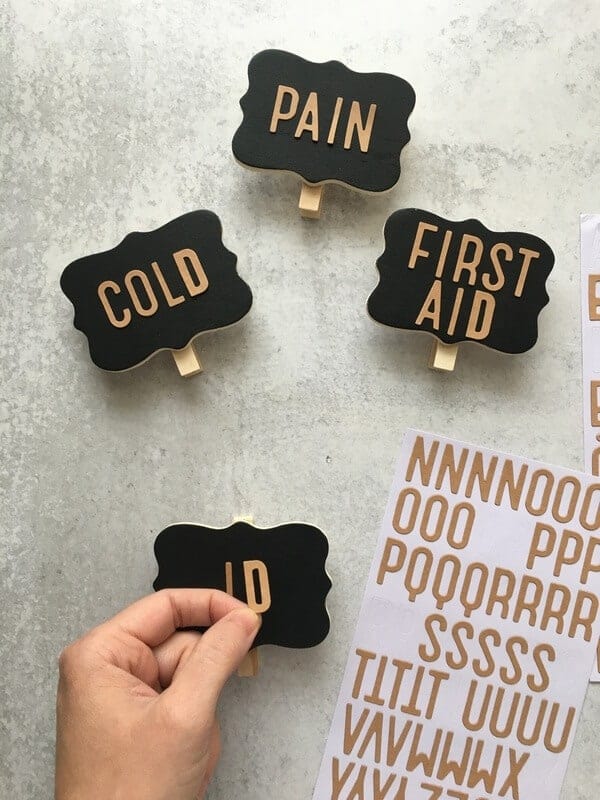
Here’s a TIP for getting your letter stickers evenly spaced on your storage labels… Start with the center letter FIRST. So, if you are spelling out “CLEAN” for cleaning supplies labels, then place your “E” in the center of your chalkboard label first. Then, stick on the “L” then “C”.
If you are creating DIY labels with words that have an even number of letters, then find the 2 middle letters and let them split the center of the label. So for “HAIR” the “A” and the “I” would split the center line.
Step 2: Cover the Storage Basket Labels with Mod Podge
The stickers that I used did not seem to stick well to the chalkboard paint on my DIY basket labels, so I just used a few coats of Matte Mod Podge to hold them in place.
After you’ve got your letter stickers where you want them, just brush on a medium thin layer of Mod Podge all over the label and the letter stickers like this:
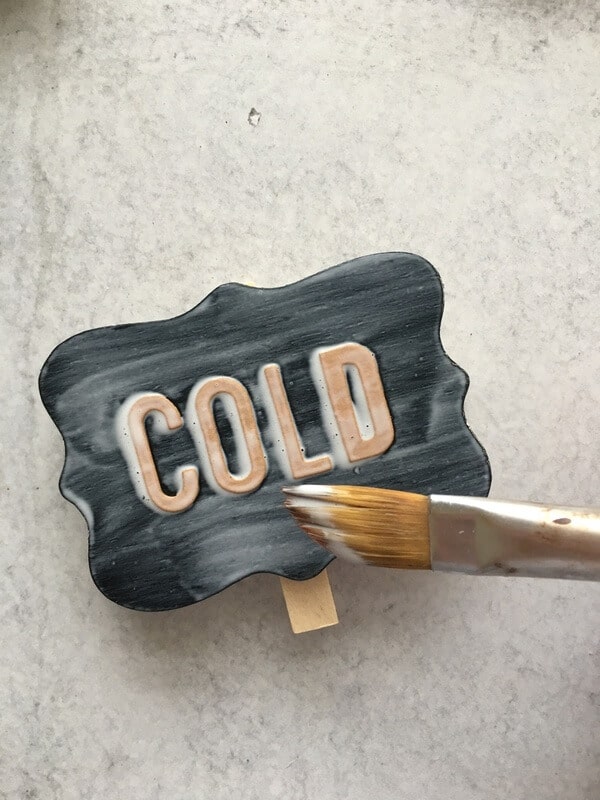
Don’t worry! The Mod Podge will dry clear!
I applied a total of 3 coats of Mod Podge to my DIY storage labels, allowing each coat to ALMOST fully dry before applying the next. The Mod Podge really helps to hold the letter stickers firmly in place, so I don’t recommend skipping this step.
Step 3: Allow your DIY Storage Labels to dry
After you’ve got your desired coverage of Mod Podge (probably 2 or 3 coats), allow your storage basket labels to dry completely.
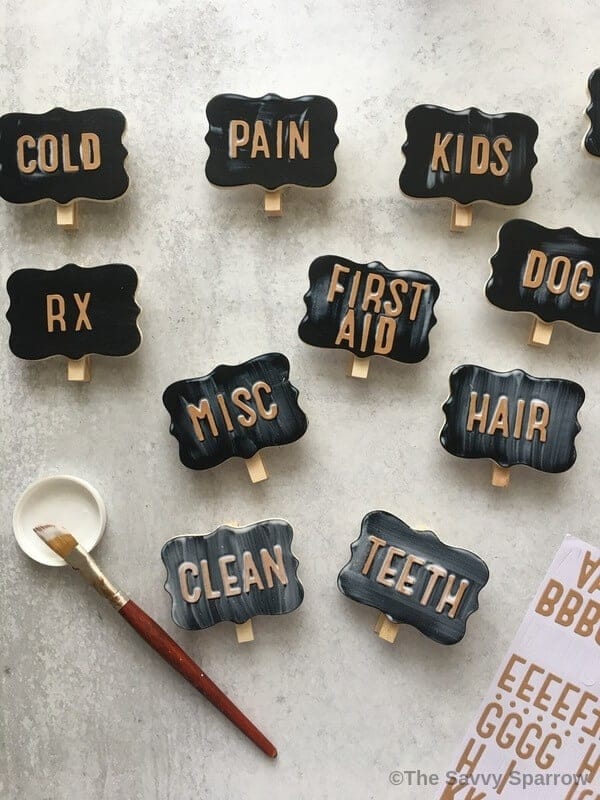
Then it’s time to attach your labels to plastic storage bins, wire baskets, or whatever bins that you need to organize. Just use the clothespin to clip your cute new tags to your baskets, and you’ve got super cute DIY storage labels!
And that’s it!
I used my DIY storage labels to give my medicine cabinet/linen closet a serious facelift! You can read more about how to organize your medicine cabinet HERE!
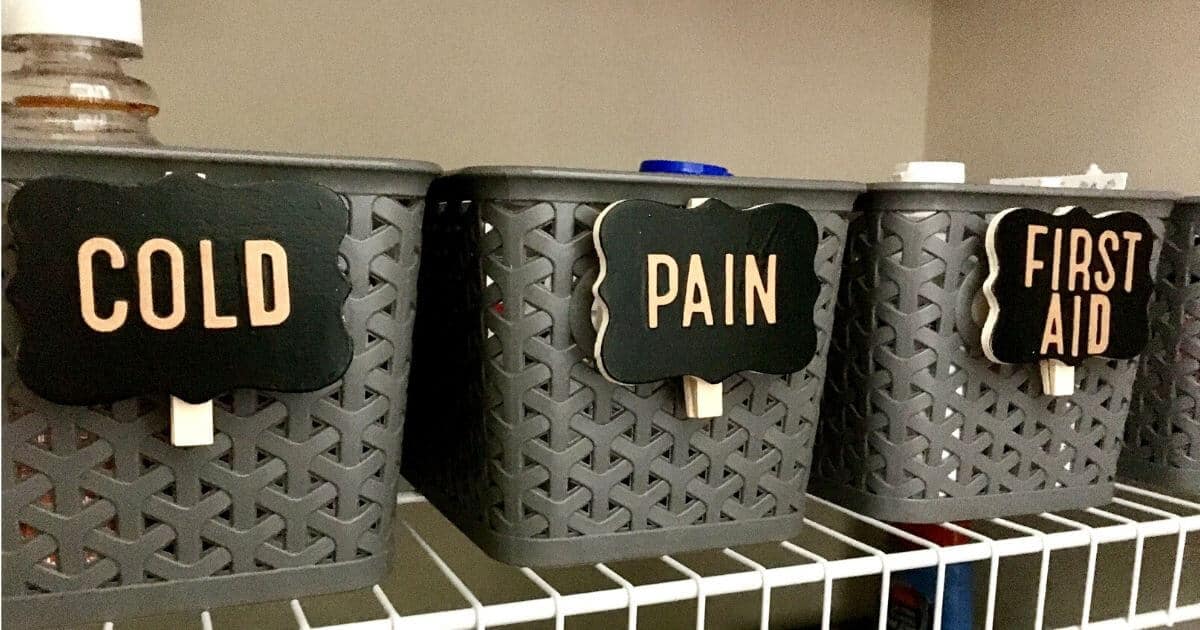
This easy DIY project is PERFECT if you’re drooling over those cute labeled baskets that you see all over Pinterest, but you don’t have the money or TIME to invest in a Cricut!
Just a few basic supplies and a few minutes of your time and you’ll have cute storage bins with DIY basket labels!
Want to organize even more stuff? Check out these posts:
- How to Organize Computer Files so You Can Actually Find Things
- How to Create Farmhouse Pantry Labels in Cricut Design Space
- DIY Spice Jar Labels with Cricut
And be sure to check out this post for even more ways to label baskets!

Leave A Reply!