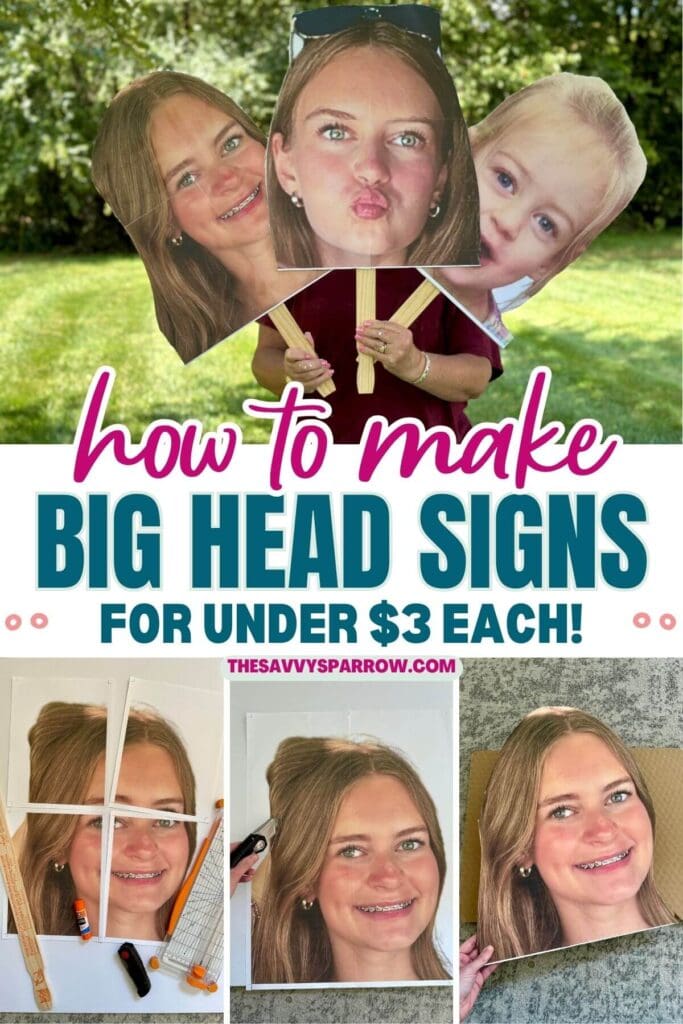
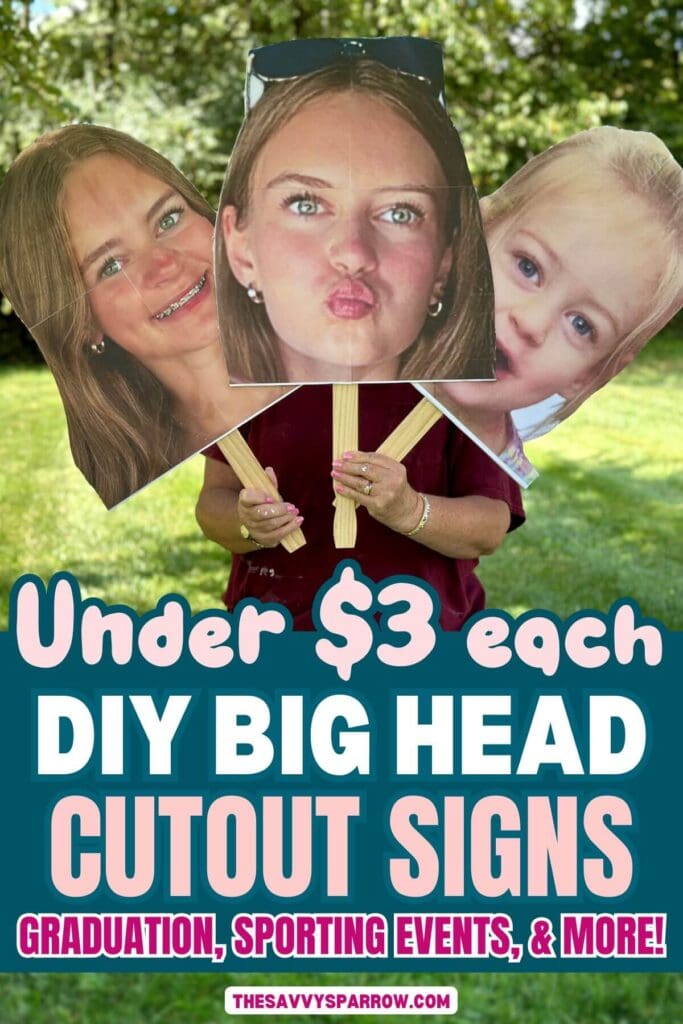
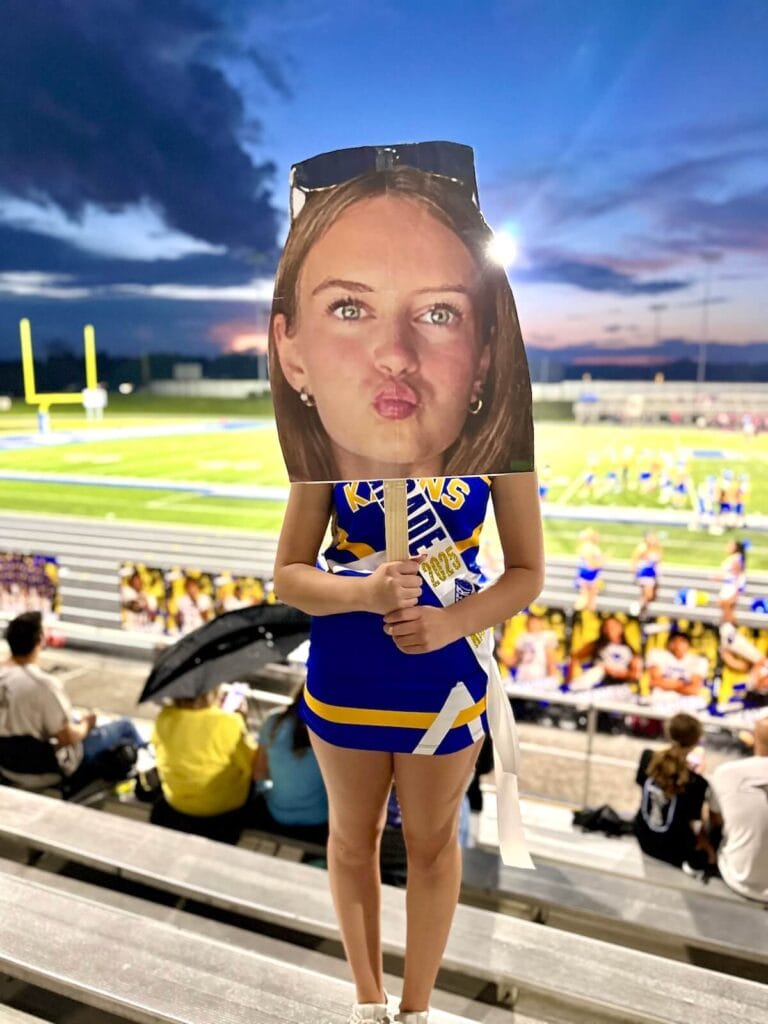
Learn how to make DIY big head cutouts using any photo with just a few simple supplies – no specialty print shop or expensive photo prints needed! Super fun big face signs perfect for kids’ sporting events, graduation, birthday parties, and more!
Making Your Own Big Head Signs
Most DIY tutorials for big head cut outs involve getting a 16″ x 20″ print made of your photo, and then gluing it to a piece of cardboard or foam board. I know this because I was frantically searching the internet trying to figure out how to DIY one of these signs for my daughter’s 8th grade night for the football game that she was cheering at the very next night… yes, she gave me less than 24 hours notice that she wanted me to have big head signs for her!
Getting a large print made from Walgreens or Staples definitely works, but at about $18 per photo print, it’s not exactly budget-friendly, especially if you’re making multiple signs. So I turned to one of my favorite free programs online – the same program that I use to make these easy DIY wood signs with large wording – and I got crafty!
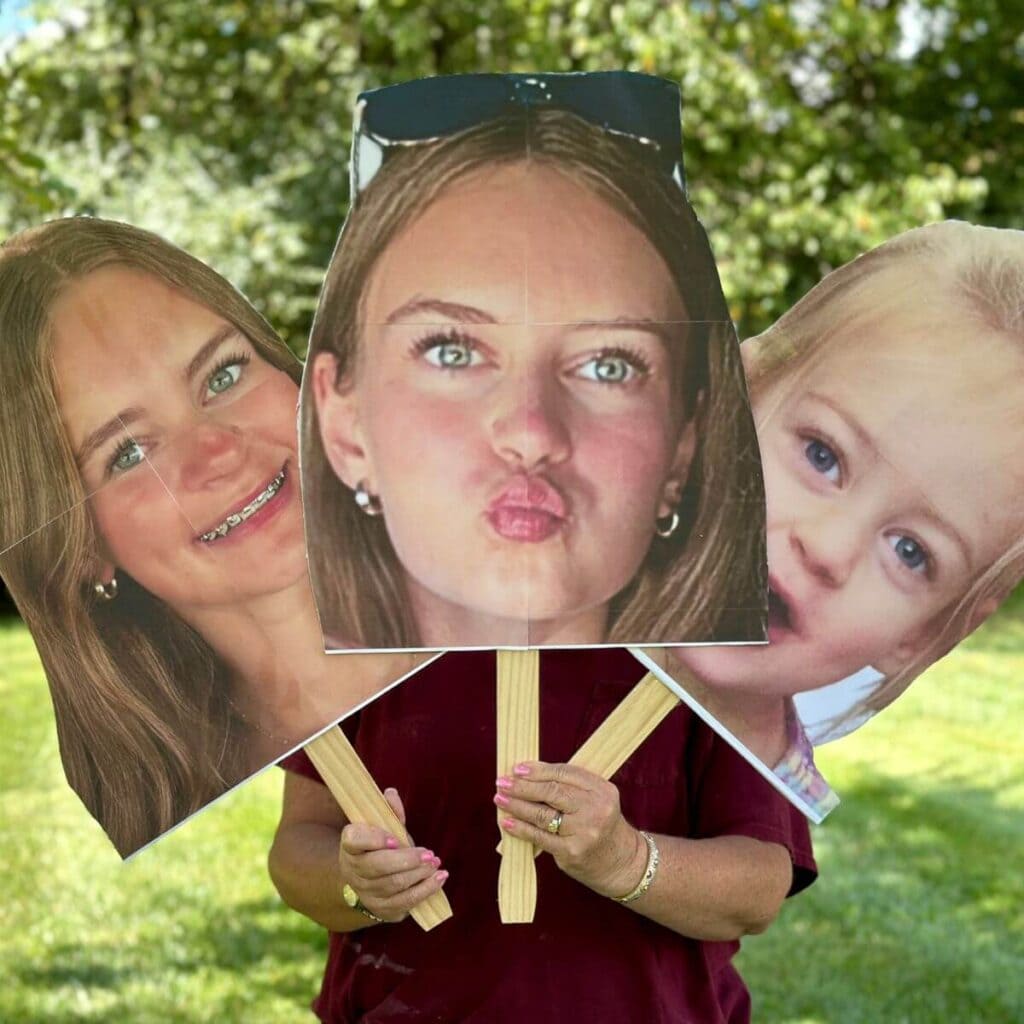
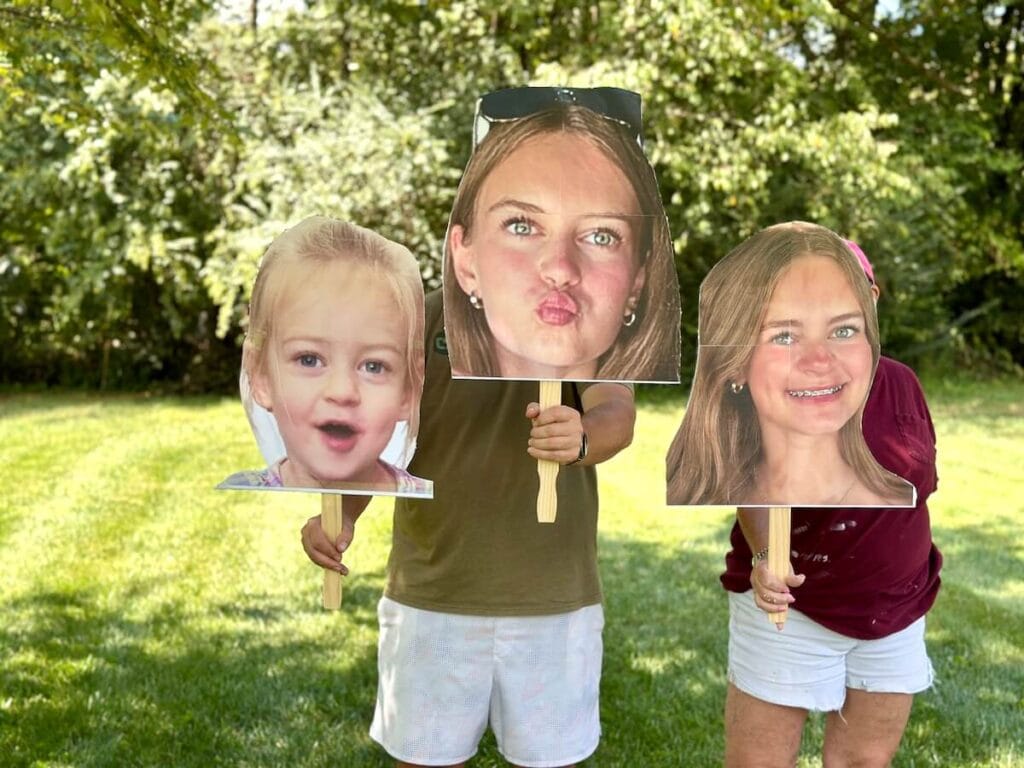
Just an hour later, and I had three perfect DIY big head cut outs ready to cheer her on! Here’s how I made them…
Why You’ll Love this DIY Project
- Make lots of signs with different photos – My daughter wanted 3 different photos printed for her big head signs, and since I printed the photos at home, it only cost less than $1 versus $20 for each print.
- Inexpensive and easy to make – These big head cutouts are budget-friendly since they don’t require a large scale photo print, and they’re very easy to make. I’m even going to make one for each of the 12 girls on my daughter’s cheer team.
- No special supplies or photo prints needed – You only need a few basic supplies, most of which you probably already have in your craft closet or junk drawer.
- Great for showing support – Take the signs to graduation, kids’ sporting events, concerts, parades, or other events to show support and stand out in the crowd!
Video Tutorial
More of a visual learner? You can watch me make this easy craft project from start to finish!
Supplies Needed
- face photo – You should have a clear photo in JPG or PNG format of the person’s face that you are creating the big head for. It’s okay if the photo has a busy background – you’ll be cutting out the face part only.
- foam board – We got our 20″ x 30″ foam boards from Dollar Tree. Depending on how large your face photo print is, you may even be able to fit two big head posters on one piece of foam board.
- paint stir sticks – For a large sign, you’ll need the 5 gallon size sticks. These are available for free with purchase of paint at Home Depot, or you can buy them for about 50 cents each.
- color printer and printer paper – I recommend a slightly heavier weight paper for this project, like 24 lb printer paper. Regular copy paper works also, but I like the thicker weight for prints with lots of color ink.
- glue stick – The regular Elmer’s school glue stick works great for this project!
- sharp scissors, Xacto knife, or box cutter – We used a box cutter to cut out the foam board.
- packing tape – To tape the stick on the back of the big head.
*TIP – We have made these DIY big head signs multiple times, and most recently we used an upgraded foam board (slightly better quality) versus the Dollar Tree boards. The more expensive foam board is not recommended because it was more difficult to cut out. Definitely go with the Dollar Tree board if possible.
Preparing the Photo for a Big Head Sign
If you don’t want to fork out big bucks for a large scale print, then you’ll need to complete a few steps to print a large face photo at home on regular US letter paper. My method uses two different online programs, but they’re both completely FREE! Just follow these steps:
To enlarge the photo in Canva:
The first step is to make your photo larger, and to ensure that it will fit nicely on your foam board. This is very easy to do in an online program called Canva.
- Go to Canva.com and select “Custom Size”. *If you don’t already have a free Canva account, you may be prompted to sign up for one. Set the size to 20″ x 30″ (or for a slightly smaller cutout, you can set it to 16″ x 20″).
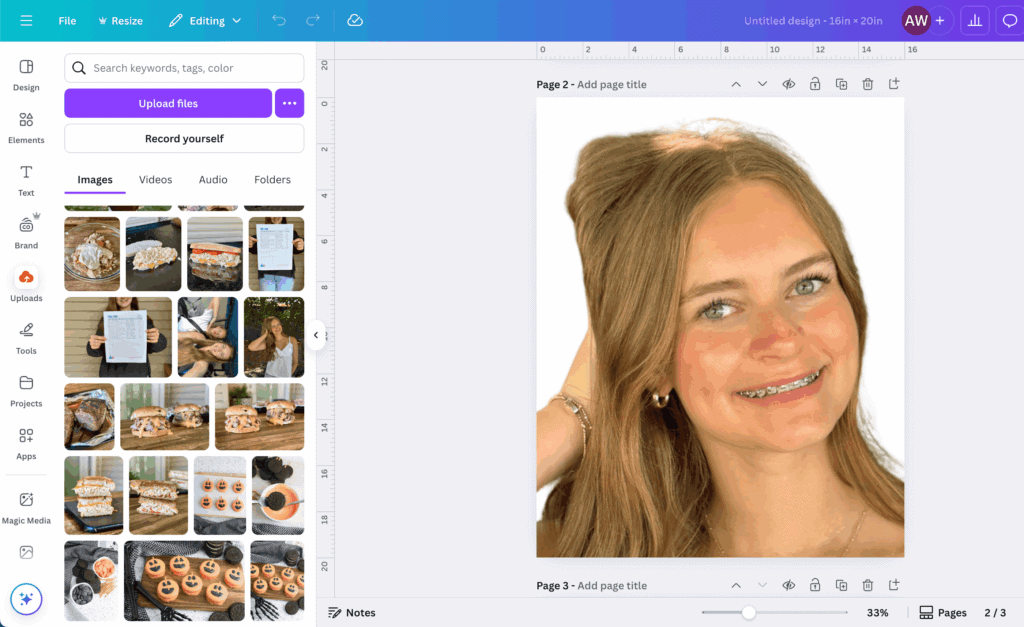
- Upload the photo you want to use. From the left menu bar, select “Uploads” and then “Upload Files”. Find the photo for your DIY big head to upload to Canva. Then click and drag the photo from the uploads section of Canva to the blank white box.
- Stretch the photo to the canvas (white box) size. Select the photo, and then white dots will appear on the corners. Click and drag the white dots to adjust the size of the photo outward, until it fills the majority of the white space. (See the photo above for reference.)
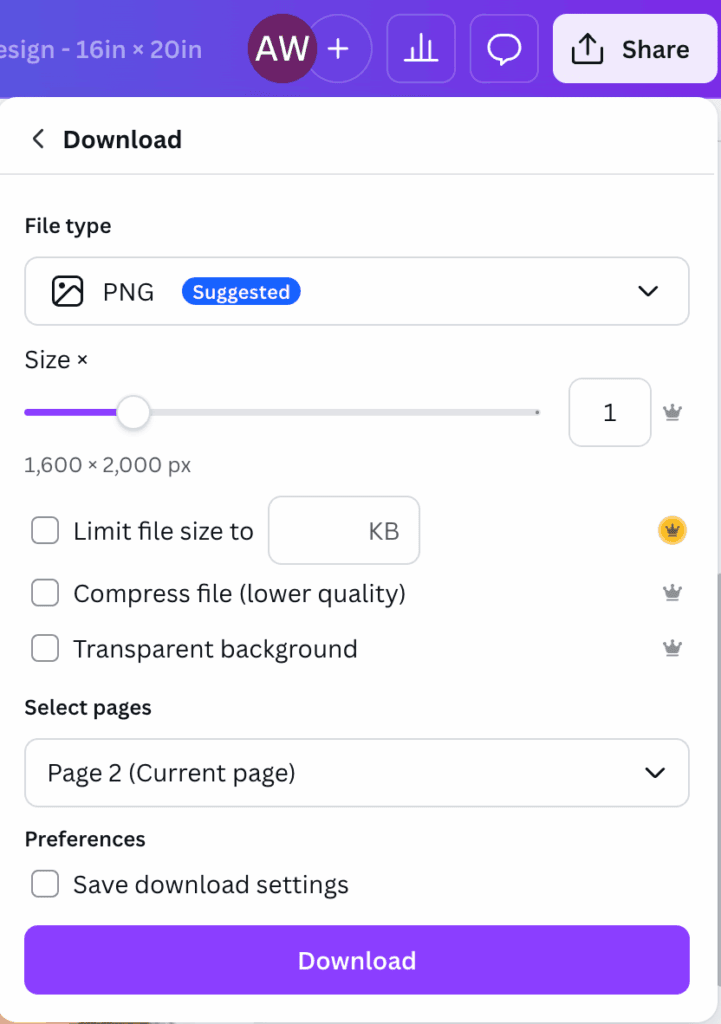
- Download the photo in JPG or PNG format. Once the photo is sized how you want it, select “Share” from the top right, and then “Download”. Change the file type to JPG or PNG. Then select “Download”. The enlarged photo will download to your computer or device.
To Print a Large Photo at Home:
Once your enlarged photo is downloaded to your device, the next step is to separate it into tiled sections so that each section will print on a US Letter sized paper. Think of it like creating a jigsaw puzzle or tile mosaic with your photo. Follow these steps:
- Go to Posterizer.com. The “Rasterbator” will open – the tiled printing program.
- Upload your enlarged photo. Click in the box that says “Select your image” and upload your photo.
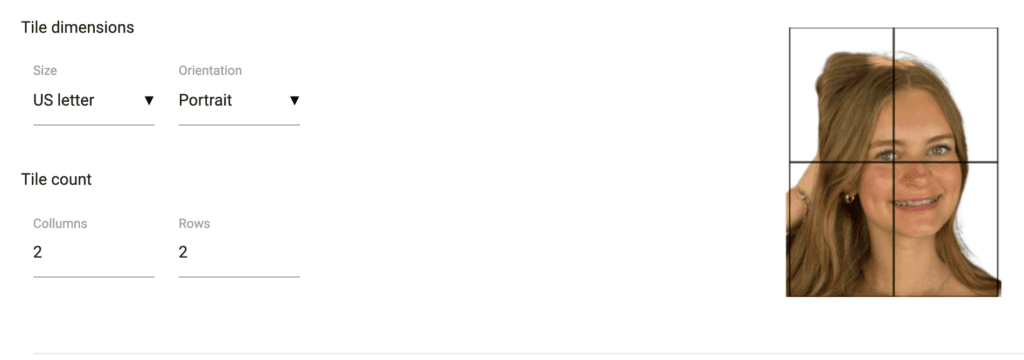
- Change the tile dimensions. Scroll down to the “Page Setup” section. Under “Tile Dimensions”, change the paper size to US Letter and change the “Tile Count” to 2 columns and 2 rows.
- Download the tiled photos. Scroll down to the bottom of the page and select “Create PDF” from the Download section. The 4 page poster print will download to your device.
- Print the tiled photos. Find where the 4 pages downloaded to your device. Open the photos and print. Then you’re ready to make your DIY big face sign!
*VERY IMPORTANT – In your printer settings, change the scale to “Fit to Printable Area”. This will shrink the 4 pictures down just a bit so that they line up properly when you’re gluing them to the foam board.
How to Make a DIY Big Head Cutout
Now let’s go through the process, from prepping your printed image to waving your new sign proudly from the stands. No expensive print shop required!
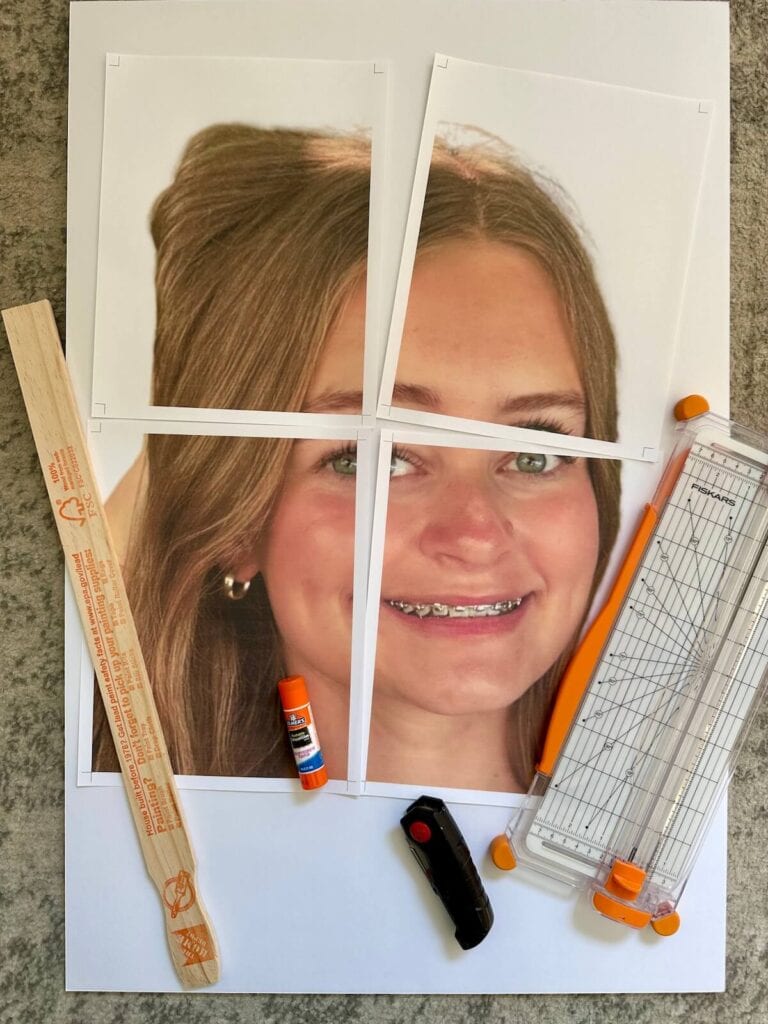
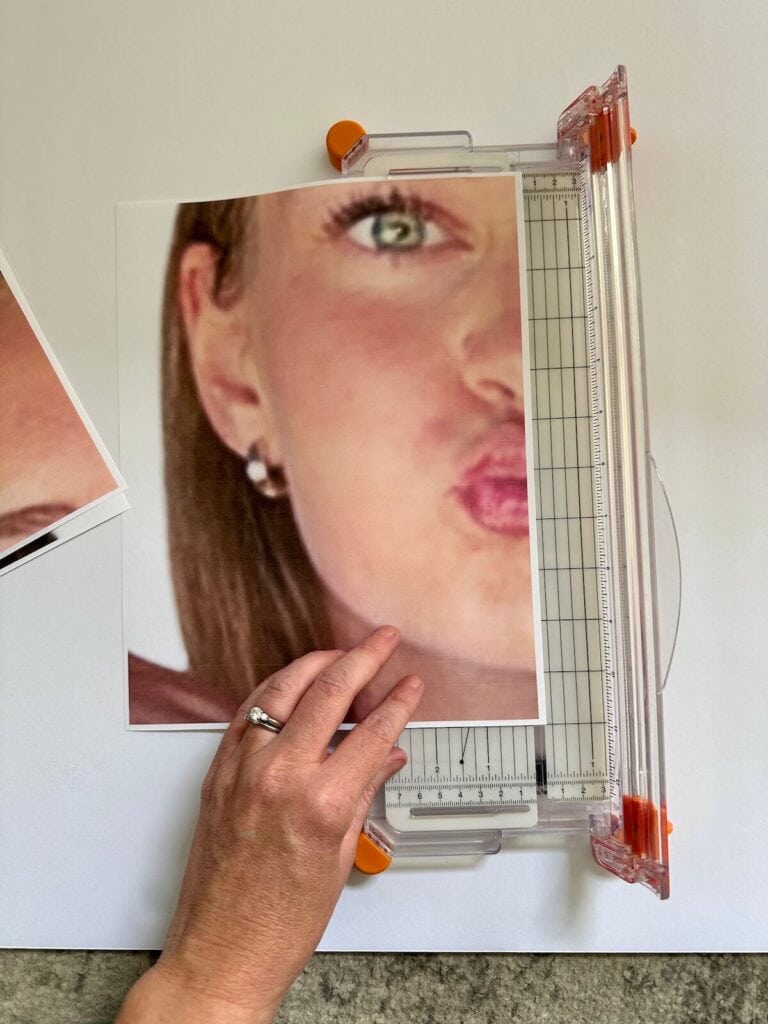
Step 1: Trim the white border off the photos.
Once you’ve printed your big face photo in tiled format, it’s time to assemble your poster-sized face! Each printed image quadrant will have a thin white border. To create a clean, “seamless” look start by trimming away the white border only on the sides that will butt up against each other.
*TIP – I like to start with the bottom right picture panel, and leave those white borders untrimmed. Then, trim off the borders of the photos next to it. This allows you to overlap the white border. It helps to lay your photos out like a jigsaw puzzle and figure out which borders you will trim first.
Use a paper trimmer for the straightest lines – I love this Fiskars paper cutter for its small piece of wire that shows you exactly where the cut will be. Makes this project so much easier!
Step 2: Glue the photos to the foam board.
Lay your 20″x30″ foam board flat on a protected surface. Starting with your first photo, use a glue stick to generously cover the back. Go edge-to-edge to prevent lifting and bubbles. Firmly press the paper onto the foam board. Smooth gently with your hand or fist to avoid fingerprints/streaks.
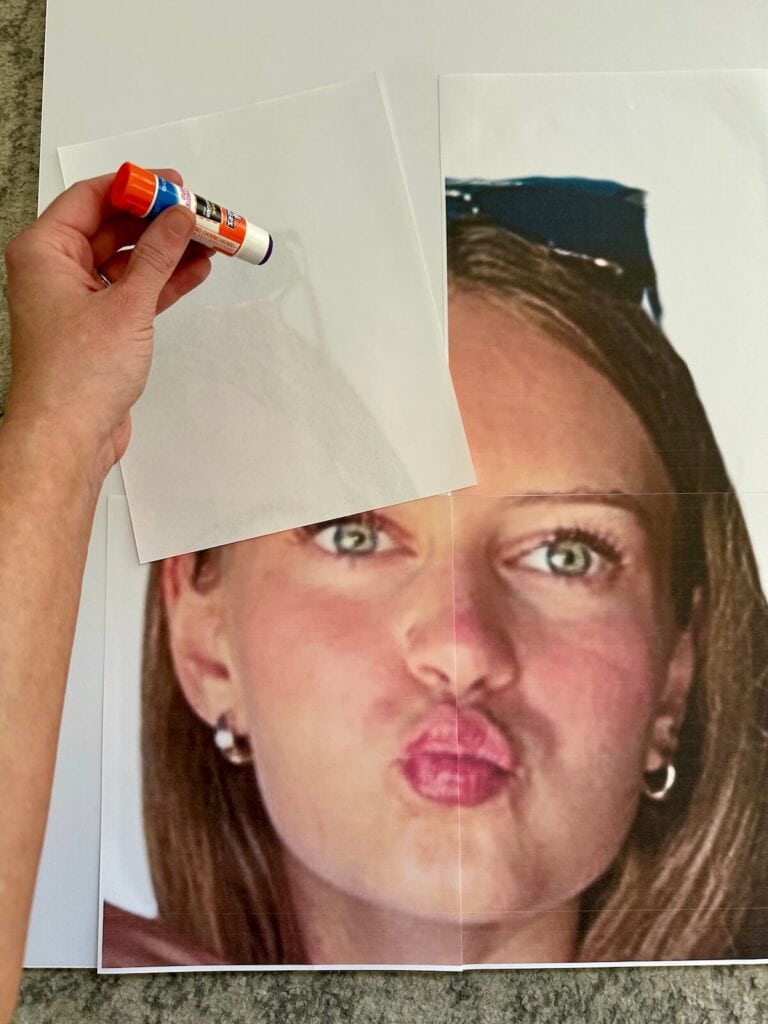
Continue with adjoining panels, perfectly aligning edges and seams as you go. Repeat until all four quarters have been glued to the foam board.
Step 3: Cut out the big head.
Place a thick piece of cardboard or a cutting mat beneath your foam board to avoid damaging your table or floor. Using a fresh razor blade or X-ACTO knife, carefully follow the outline of the face/photo.
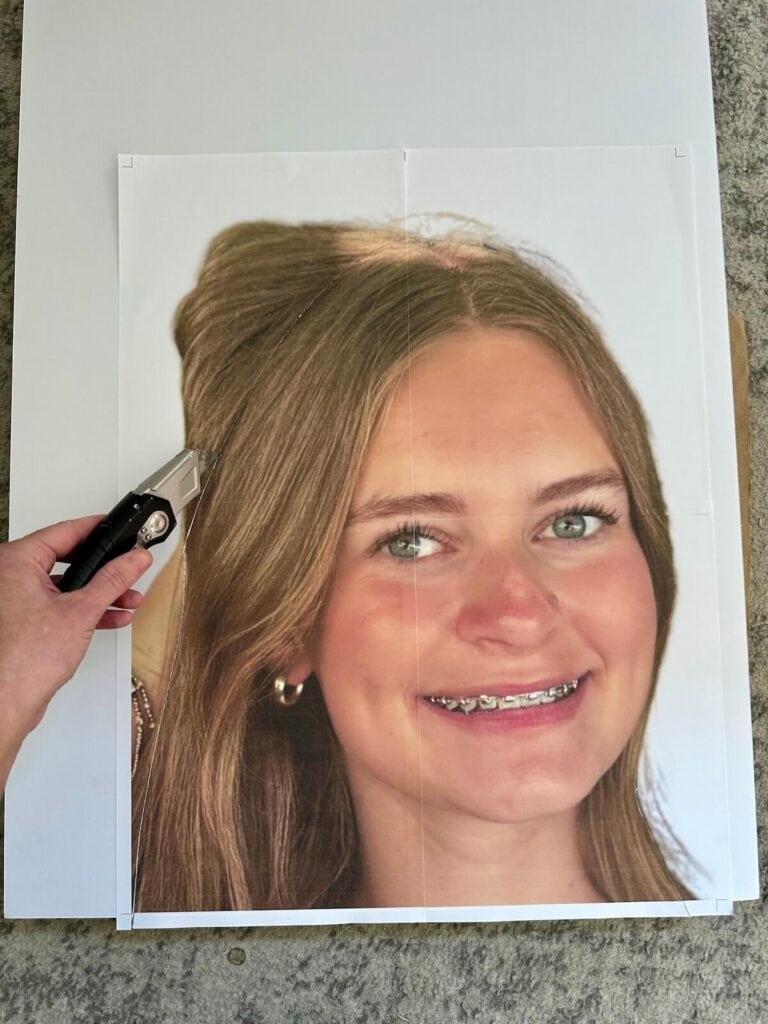
Take your time, especially at seams where the photo panels meet. Use a gentle “sawing” motion, rather than trying to slice through the foam board in one go. If you just try to “drag” the blade, then your photo may rip.
If the image shape is especially intricate (around ears, hair, etc.), feel free to cut a more basic outline for structural strength. When you finish, the cutout should pop cleanly away from the main board.
Step 4: Attach the paint stir stick on the back side of the big head.
To complete your sign, flip the cutout over to the back side. Position the large painter stick vertically at the base or center back – be sure any printing on the stick faces the back, not towards the front of the sign. For extra stability, make sure that the stick covers the majority of the height of the cut out.
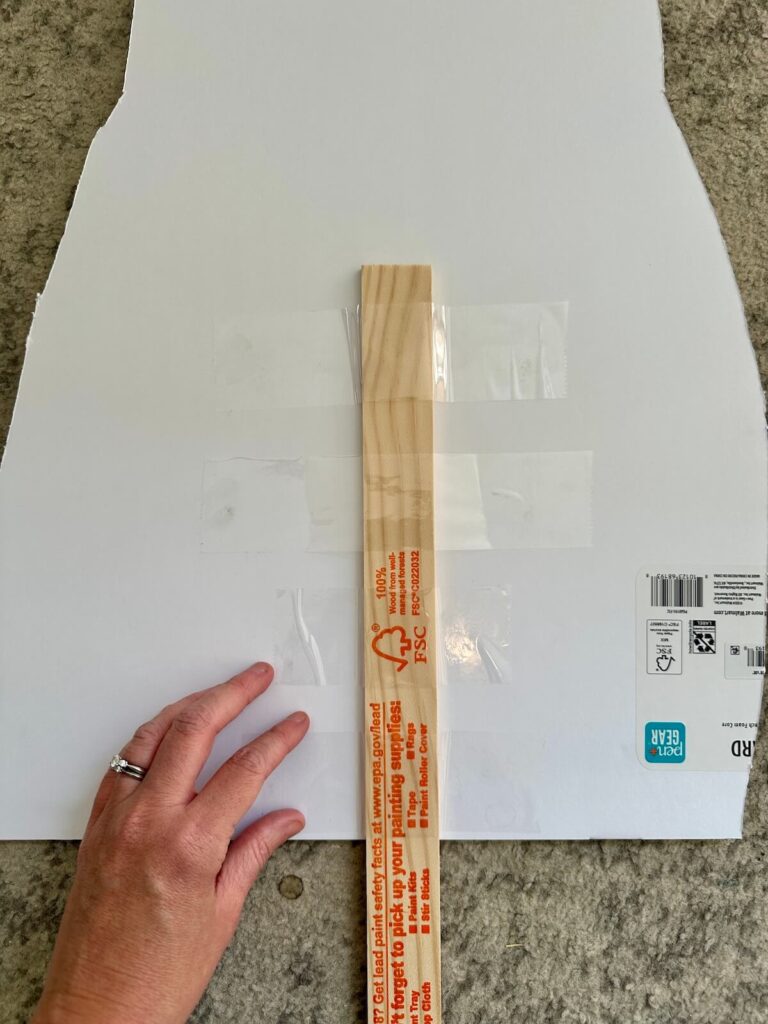
Secure with 4–5 strips of packing tape stretched across the stick and onto the foam board. Press the tape down firmly so that it stays in place.
And then your big head is done, sturdy, and ready to bring smiles!
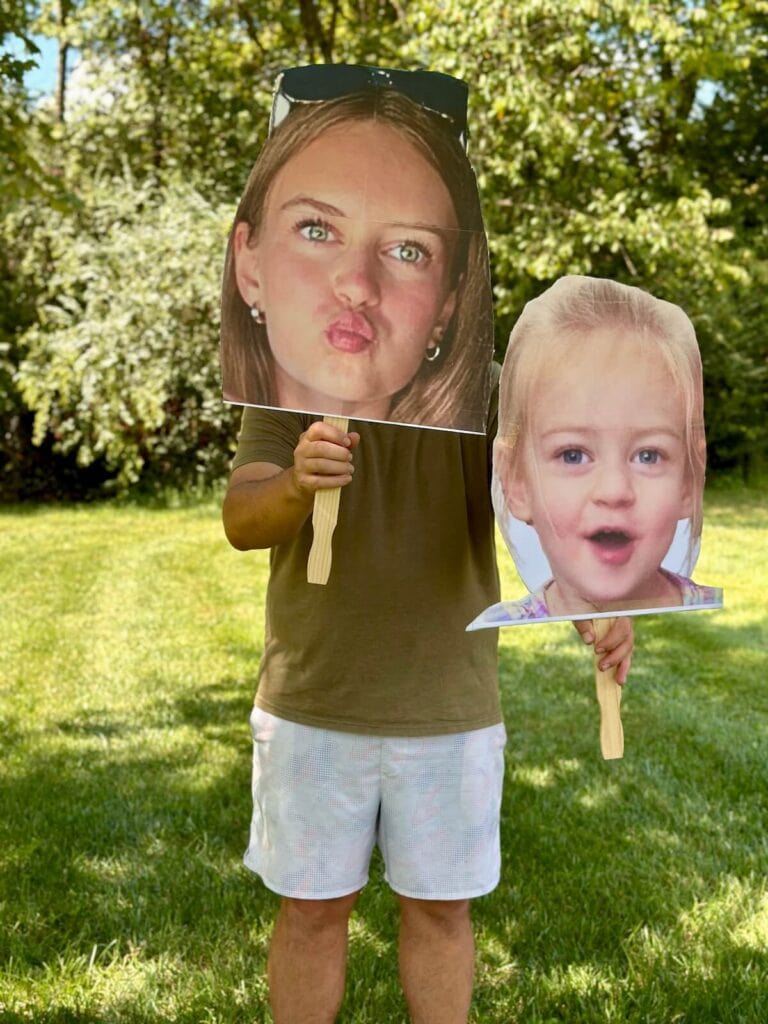
Creative Uses for DIY Big Head Cutouts
Now that you’ve mastered the process, try these fun ideas:
- Sports and pep rallies: Cheer on your favorite athlete from the stands, or make a large face cut out for your child’s homecoming game or special sport award ceremony.
- Graduations: Celebrate grads with huge, silly versions of their yearbook photos.
- Birthdays: Make someone the “big head of the party!”
- School events: Use as stage props or class decorations.
- Family reunions: Liven up group photos — or gently roast the guest of honor.
Pinterest User? Do us a favor and PIN this to your board for craft projects to try. This is a GREAT way to support us!