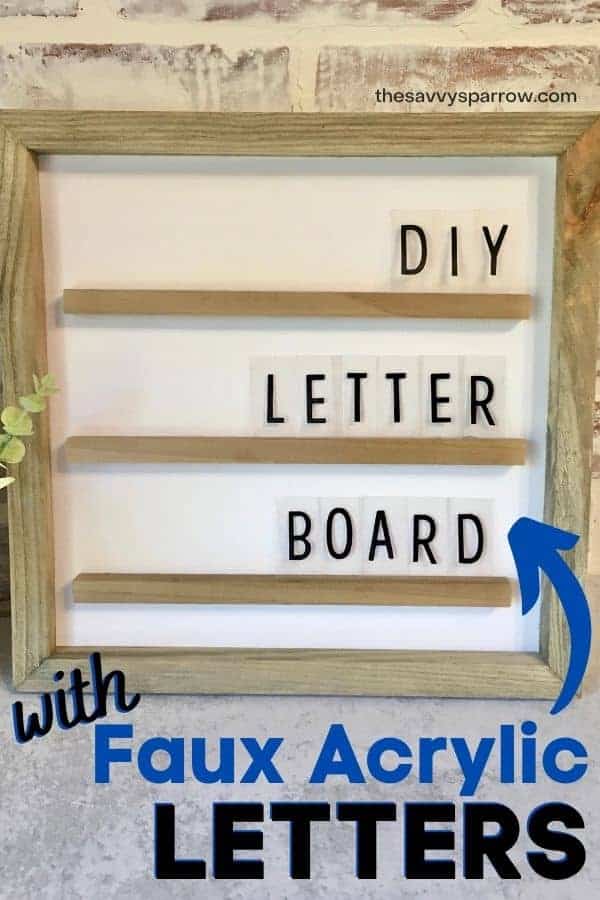
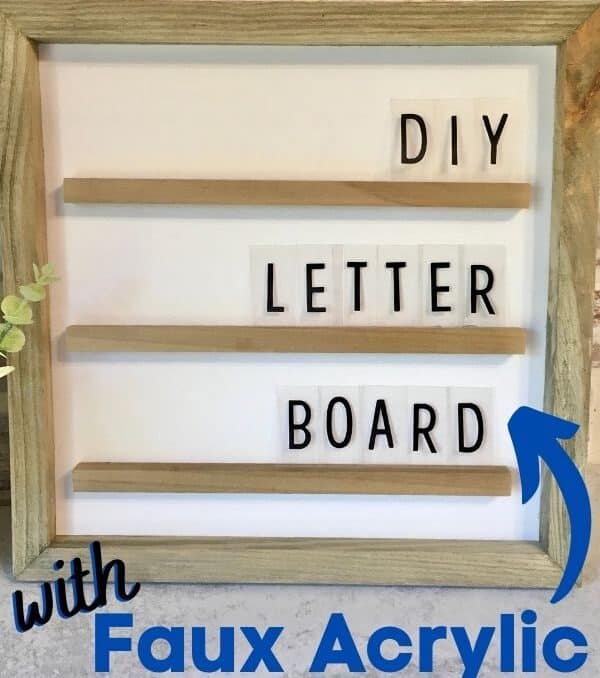
This DIY Letter Board with faux acrylic marquee letters is just like the trendy giant letter boards, but smaller. Learn how to make your own letter board with a blank wood sign and some scrapbook letter stickers!
Ever since I saw the awesome GIANT letter board ledges with acrylic marquee letters on Pinterest a while back, I’ve been racking my brain trying to figure out how to do a mini version.
Yes, I do LOVE the giant letter ledges that are super trendy right now, but my house seriously lacks blank wall space, and those acrylic letters (that are actually made for giant commercial sign boards) are EXPENSIVE… like $100+ for a set of letters expensive. So I knew that I had to figure out a way to make my own DIY letter board letters.
After scouring Amazon for mini acrylic tiles, and asking my husband if he could use a saw to cut acrylic sheets into 1″ squares (that was a no-go!), I had the GENIUS idea to use my trusty laminator!
By the way… if you’re a crafter OR a Mom of littles and you don’t have a laminator, you need one! I use my laminator to turn all kinds of household printables into instant dry erase charts… like this Freezer Inventory Sheet and these Kids Chore Charts, just to name a few. And at under $40, a laminator is a great buy! Especially considering that FedEx Kinko’s charges about $3 just to laminate one sheet of paper!
But back to this awesome DIY letter board with faux acrylic letters…
I was crossing my fingers hoping that my laminator DIY letter board letters would work, so when they came through the laminator PERFECTLY, and then my paper trimmer cut them PERFECTLY, and then they stayed PERFECTLY flat, and they fit on my DIY letter board PERFECTLY… well, everything was just PERFECT!
It’s so nice to have a vision in your mind, and then actually have it work out! Trust me, plenty of my ideas have been complete duds… I’ll tell you about my Sharpie wall attempt another day. 🙂
So if you want to make your own DIY letter board with super easy DIY letters also, then here’s how to copy mine…
*This post contains affiliate links, which means if you click a link and make a purchase, I earn a commission at no additional cost to you. Read my full disclosure here.
Supplies for DIY Letter Board and Letters
You only need a few basic supplies for this super cute DIY project:
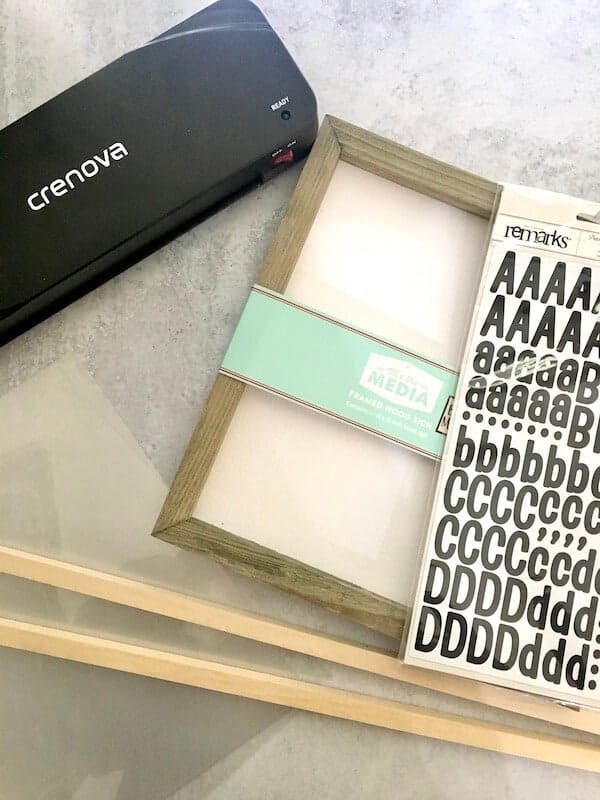
Blank Wood Sign
I found my blank rustic wood and white sign at JoAnn’s, and I used a 60% off coupon to get it for a GREAT price! My blank sign measures 10″ x 10″ square, and it’s the perfect size for this DIY Letter Board.
If you don’t have a JoAnn’s nearby, you can find similar blank wood signs for crafts at other craft stores like Michael’s or Hobby Lobby. Or save a trip to the store and check out the blank wood signs on Amazon here!
Square Wood Dowel
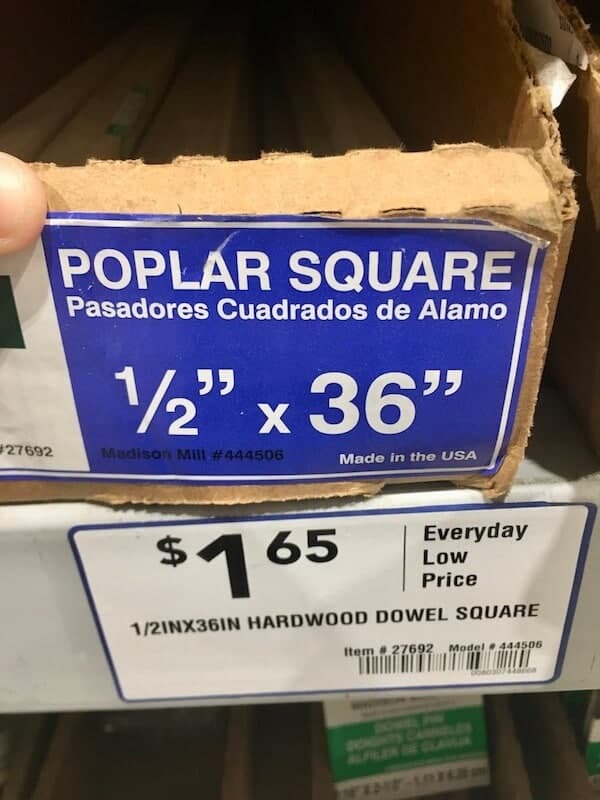
I first bought the shorter, squared balsa wood dowels from JoAnn’s craft store for $3.99 each (I needed two of them). But then I was at Lowe’s and I found these 1/2″ x 36″ Poplar Square Dowels for a much better price. Plus, they are longer, so I only needed one, which saved about $6.00.
Here’s the Lowe’s shelf tag so you know what you’re looking for:
Glue Gun and Glue Sticks
The DIY Letter Board Letters are so lightweight that a regular hot glue gun and glue sticks will work for this project. No need to get an industrial grade glue gun.
Letter Stickers
These are the exact letter stickers that I used for my DIY Letter Board. But you can use pretty much any scrapbooking letter stickers that you want, as long as they are sized correctly for the wood sign that you have. My letter stickers measure about 1 1/8″ tall.
If you don’t have a laminator, you can also purchase pre-made Cinema Light Box Letters like these to use with your DIY Letter Board.
Laminator
I have this laminator and LOVE it! I’ve used it to make my printable Freezer Inventory Chart and my Kids’ Chore Charts. Plus, I’ve laminated little cards for my kids with their lunch numbers and class schedules on them. It’s a GREAT tool to have!
Laminating Pouches
These are the laminating pouches that I use and HIGHLY recommend! They are 5 mil thick, which is perfect for this DIY Letter Board. A 3 mil pouch would probably be too flimsy for your faux acrylic letter board letters.
Paper Trimmer
My paper trimmer is from Stampin’ Up!, but it’s very similar to the ones made by Fiskars that you can pick up at any craft store. A paper trimmer makes cutting your DIY Letter Board letters SO much easier! Plus, it ensures that your cuts are perfectly straight.
Printable Template for DIY Letter Board Letters
You can download the FREE printable template that I used here. I’ll explain how to use it to get your letter board letters straight down below.
How to DIY Letter Board Letters to Make them Look Like Acrylic Letters
Now that you’ve got all of your supplies together, it’s time to make your DIY Letter Board and Letters. I found it easiest to make the letters for my letter board FIRST, because it allowed me to use the finished letters as spacers so I knew where to put my letter “ledges”.
Here’s how to make these Faux Acrylic Letter Board Letters (sometimes called “cinema light box letters” or “acrylic marquee letters”):
Step 1: Position the printable letter board letters template UNDER a laminating pouch.
The template is just a grid that will help you place your letter stickers perfectly straight so it’s easier to cut them out.
Lay the template down on a flat surface, and then put the laminating pouch on TOP of it, so that you can see the grid design through the bottom of the pouch like so:
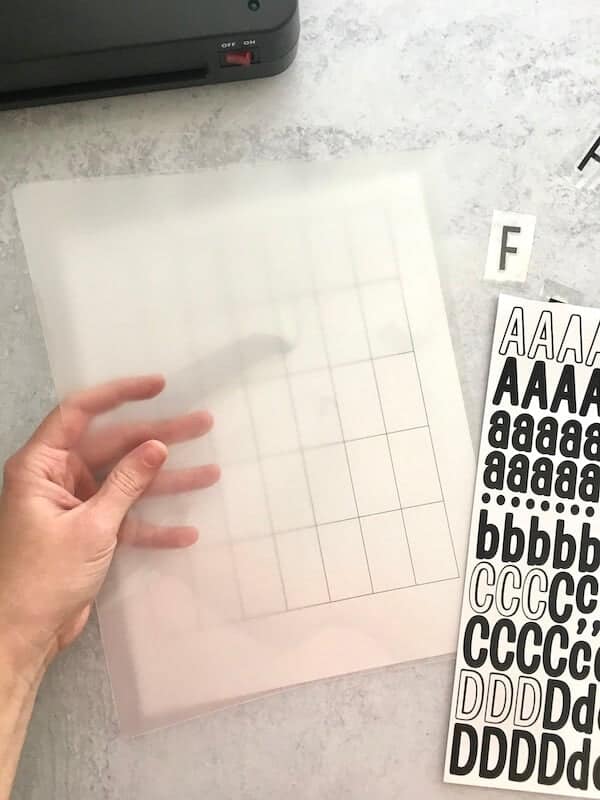
Try to position the template under the pouch, in the CENTER. So you should have an equal distance of space all around the sides. This will help you when it’s time to cut the laminated letters.
Step 2: Open the laminating pouch, and apply letter stickers.
Your laminating pouch should open like a card (attached on one side with 3 sides open). Open the pouch, and position one letter sticker in the center of each square from the grid template. Here’s what it should look like:
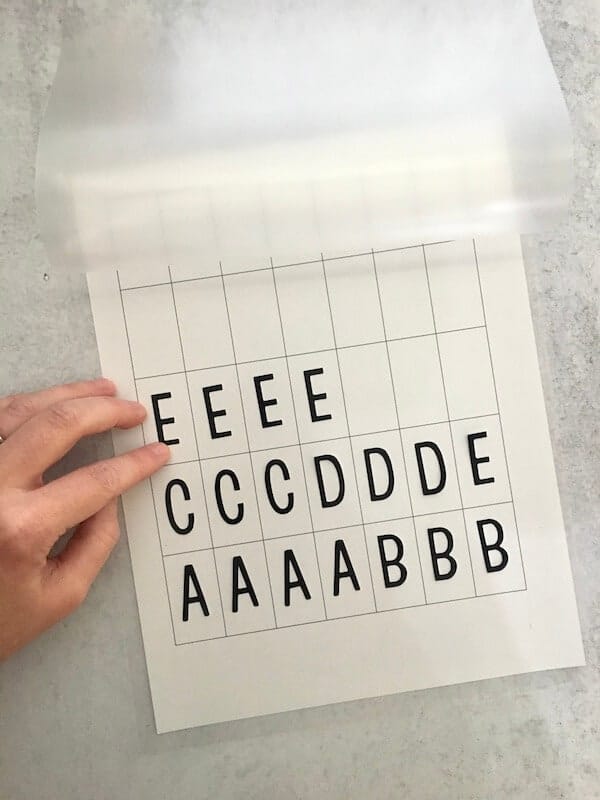
Keep in mind that you want to make enough of each letter to spell a variety of words.
*And remember… I’m sticking my letters directly on the inside of the laminating pouch NOT on the paper grid template!
Step 3: Close the pouch and run it through your laminator.
Carefully close the laminating pouch, and gently apply pressure to the top to make sure that all of the letters inside are nice and secure. Keep in mind that you are applying stickers to a very slick surface, so the stickers will have a tendency to curl up.
But don’t worry… that’s why we’re laminating them!
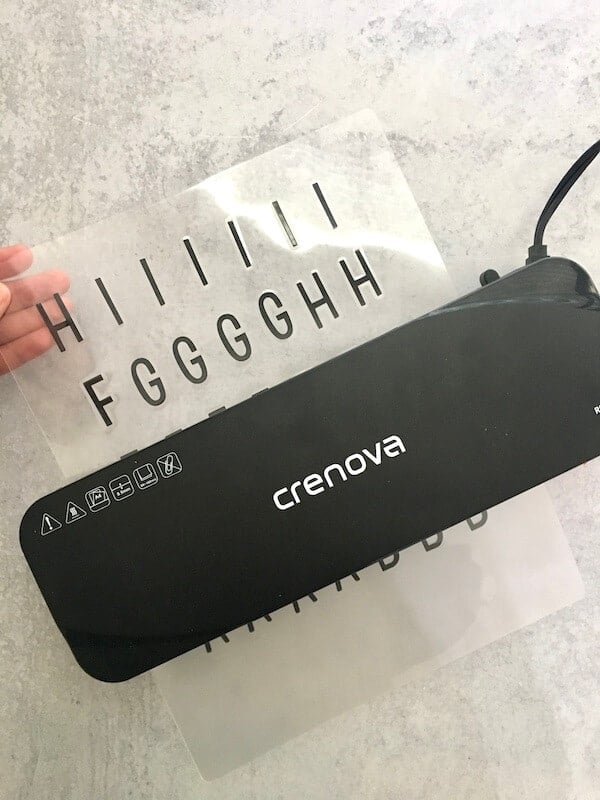
Run your laminating pouch through your laminator, and your DIY marquee style letters are almost done!
Step 4: Cut your DIY letter board letters.
Here’s where a paper trimmer comes in handy! The grid template that you used has squares that are 1.75″ tall and 1″ wide. Use the lines and ruler on your paper trimmer to cut the laminated letters to make “faux acrylic letters” in that size.
It may sound difficult, but TRUST ME, this step went very quickly! Nothing to be afraid of!
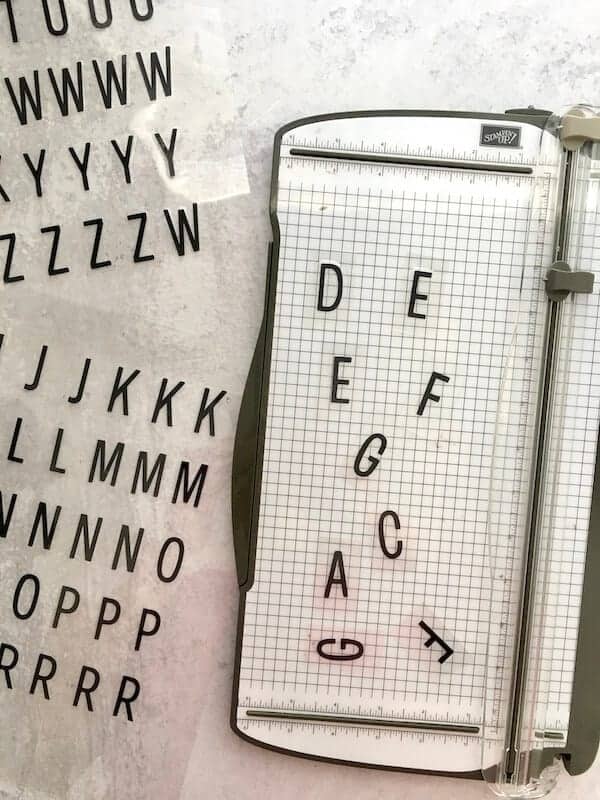
Look closely… can you tell that the marquee style letters on top of the paper trimmer are actually rectangular shaped? In person, they look like cute mini versions of the large acrylic letters!
Once you’ve got your DIY letter board letters done, you’re ready to make the actual letter board! Here’s how:
How to Make Your Own Letter Board
If you thought making your own mini “acrylic” letters was easy, then this will be a walk in the park!
Step 1: Cut and sand the square dowels.
I used a miter saw, but since these square dowels are pretty thin, you can probably use a hand saw also. I cut my dowels to 9 1/2″ long, which was perfect for my 10″ sign.
The edges where you cut will probably be a bit rough, so just grab some sand paper and sand them down a bit until they’re smooth.
Step 2: Hot glue the dowels to the wood sign.
Since your faux acrylic letter board letters are already done, you can use them as spacers to know where you want to glue your letter ledges.
I just played around with the spacing until I found where I wanted to glue my dowels on to my blank sign:
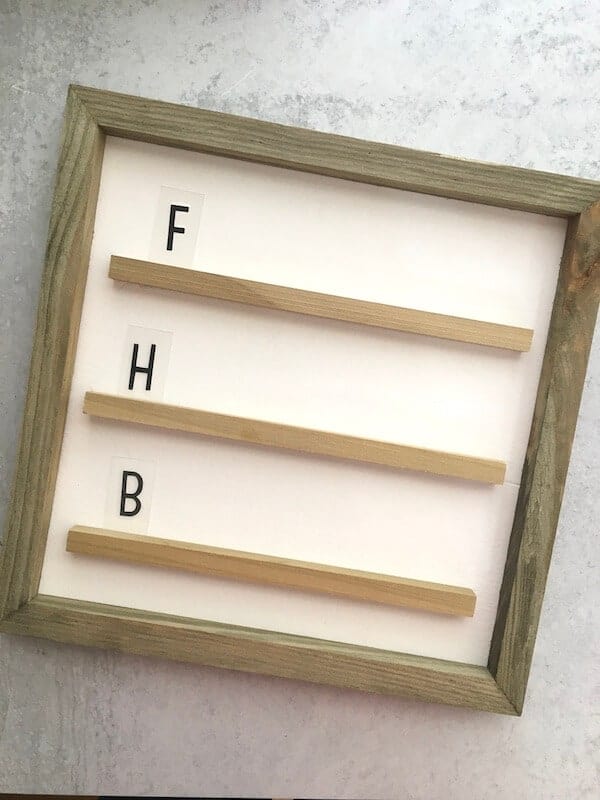
Once you’ve figured out the right spacing, just run a bead of hot glue down one side of each dowel, and glue the dowels where you want them. Let the glue dry for a few minutes, and you’re ready to display your awesome DIY Letter Board!
To add letters to your letter board, simply set them on the ledges, leaned up against the back of the wood sign, like this:
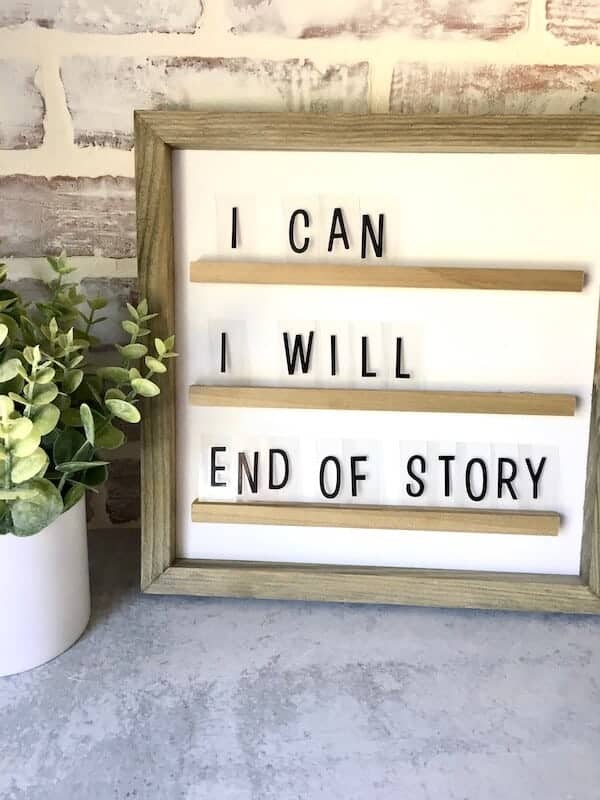
The hardest part of this DIY Letter Board with marquee style letters is coming up with something clever to put ON your finished board.
I saw this quote on Pinterest recently, and I thought that it was super motivating, and since my letter board is displayed on a shelf in my home office, I thought this saying was perfect for when I need a little kick in the butt.
Go here for 40 Funny Letter Board Sayings if you’re short on ideas!
And be sure to check out some of my other DIY signs here:
- Cheap and Easy DIY Farmhouse Wood Signs
- DIY Signs on Canvas
- DIY Scroll Sign (10 signs in ONE!) made with Printable Sign Templates!
What are some of your favorite letter board quotes? Have you seen any funny ones on Pinterest? Leave me a comment down below, so I can get some inspiration for my new DIY Letter Board!
Happy nesting!

Leave A Reply!