Looking for fun Easter crafts to do with your kids? Make this easy paper plate Bunny with cotton balls and a free printable Easter Bunny template!
The holidays are a great excuse to break out the craft supplies and do a fun and creative activity with your kids! And nothings says “kids’ crafts” like a paper plate!
A paper plate is so versatile when it comes to crafting, and it even makes a handy disposable canvas for this 2 Ingredient Edible Finger Paint!
And the great thing about using paper plates for crafts is that they are super cheap, and you probably already have some in your kitchen (if you’re a lazy dish-washer like me!).
So, after you’re done making your own DIY dyed Easter eggs with markers and coffee filters, then grab that stack of paper plates and raid your vanity for some cotton balls to create these fun paper plate bunny crafts with your kids!
Supplies Needed
- Small paper plate
- Cotton balls
- Googly eyes
- Brown pipe cleaner
- Pink button – or you can also use a pink pom pom
- Glue
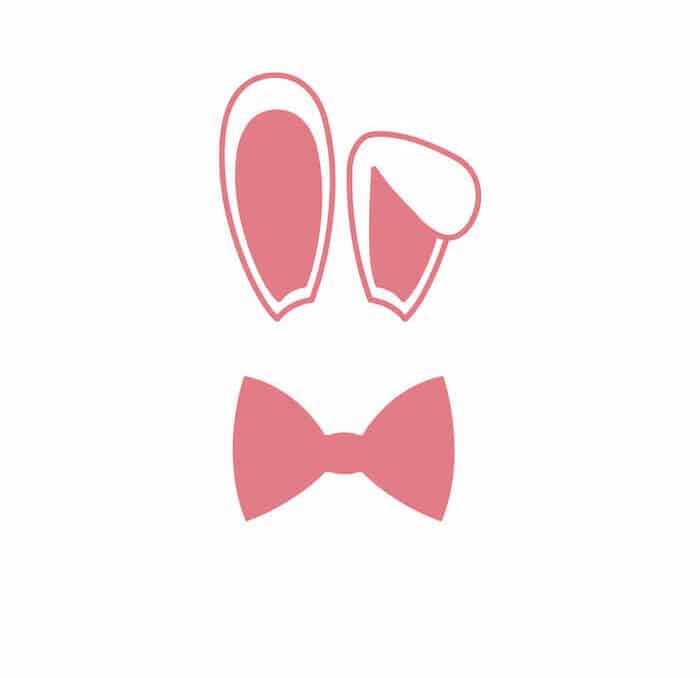
- Printable bunny ears and bow tie – Click HERE to download the FREE printable Easter Bunny ears and bowtie!
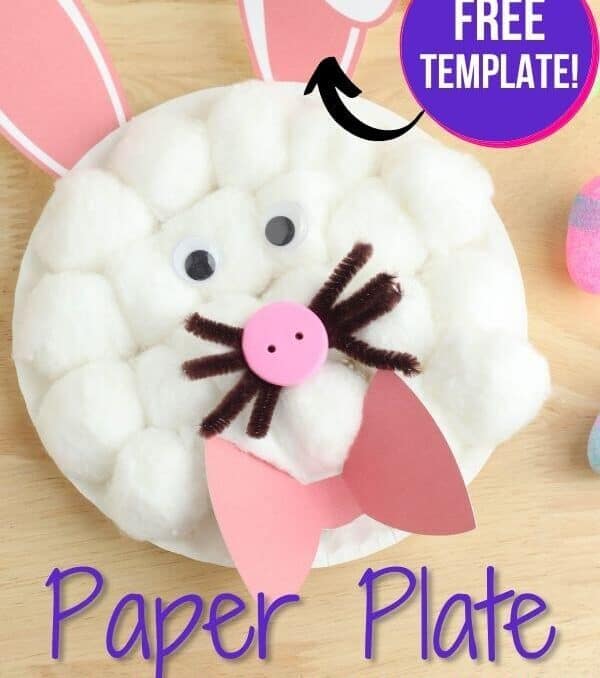
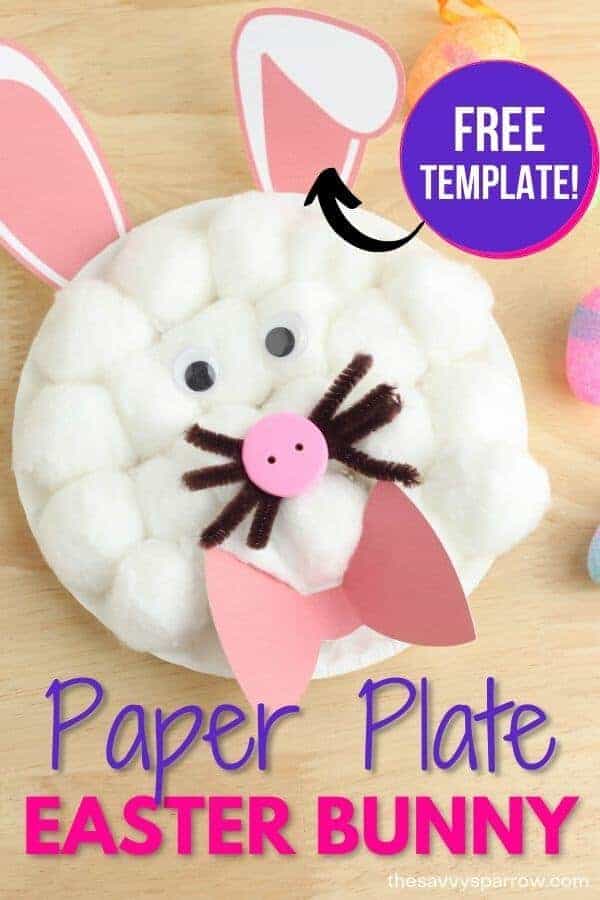
How to Make a Paper Plate Bunny
First, print the Easter Bunny ears and bowtie template on white card stock. The card stock is a heavier weight, so it will look nicer and stay more wrinkle-free than regular printer paper.
Then, cut the bunny ears and bow tie out using scissors, and set those pieces to the side.
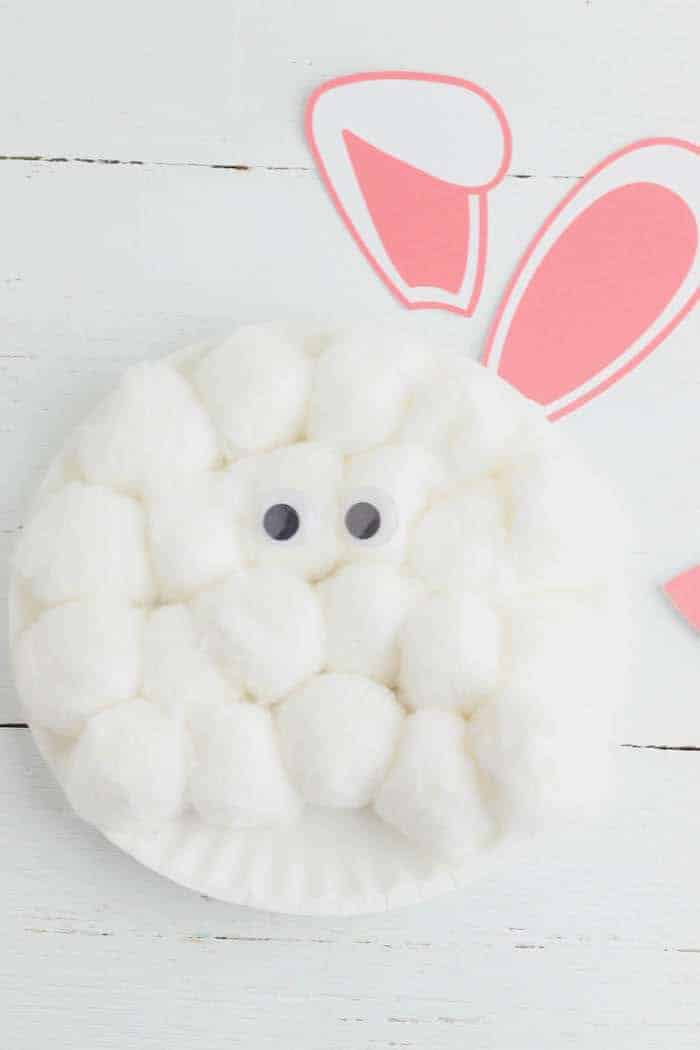
Next, make the bunny face by gluing cotton balls all over the paper plate. Be sure to leave room at the bottom of the plate to glue on the bowtie.
After the paper plate is covered with cotton balls, glue two googly eyes on top like this:
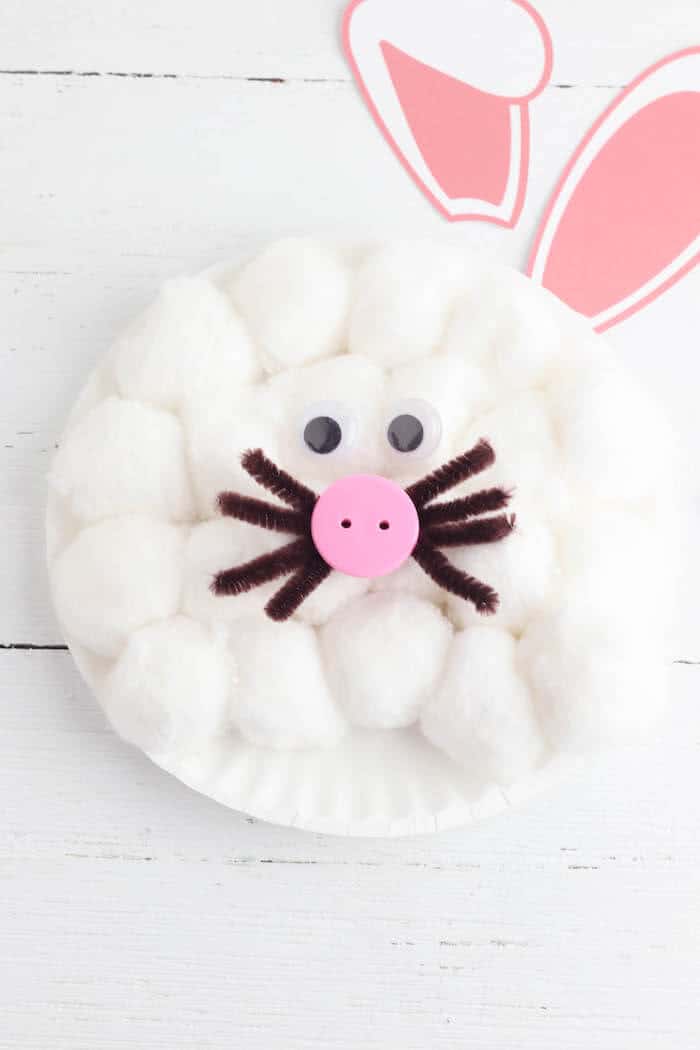
Then, cut the brown pipe cleaner into four pieces that are all the same length. Line the pipe cleaner pieces up evenly, and twist them together in the center to form bunny whiskers. Glue the whiskers to the center of the plate, about 1″ to 1.5″ below the eyes.
Glue the pink button on top of the pipe cleaner whiskers. You can also use a pink pom pom if you don’t have a button.
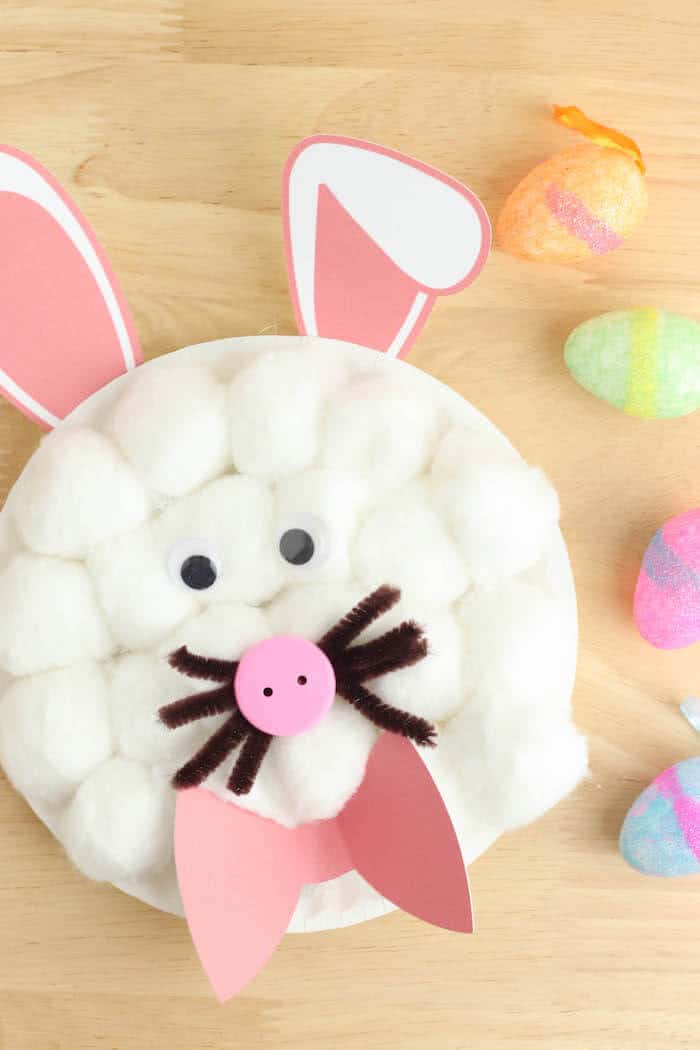
Finally, glue the Easter Bunny ears and bowtie pieces to the plate, and allow all of the glue to dry.
Then, the cute paper plate bunny is ready to hang on the fridge!
And that’s it! Told you it was super easy!
Your kids can probably even do this craft by themselves (if you cut the pipe cleaner for them), leaving you a few free “Mommy” minutes.
And if you loved this activity, check out some of my other fun Easter ideas for kids:
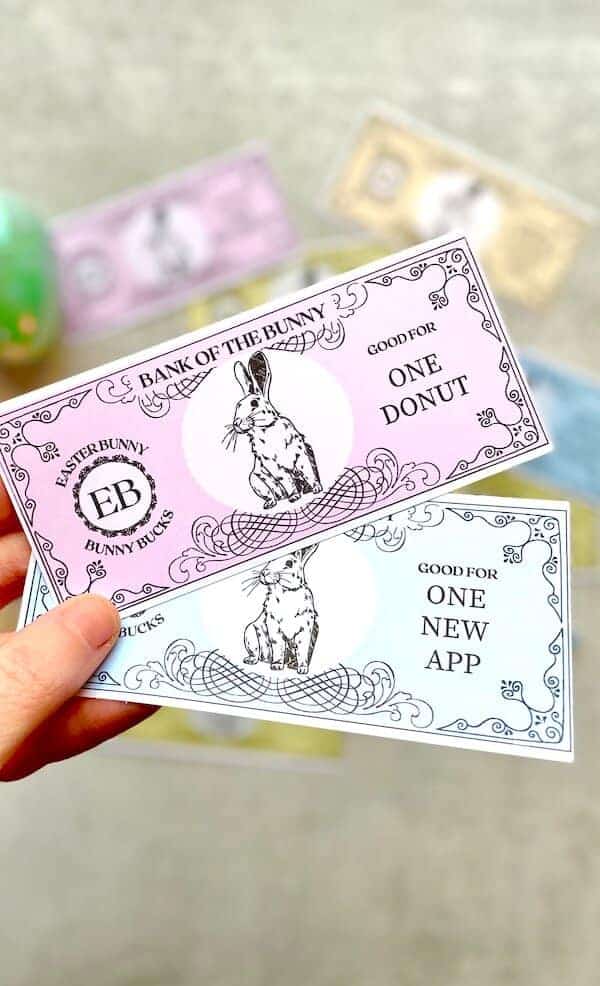
Printable Easter Bunny Money – These cute Easter coupons make GREAT non-candy plastic egg fillers!
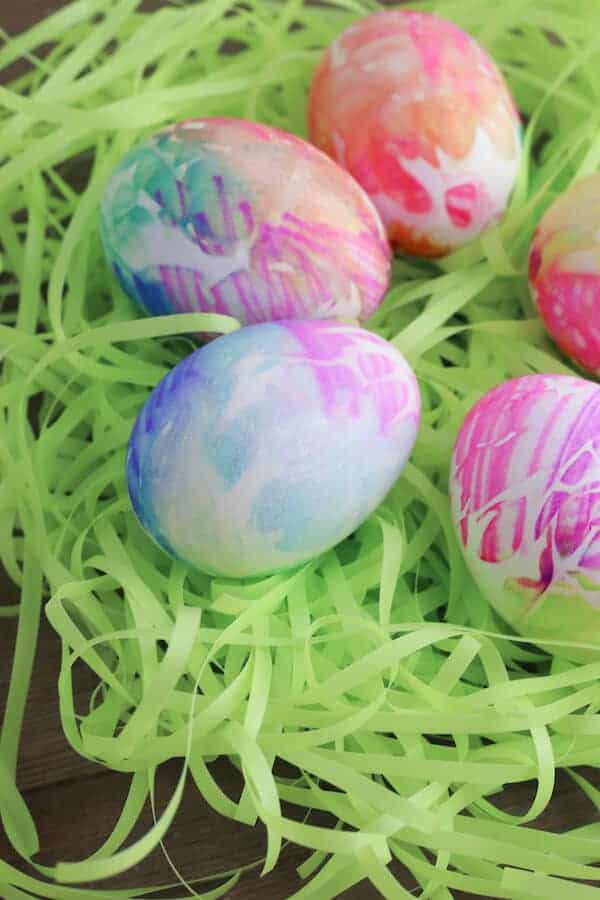
How to Dye Easter Eggs with Markers and Coffee Filters – This DIY egg dye method is AWESOME for younger kids, because you don’t have to worry about them accidentally spilling a whole bowl of egg dye!
Or, visit One Little Project for 40+ Simple Easter Crafts for Kids!