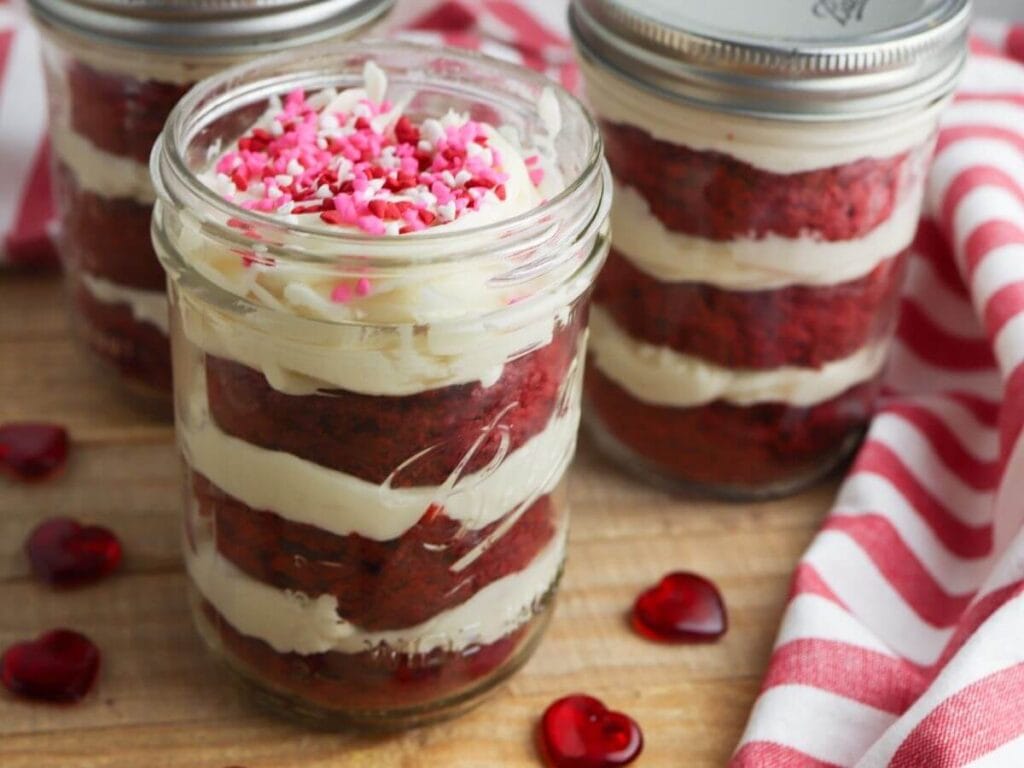
This red velvet cake in a jar recipe is so easy to make with boxed cake mix and an easy homemade cream cheese icing! Make a batch to gift to your neighbors or to enjoy with your sweetheart!
Red velvet cake is a classic Valentine’s Day dessert. But there’s no reason to prepare a full cake when you can serve this delicious dessert in a jar instead! With this red velvet cake in a jar recipe, you can give your loved ones a sweet treat for two to celebrate Valentine’s Day this year.
Red Velvet Cake in a Jar Ingredients
With the help of boxed cake mix, you can cut the prep time of this delicious red velvet dessert in half. That means you can put together six beautiful desserts in just over an hour! To make your own red velvet cake in jar, you’ll need:
- Red velvet cake. Using a boxed cake mix is the quickest way to prepare the cake batter for your jarred desserts. You can also use your favorite red velvet cake recipe to make this quick and easy dessert.
- Cream cheese icing. You can’t have red velvet cake without cream cheese icing! And with my simple recipe, there’s no need to use the store-bought frosting because you can whip up fresh icing in just a few minutes.
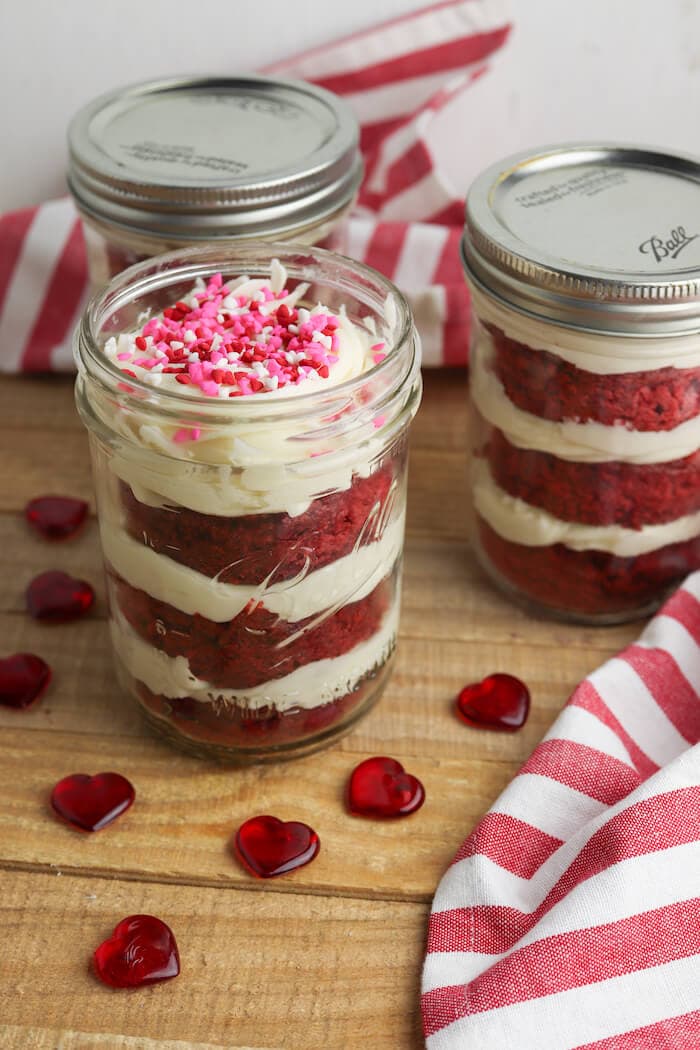
- Valentine’s sprinkles. Add some Valentine’s Day flair to your jarred cake with the help of sprinkles. A handful of pink and red heart sprinkles makes the perfect topping for this romantic dessert.
What Tools Do I Need to Make Cake in a Jar?
This layered dessert may look fancy and complicated, but it’s actually very simple to make.
The key to making your jarred cake look beautiful is having the right tools on hand. In addition to your cake and icing ingredients, you’ll also need to have a few special cake decorating tools and other supplies, including a:
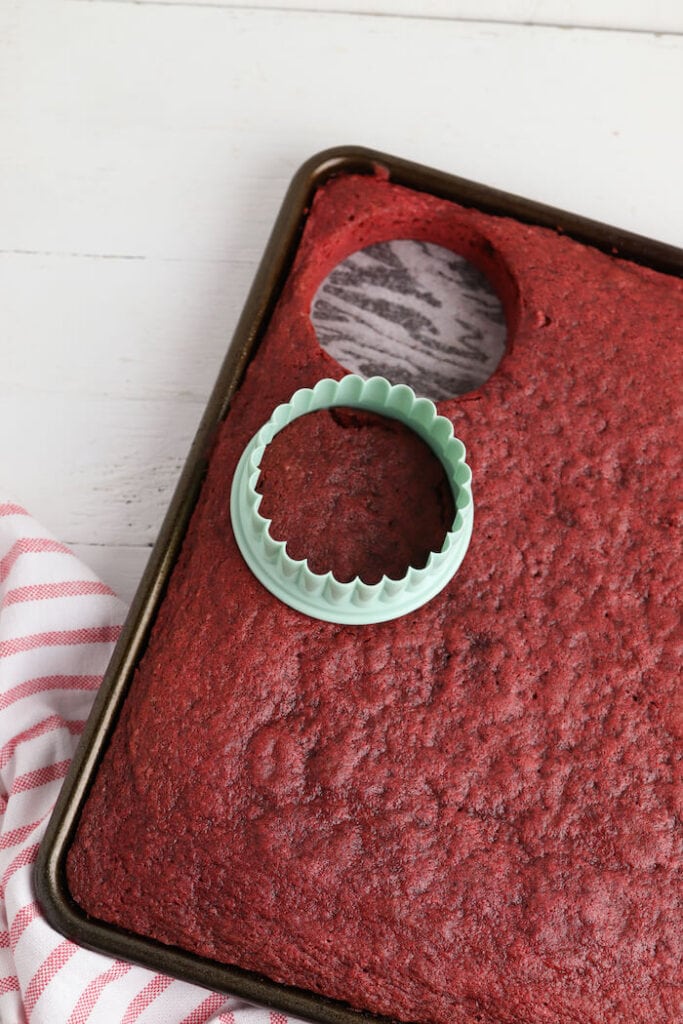
- Sheet pan. To get the right thickness for your cake slices, the red velvet cake needs to be baked on a sheet pan, just like my Momma’s Blue Ribbon Chocolate Sheet Cake! The best pan size to use for this recipe is a 10×16 pan.
- Parchment paper. When baking any type of cake, you run the risk of the cake sticking to the pan. To prevent your red velvet cake from sticking to the sheet pan, it’s a good idea to use parchment paper. Make sure to trim the paper to fit inside the pan before pouring your batter over the top.
- Wide mouth pint jars. Although it typically doesn’t matter what type of jar you use for many mason jar recipes, when it comes to making cake in a jar, wide mouth jars are the only way to go. Jars with a traditional opening on top aren’t wide enough to fit the cake slices and piping bag inside, so it’s important that you use jars with a wide mouth for this recipe.
- Round cookie cutter. Another essential element of this recipe is the cookie cutter. To get the perfect sized slices for placing in your jar, you’ll need a cookie cutter that is 2 ½ inches around.
- Piping bag. After you have your cake prepared, you will need a way to easily add the icing to the jar. A piping bag is the best way to get clean lines and evenly coat each layer of cake with icing.
- Star tip. While using a star tip is not necessary, it does make the icing look pretty inside your jar. A large star tip will help you get just the right amount of icing on top of each cake slice and give you a beautiful decoration on top of your jar.

How to Make Red Velvet Cake in a Jar
Now that you have all your ingredients gathered and ready to go, it’s time to start baking. Making these jarred desserts is so simple, you really just need to follow four steps:
Step 1: Bake the cake.
Start by preparing the cake batter according to the package instructions. When the batter is ready, pour it evenly over the top of the sheet pan and bake for 30 to 35 minutes. After the cook time is up, remove the cake from the oven and allow it to cool completely.
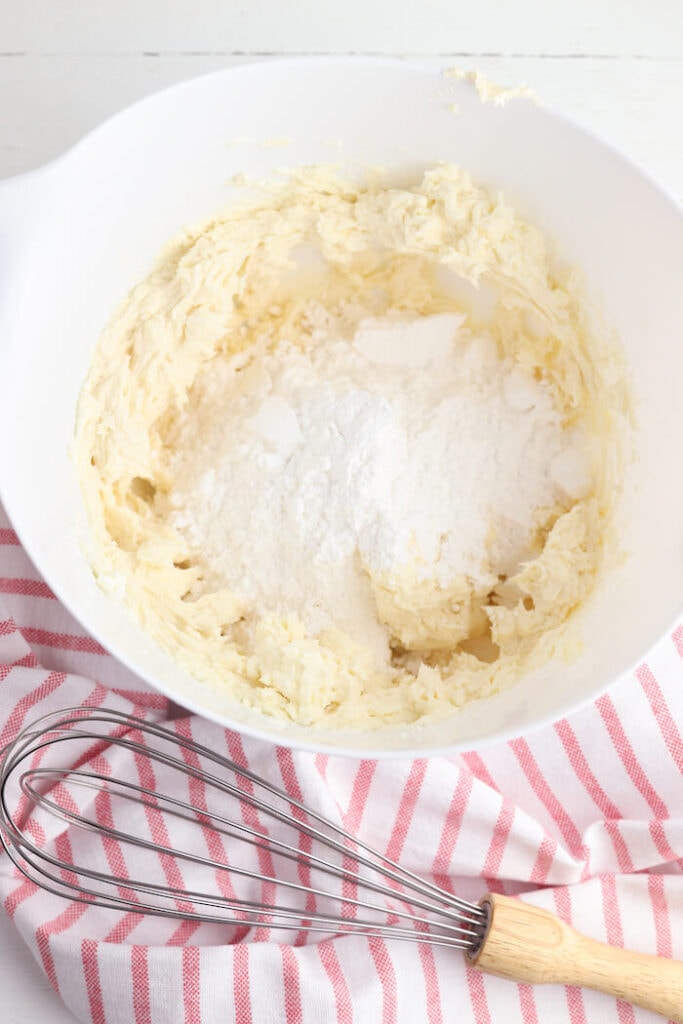
Step 2: Prepare the icing.
While the cake is cooling, you can mix together the icing by beating cream cheese, butter, and vanilla extract together until the mixture is smooth. After that, add powdered sugar and beat until thickened. Transfer the icing to a piping bag with a star tip to decorate the cake jars.
Step 3: Cut the cake slices.
When the cake is completely cooled, use the round cookie cutter to cut slices of cake. You’ll need three slices for each pint jar. So, if you’re making six jars, you should cut a total of 18 cake slices.
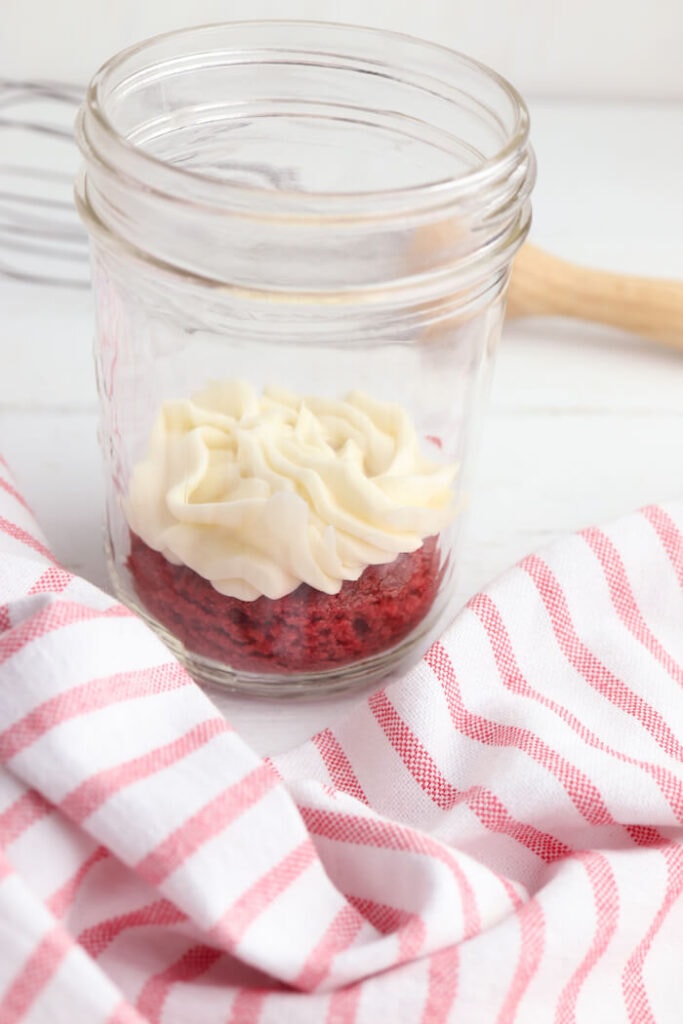
Step 4: Layer the cake and icing in mason jars.
Start by placing one slice of cake in the bottom of each jar. After that, pipe a layer of icing around the edge of the cake slice and fill in the center. Place a second piece of cake on top of the icing and continue layering until the jar is full. Decorate the top of the jar with sprinkles, then place the lids on and store the cakes in the refrigerator until you’re ready to serve them.
And that’s it!
I hope you enjoyed this easy recipe! And if you’re looking for more sweet treats to make for Valentine’s Day, then check out some of these posts:
- Homemade Chocolate Fondue – A Yummy Valentine’s Day Treat! – We make this easy chocolate fondue for our two daughters every year, and we have a family Valentine’s date gathered around the dining table!
- Valentine’s Rice Krispie Treats Heart Boxes – Already have the sheet pan and cookie cutters out? Try these adorable edible heart boxes that are made out of Rice Krispies Treats!
- Easy No-Bake Valentine’s Brownies for Kids – Pre-packaged brownie bites, some canned icing, and some food coloring is all you need to make these sweet treats for your kids!
Red Velvet Cake in Jar Recipe
Red Velvet Cake in a Jar
This red velvet cake in a jar recipe is so easy to make with boxed cake mix and an easy homemade cream cheese icing! Make a batch to gift to your neighbors or to enjoy with your sweetheart!
Ingredients
- 1 box red velvet cake, prepared
- 8 ounces cream cheese, softened
- ½ cup butter, softened
- 1 teaspoon vanilla extract
- 4 cups powdered sugar
- sprinkles (optional)
- 6 wide-mouth pint jars
Instructions
- Preheat the oven to 350 degrees.
- Prepare the cake mix according to the package instructions. Line a 10x16 inch baking sheet with parchment paper and grease the sides of the pan with nonstick cooking spray.
- Spread the cake batter evenly over the pan and bake in the preheated oven for 30 to 35 minutes, until a toothpick inserted into the center of the cake comes out clean.
- Allow the cake to cool completely, then use a 2 ½ inch round cookie cutter to cut out the cake. Each jar will need three round pieces of cake.
- For the icing, beat together the cream cheese, vanilla extract, and butter until smooth and well combined. Add the powdered sugar and beat until smooth.
- To build the cake in a jar, place one cake round in the bottom of each jar.
- Use a piping bag to pipe a layer of icing on top of the cake. Continue layering cake and icing until the jar is full. Repeat the process with the remaining jars.
- Top each jar with sprinkles, if desired.
Nutrition Information:
Yield:
6Serving Size:
1Amount Per Serving: Calories: 620Total Fat: 32gSaturated Fat: 20gTrans Fat: 1gUnsaturated Fat: 10gCholesterol: 94mgSodium: 295mgCarbohydrates: 82gFiber: 0gSugar: 78gProtein: 3g
Nutritional information is provided as a courtesy and is an estimate only. Different online calculators may calculate nutritional information differently. Also, the addition of optional ingredients and varying brands and products may change the information. For the most accurate data, you should calculate the nutritional information with the actual ingredients that you use.