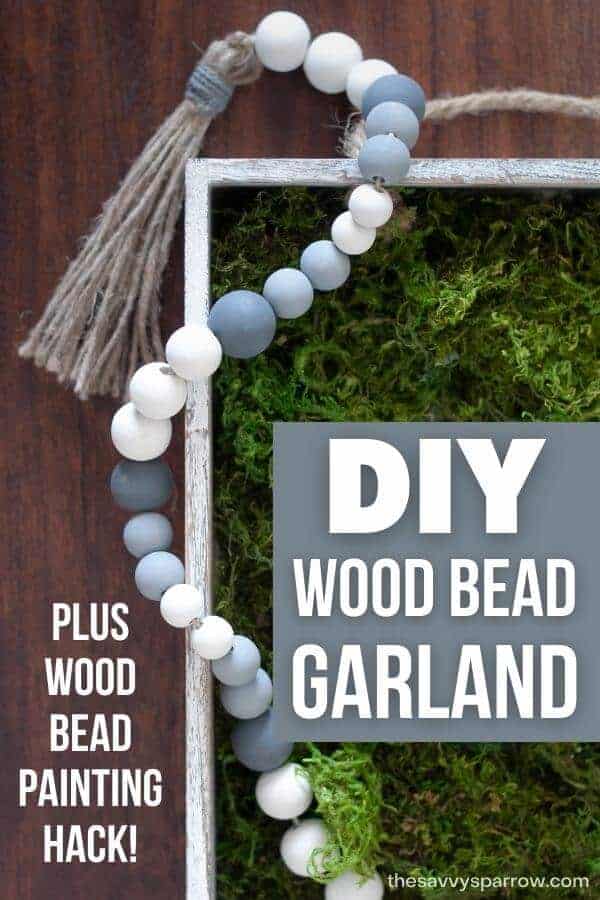
Learn how to make a wood bead garland with painted beads and twine tassels. Great for your farmhouse decor!
Wood bead garlands are the quintessential farmhouse decor piece. You can use them to drape over a DIY scroll sign, to decorate a tiered tray display, or to place in a centerpiece on your dining table or ottoman.
And they’re SUPER easy to make so you can create your own holiday themed garlands with painted wooden beads, or even make a bunch of them to sell at craft fairs or on Etsy.
Once you know how to paint wood beads (the easy way) and make your own jute tassels, then the possibilities are endless!
*This post contains affiliate links, which means if you click a link and make a purchase, I earn a commission at no additional cost to you. Read my full disclosure here.
Supplies Needed
- wooden beads in assorted sizes – 14mm, 16mm, 20mm, and 25mm are all great sizes for garlands
- acrylic paint in your choice of colors – I like to get the cheap smaller bottles at craft stores for less than $1 each, or you can also skip painting the wood beads and just leave them natural.
- paintbrush – if you want to paint the wrap part of your twine tassels like I did
- tie wire – This will be used to create a “drying rack” for your painted beads, or you can also use a thinner wire coat hanger that has been unwrapped and straightened.
- jute twine – Like this one
- hemp cord – It needs to be thin enough to string your wood beads on, or you can also use a thinner jute twine.
- scissors
Where to Find Wood Beads for Cheap
If you’re looking for cheap wood beads for craft projects, then you can’t go wrong with Amazon. I’ve compared prices at all of the major craft stores (Michael’s, JoAnn’s, Hobby Lobby), and even if you have a coupon, the bulk wood beads on Amazon are still the cheapest.
Here are some great options:
Natural Wooden Beads in 3 different sizes – 150 pieces– This set comes with 16mm, 20mm, and 25mm beads, the perfect sizes for garlands.
Natural Wooden Beads in 7 different sizes – 1000 pieces – If you want to make a variety of wood bead projects like garlands AND smaller beaded gift tags with tassels, then this is a great set. You get 100 beads each in sizes 20mm and 16mm (great for garlands), and you also get a good variety of smaller beads for smaller jute tassel decorations.
And if you have wood beads leftover, then try one of these other wood bead crafts.
How to Make a Wood Bead Garland
Painting Wooden Beads (the Easy Way!)
Painting wooden beads for your garland is completely optional, but doing so is a great way to customize your wood bead garland for a variety of holidays or to add a pop of color to your farmhouse decor.
You can paint your beads red and white and then use your garland for Valentine’s Day, 4th of July, and Christmas, or paint the beads pastel colors for pretty spring and summer decor.
Here’s how to paint the wood beads:

First, you need to do a bit of planning to determine what you want your final garland to look like. Do you want to alternate colors and sizes in a pattern or take a more organic approach?
Sort your beads and decide which sizes you want in which color.
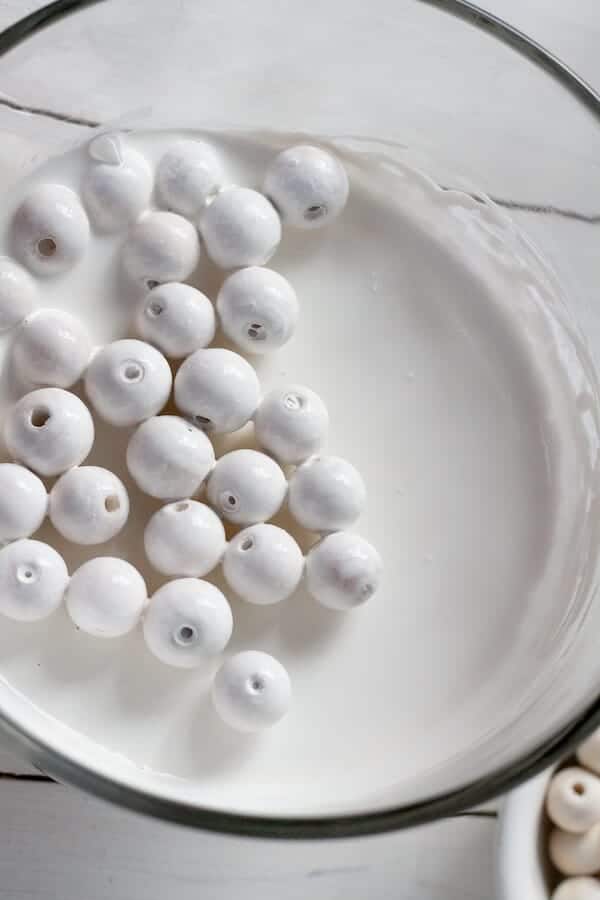
Then, mix 1 part acrylic paint with 1 part water in a bowl with higher edges. Pour in all the beads that you want that color, and roll them around in the paint until they are completely coated. Trust me, it is SO much easier doing it this way, rather than painting every individual bead with a paintbrush!
Next, you’re going to make a drying rack for your painted beads, so that the paint dries nice and evenly on all sides.
To do so, cut a 12” piece of tie wire and bend it twice at one end. The first bend will stop the beads from sliding off the end of the wire, and the second bend will be hooked on the edge of a sturdy drinking glass.
One by one, pick the painted beads up with the straight end of the tie wire and thread them onto the wire. Stop when you have about 1-2” left on the straight end and bend it to make a hook. Use the two hooked ends to suspend your painted beads between two sturdy glasses or bowls to dry, like this:

You will also want to have a piece of paper or a paper towel under the beads to catch any paint that may drip.
Repeat the steps above for each color of paint that you will be using.
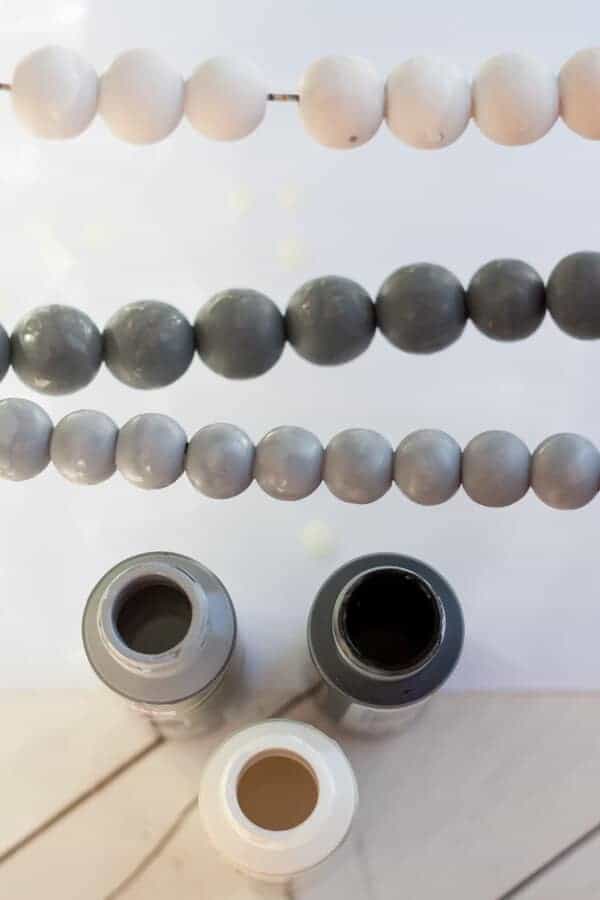
Then, allow all of your painted beads to dry completely before stringing them on to your garland. You can also use a blow dryer on a low setting to help speed up the drying process.
Making the jute tassels
While your beads are drying, you can start making the jute tassels for the ends of your wood bead garland.
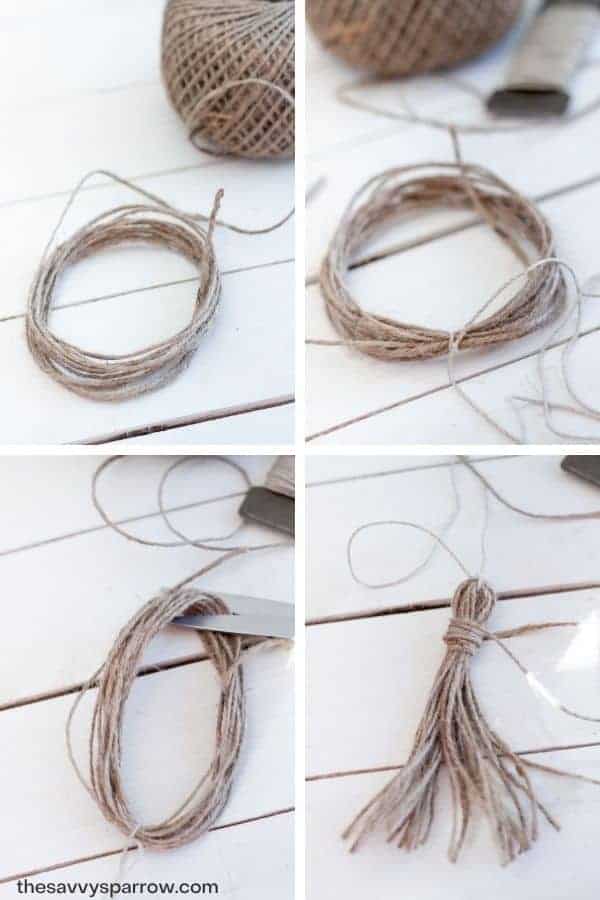
To make the garland tassels, wind the jute twine around your hand about 15 times. If you want a longer tassel, just spread your fingers out and wind the jute around the widest part of your hand. Or, you can also wind the twine around a piece of cardboard for a much longer tassel.
Next, remove the jute loop from your hand and tie a piece of hemp string into a very tight knot around it. (See the photos above for reference.)
The hemp piece should be about 8 inches longer than you want your finished garland to be. So if you want a garland that is 16 inches long like mine, then cut a piece of string that is 24″ long. Also, when you are tying the hemp around the jute twine, be sure to leave a tail of hemp about 1 1/2” long.
Next, cut the loop of twine on the opposite end of where you tied the hemp, and trim any uneven pieces.
Then take another 12” piece of jute twine and wrap it around the top of the tassel multiple times, about 1/2″ from where you tied the hemp. Secure it into a knot. You can then paint the 12″ wrapped part like I did, or just leave it natural.

Finally, make a second tassel but don’t tie the longer hemp piece on it just yet. You will tie this second tassel onto your finished garland after all of the beads are strung on.
Stringing the wood beads to make a garland
Next it’s time to string your beads on to the hemp cord to form a garland. You can use whatever color and size pattern that you like.
*Tip – To keep your hemp cord from unraveling while you string on the beads, smooth a small amount of school glue around the end, or tape the end with a small piece of Scotch tape to hold it together.

Once you have the garland to your desired length, tie the end onto your second jute tassel. Don’t tie the second tassel to closely to the end of your wood beads, because then you won’t be able to get a nice drape and bend when using your garland to decorate. Leave a few inches of slack.
And you’re done!
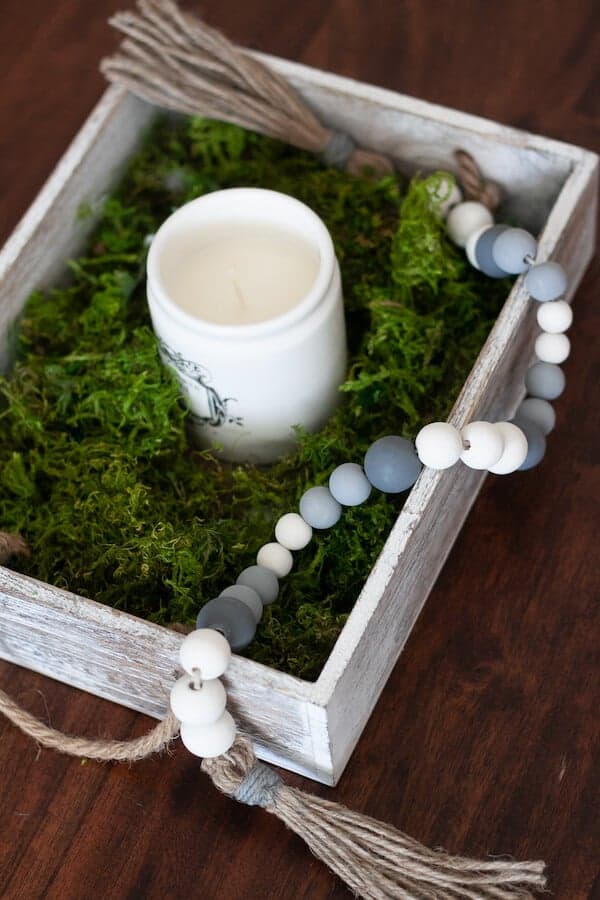
This beautiful DIY wood bead garland can be used to tie around a glass vase or to lay in a centerpiece. You can also make smaller versions with wood tags to use for Christmas stocking name plates or fancy gift tags.
I also love to drape wood bead garlands over this DIY Scroll Sign that I made! This scroll sign is actually 10 signs in one… I Just unroll it to get to the next sign, and it’s SUPER easy to make!

And if you loved this easy wood bead garland craft, then be sure to check out some of my other farmhouse DIY home decor projects:

Leave A Reply!