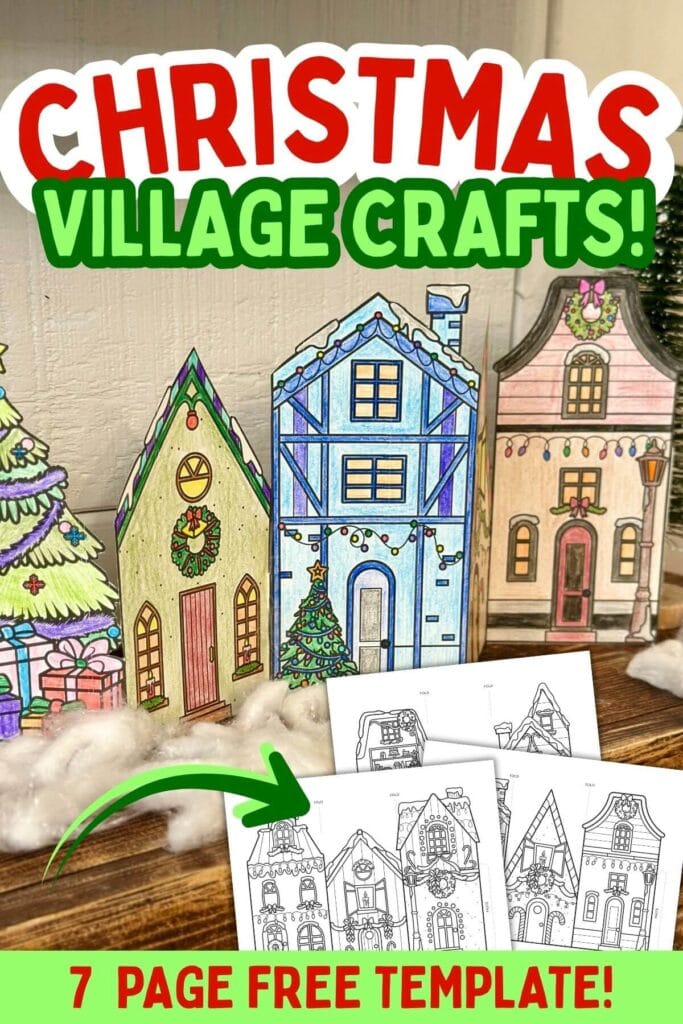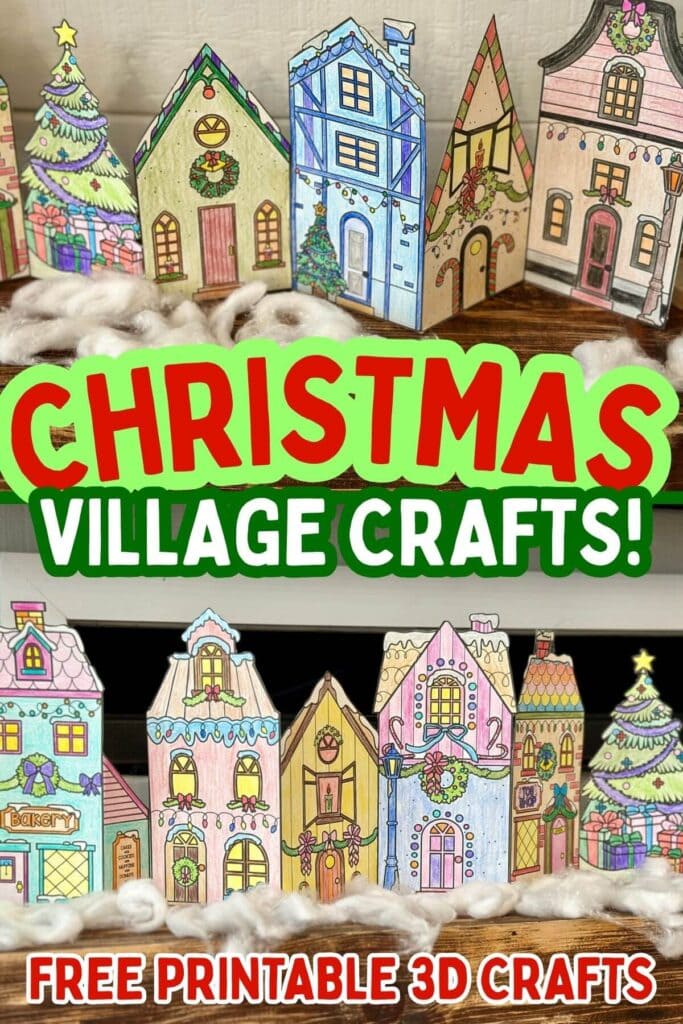
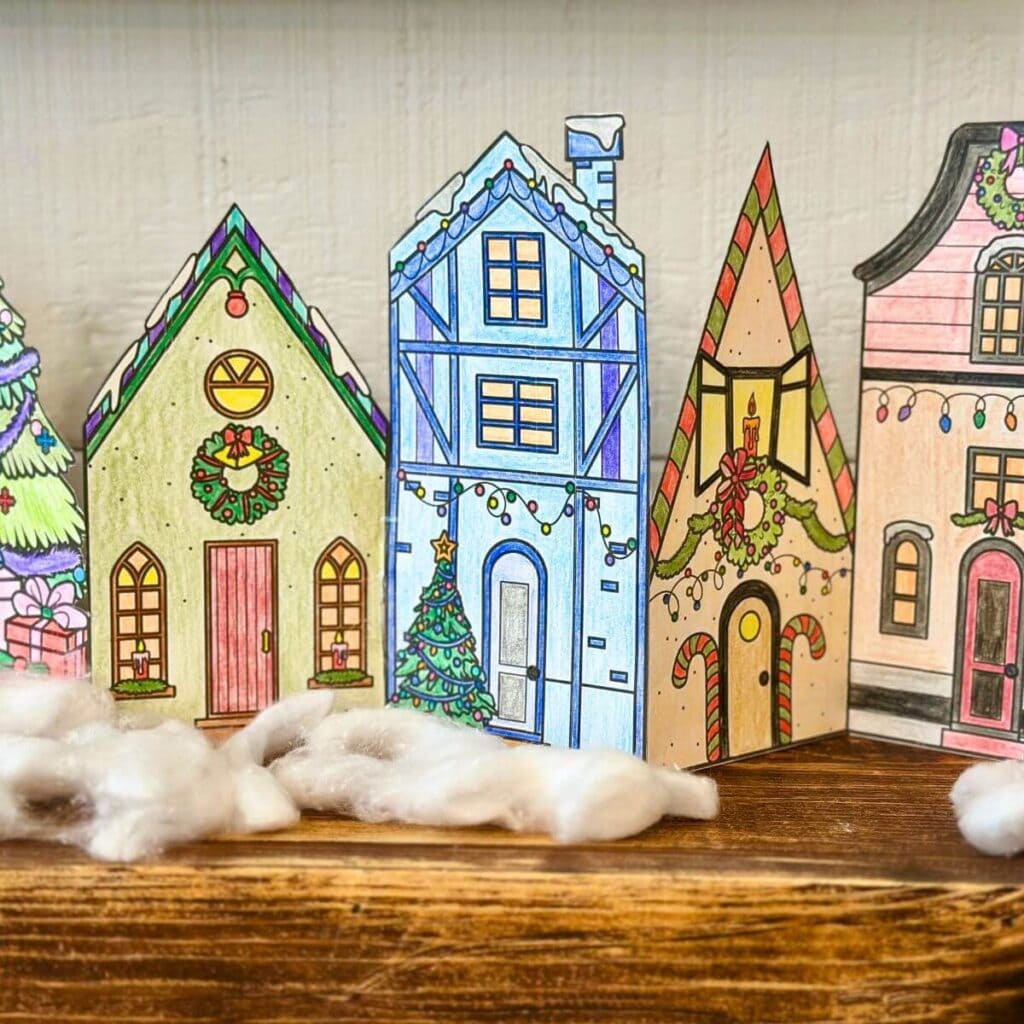
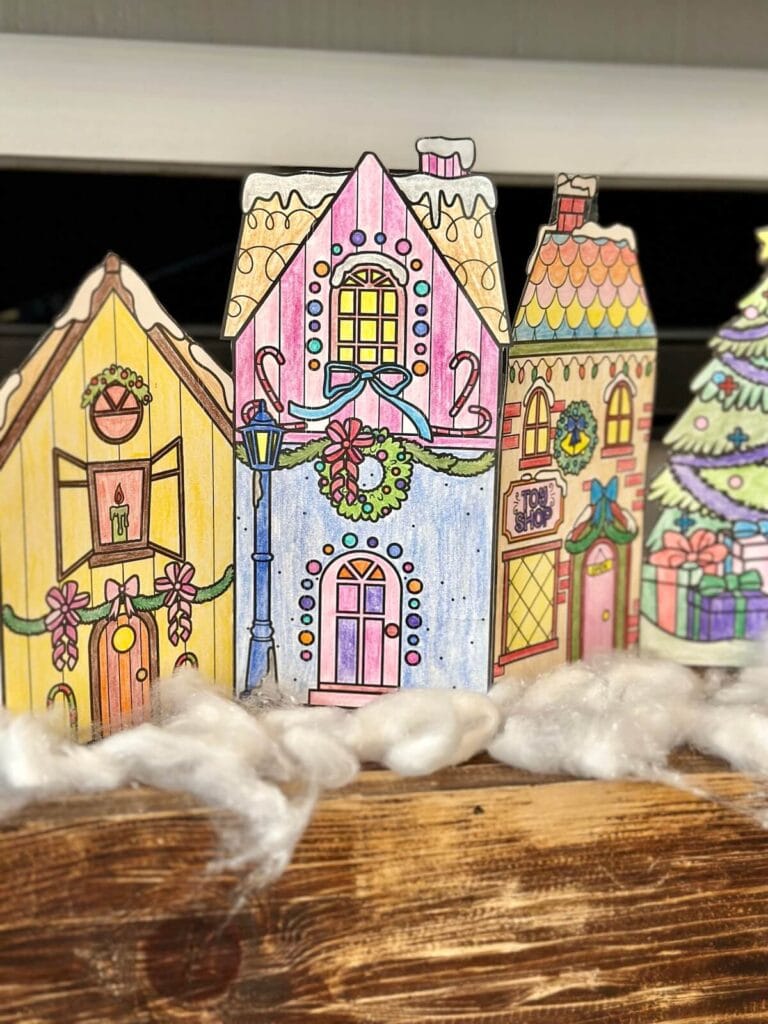
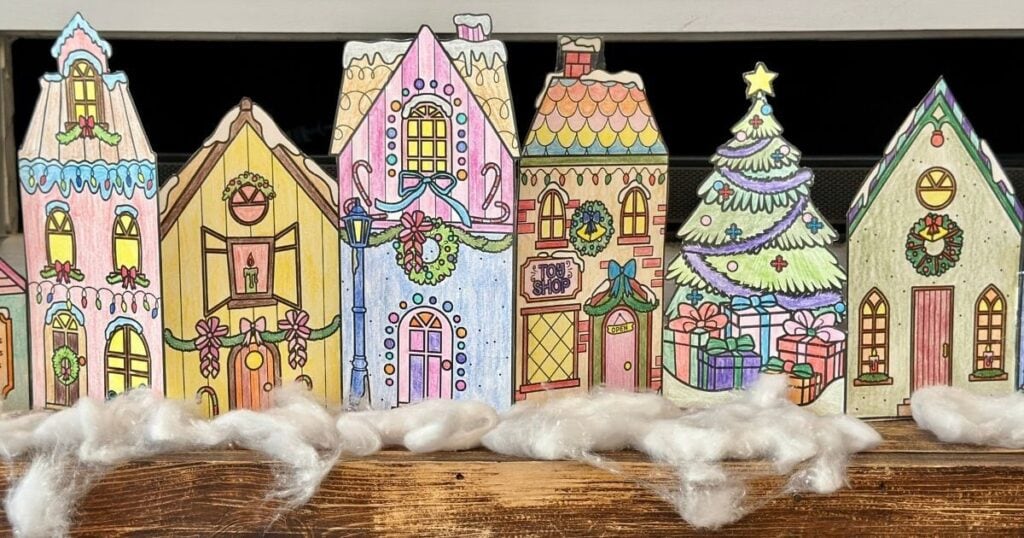
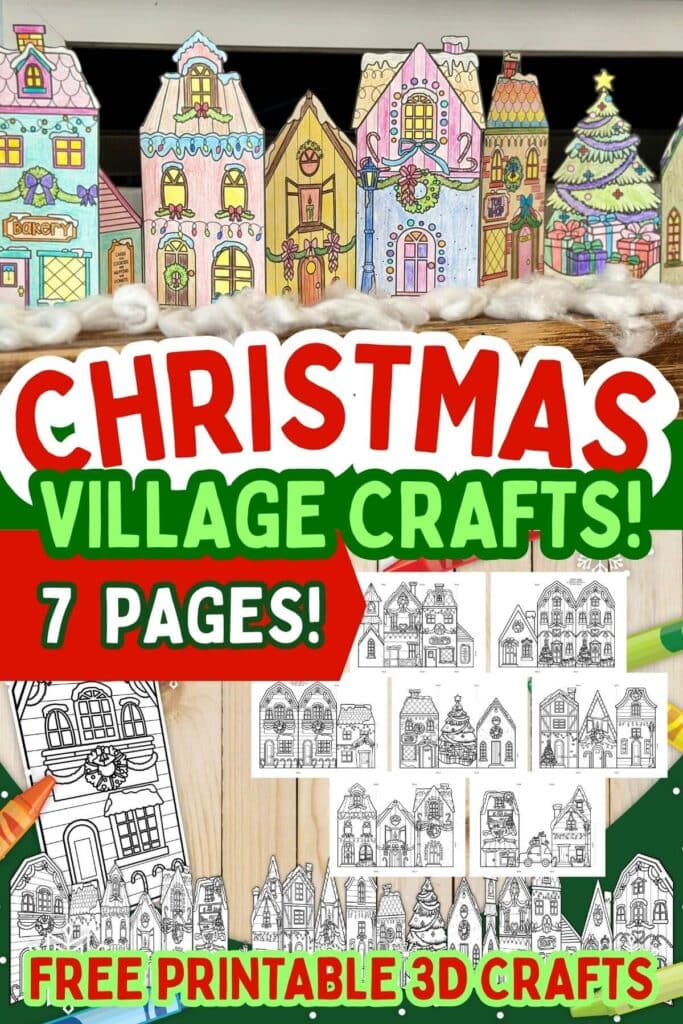
This Christmas village coloring craft doubles as a fun holiday activity and cute Christmas decor for your mantle or dining table. Download the free printable templates, color the houses and shops, and glue the ends together to form one giant paper Christmas village!
It’s 2:47 p.m. on a Tuesday, and I’ve already heard “I’m bored” approximately 147 times. The holiday break hasn’t even started yet, but my kids are already restless with that pre-Christmas energy that makes them simultaneously excited and unable to focus on anything.
I could panic, or I could reach for my secret weapon: a free printable Christmas craft that keeps them busy for more than 5 minutes AND looks adorable on display!
This printable Christmas village coloring craft is the perfect activity for December. It’s 7 pages of festive houses, shops, trees, and churches that fold up into an actual 3D village you can stand up on your mantle or dining room table. My kids loved coloring each building, and I’m not gonna lie – I grabbed a cup of hot cocoa and colored a few pages myself after they went to bed. Sometimes moms need to destress with a little Christmas coloring too!
The best part? It’s completely free, requires supplies you probably already have in your craft drawer, and works for kids, teens, or adults who just want some cozy downtime during the holidays.
Why You’ll Love this Printable Christmas Village Craft
- Great Screen-Free Activity – Keep your kids entertained during winter break without handing them a device!
- Free and Easy – No expensive craft kits required! Just print, color, and fold.
- Perfect for All Ages – Whether you have little ones who love to color or teens who need a creative outlet (or a mom who needs 20 minutes of peace), this craft works for everyone.
- Beautiful Display Piece – Unlike most kids’ crafts that end up crumpled in the bottom of a backpack, this one actually looks gorgeous on display!
- Low Prep – Print the templates and you’re ready to go. No elaborate prep work, no complicated instructions, no tracking down obscure supplies at three different stores.
Supplies Needed
Here’s what you’ll need to create your stand-up Christmas village:
- Free printable Christmas village templates (download below!)
- White card stock – I recommend printing on card stock so that the village stands up nicely when folded.
- Crayons, colored pencils, or markers
- Scissors
- Glue stick or white school glue
That’s it! You probably have everything you need already sitting in your craft supplies.
Step-by-Step Instructions
Making your Christmas village is super simple! Here’s how:
Step 1: Print the Templates
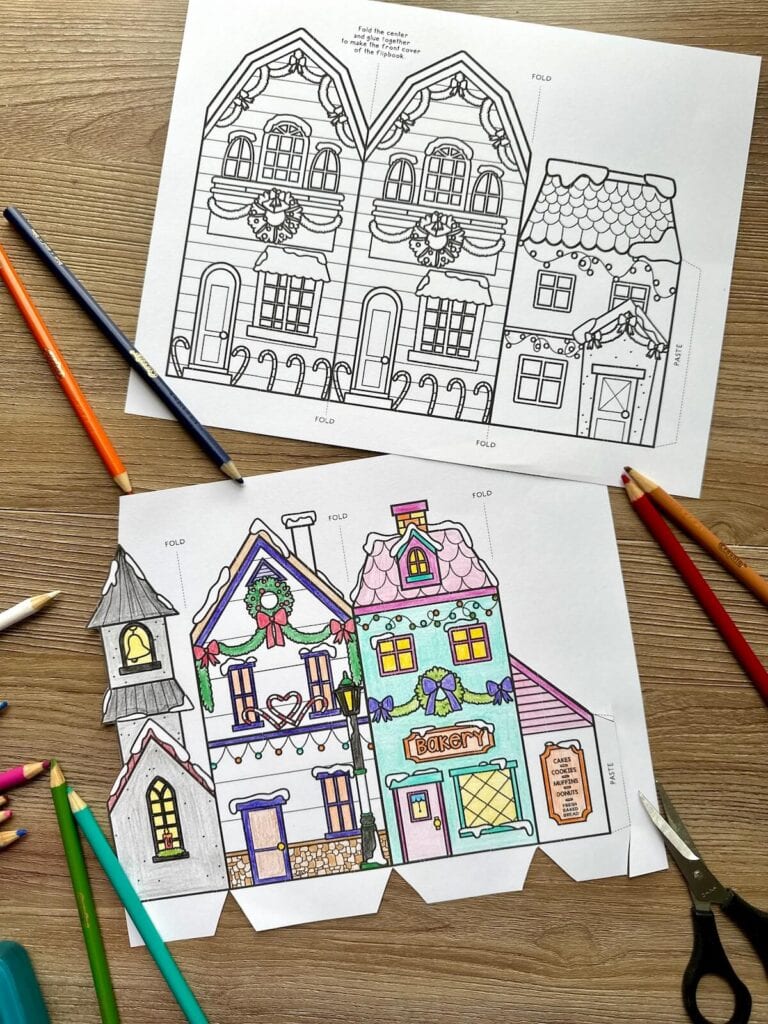
Print out all 12 pages of the Christmas village templates on white card stock. Regular printer paper will work in a pinch, but card stock makes your village sturdier and helps it stand up better. *The craft in these photos was printed on white 65 pound card stock.
Step 2: Color Your Christmas Village
This is the fun part! Use crayons, colored pencils, or markers to color each of the houses, shops, trees, and churches. Get creative with your color choices – maybe you want a classic red and green village, or perhaps a winter wonderland of blues and silvers! The brighter, the better!
Step 3: Cut Out the Pieces
Carefully cut along the solid outer lines of each template page. Take your time with this step, especially around any detailed areas. And be sure to leave the bottom fold pieces attached to the village – you don’t want to cut those off or the village won’t stand up.
You can also cut triangles in the bottom of the template, lining them up with the fold lines. This will help to create a better fold. (See photo above).
*Tip: I recommend that an adult or older teen handle the cutting if you’re doing this activity with younger children. Little ones can focus on the coloring part!
Step 4: Create the Zig-Zag Fold and Tabs
Here’s where your village really starts to come together! Fold each page along the lines between the houses to create a zig-zag pattern (kind of like folding a paper fan or an accordion). Make sure to fold crisply along each line so your village will stand up nicely.
Look at the bottom of your folded village pieces – you’ll see tabs along the base. Fold these tabs upward at a 90-degree angle. These tabs are what allow your Christmas village to stand up on its own.
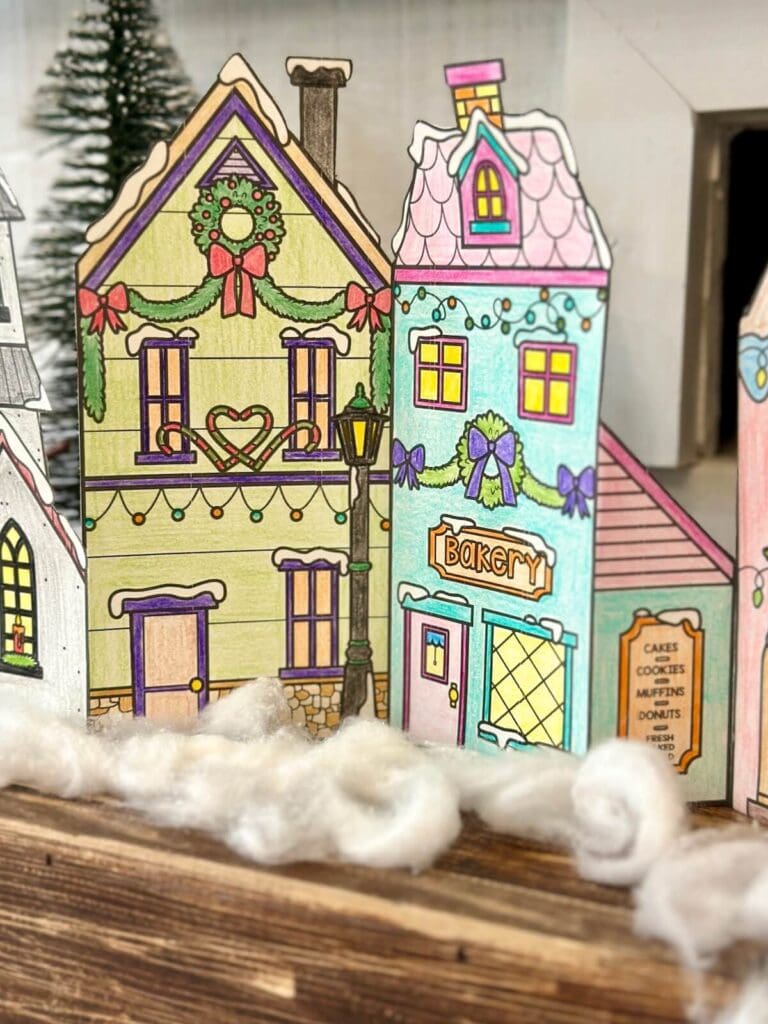
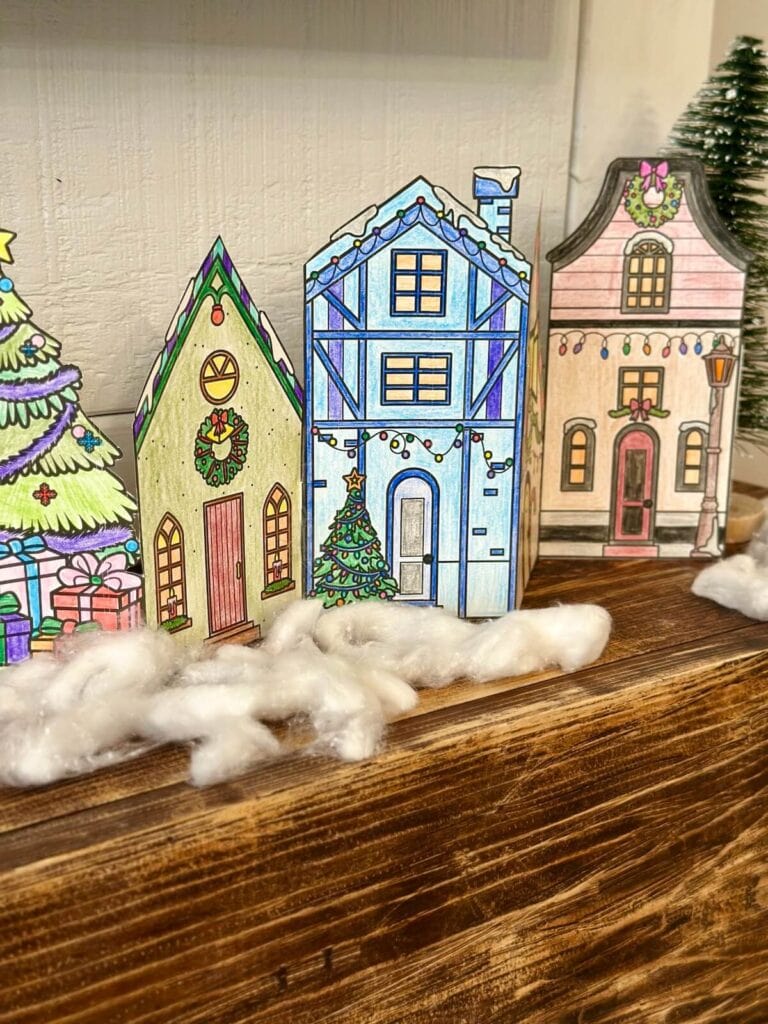
Step 5: Glue the Christmas Village Together and Display!
Use a glue stick or white school glue to attach the ends of each village template piece to the next one. This creates one long, connected village display. Let the glue dry completely before handling.
Then, once everything is dry, carefully stand up your colorful Christmas village on your fireplace mantle, dining room table, windowsill, or anywhere you want to add some festive cheer! The zig-zag folds allow the village to stand on its own and create a beautiful 3D display.
Tips for the Best Results
- Color before you cut – Trust me on this one! It’s much easier to color when the pages are still flat and whole.
- Use card stock if possible – It makes a huge difference in how well your village stands up and how professional it looks.
- Take your time with the folds – Crisp, precise folds make all the difference in the final look of your village.
- Make it a family activity – Set up a coloring station at the kitchen table with everyone’s favorite coloring supplies and work on the village together! *This could be a fun holiday craft for your Christmas activities advent calendar!
- Add glitter or stickers – Want to make your village extra special? Add a little glitter glue for sparkly snow or use festive stickers for extra decoration.
Free Printable Christmas Village Templates
Ready to create your own stand-up Christmas village? Click the button below to download your free templates and get started!
Download The Printable!
Click below to download your FREE Christmas Village Paper Craft!
This Christmas village coloring craft has become one of our favorite Christmas traditions. It keeps my kids busy on those long winter afternoons, gives us something beautiful to display throughout the season, and creates memories that are way better than another hour of screen time.
Did you make a Christmas village with your family? I’d love to hear how it turned out in the comments below!
And be sure to PIN this to your board for Christmas crafts and activities. This is a great way to support us!