If you’re looking for cute and easy Cricut fall home projects, then you will LOVE this DIY Fall Sign! Grab the FREE Fall SVG and a few basic supplies, and you’ll have a cute Cricut Fall Sign for your fall farmhouse decor in no time!
Pumpkin spice, apple pie, and cozy sweaters… Fall is almost here! Temperatures are going to be dropping soon, and pumpkin spice lattes will be on the menu once again! Rejoice!
I don’t know about you, but Fall is my most favorite time of the year. The kids are back in school (well, hopefully this year that will be the case!), and the crisp fall air is a welcome relief.
And who doesn’t love all of the cute Fall home decor at Hobby Lobby?! I was recently roaming the aisles for inspiration (these cheap and easy DIY Farmhouse Wood Signs were inspired by similar Hobby Lobby signs, too!), and I found some adorable “Fresh Baked Pies” fall signs.
I immediately thought about using paint sticks to make wood frames (just like I did on this cute DIY Quote Wall Art) and Dollar Tree picture frame glass to create my own version.
And I couldn’t be happier with how they turned out!
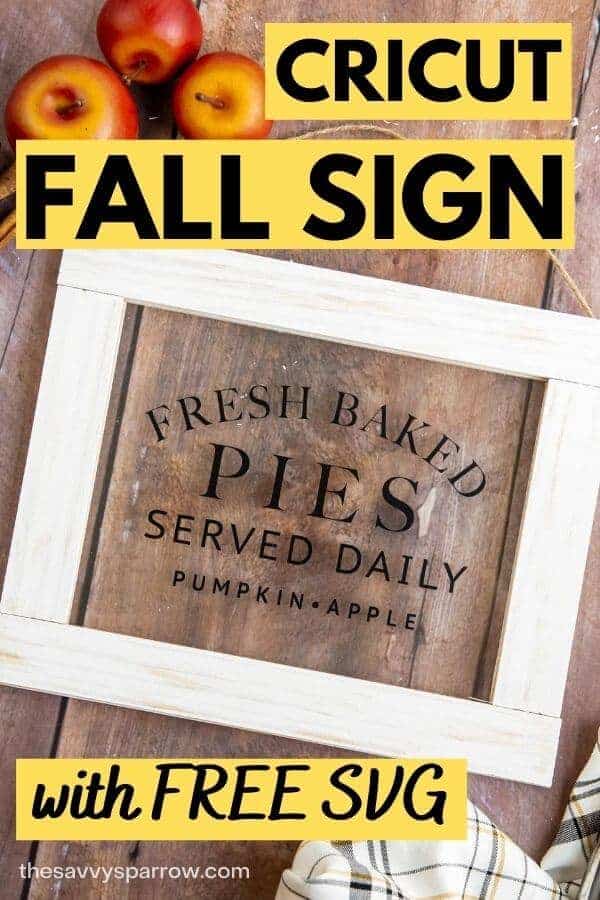
These fall Cricut crafts are so cute, right?!
If you want to give these easy Fall home decor crafts a go, then here’s the step-by-step instructions to create these super cute DIY Fall Signs with your Cricut…
*This post contains affiliate links, which means if you click a link and make a purchase, I earn a commission at no additional cost to you. Read my full disclosure here.
Supplies for Cricut Fall Sign
Here are the supplies needed to make this super cute DIY fall sign with your Cricut:
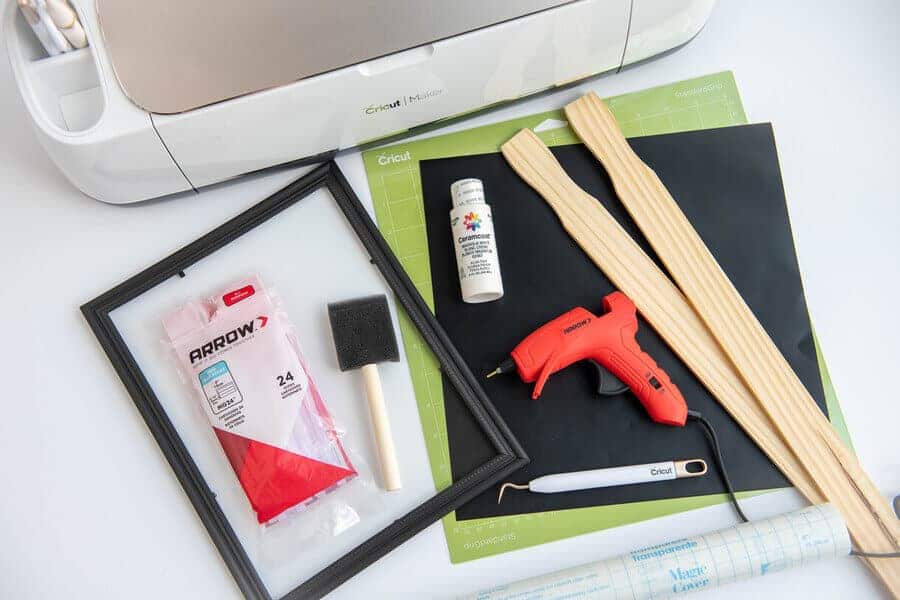
- Cricut or other cutting machine
- Cricut blue light or green standard grip mat
- Oracle 651 vinyl or premium vinyl of your choice
- Transfer tape
- High temp hot glue gun – Very important that it’s a high temp!
- Industrial strength glue gun sticks – You will need strong hold glue sticks that work with wood projects, like Arrow, Gorilla Glue, etc.
- White matte paint – Chalk paint or acrylic paint is fine
- Paint brush
- Dollar Tree frame – It doesn’t matter which frame you choose, just be sure that it is 8″x10″. You’ll only need the glass part for this DIY Fall Cricut Sign.
- Cricut weeding tool
- Cricut scraper tool – Or an old credit card works fine too!
- 2 packs of paint sticks – You can buy these at Home Depot… I think they come in a pack of 5 for 98 cents.
- FREE Fall SVG
How to Make a DIY Fall Sign with your Cricut
1. Cut paint sticks to size
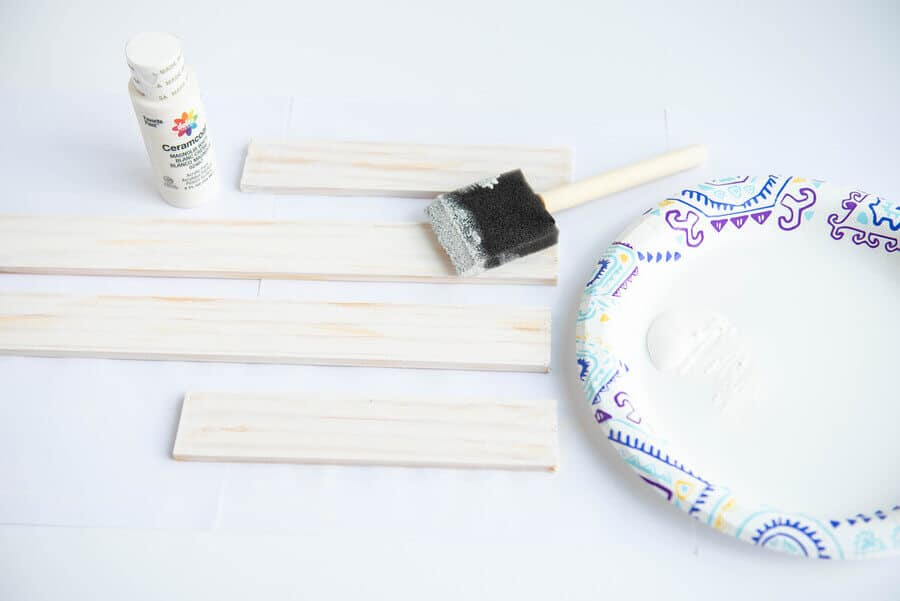
The first thing you need to do for you DIY Cricut Fall Sign is to cut your paint sticks to the size of your Dollar Tree frame. You will need two longer sides and two shorter sides to make the front side of the frame and the same for the back side of the frame.
Here’s a photo for reference of how to cut your paint sticks:
2. Paint the paint sticks
Paint the paint sticks with your white matte paint using a dry brush technique. Just get a little bit of paint on your brush at a time, and lightly brush it on so that you get an aged, rustic effect. This technique allows the raw wood to show through, and it makes your finished DIY Fall sign look more farmhouse-y.
*NOTE: Be sure to paint the sides of the paint sticks that will be exposed, NOT the side with the ruler markings.
3. Assemble front of the frame for you DIY Fall Sign
Once your paint sticks are completely dry, it’s time to start assembling your frame.
Lay out the pieces for one side of the frame to form a rectangle. Then, add hot glue using a high temp hot glue gun and industrial strength glue sticks (super important that it’s HIGH TEMP and INDUSTRIAL STRENGTH!).
If you don’t have a high temp glue gun, you can also use E6000 for assembly. If you do that, you can use a hair dryer on low heat to speed up the drying time of the E6000.
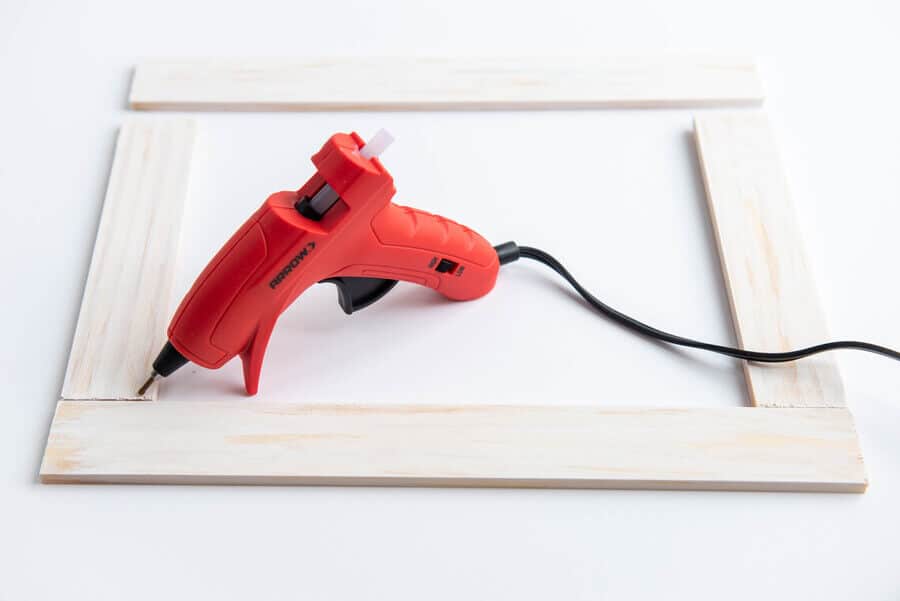
To glue the sticks together, it’s easiest to add glue to the top and bottom edges of the shortest sides of the shortest sticks and attach the top and bottom of the longest sticks.
ONLY do one side of the frame right now… just keep your other painted paint stick pieces to the side because you will use them later.
4. Attach glass to the wood frame
Now that the front of the frame is assembled, remove the glass from your Dollar Tree frame. You can go ahead and discard the frame part, or save it to make these super cute DIY Dollar Tree Laundry Room Signs!
Lay the glass onto the wood frame and align the edge of the glass in
the center of each wood side, as show in the picture. Use a pen to mark the corners of the glass.
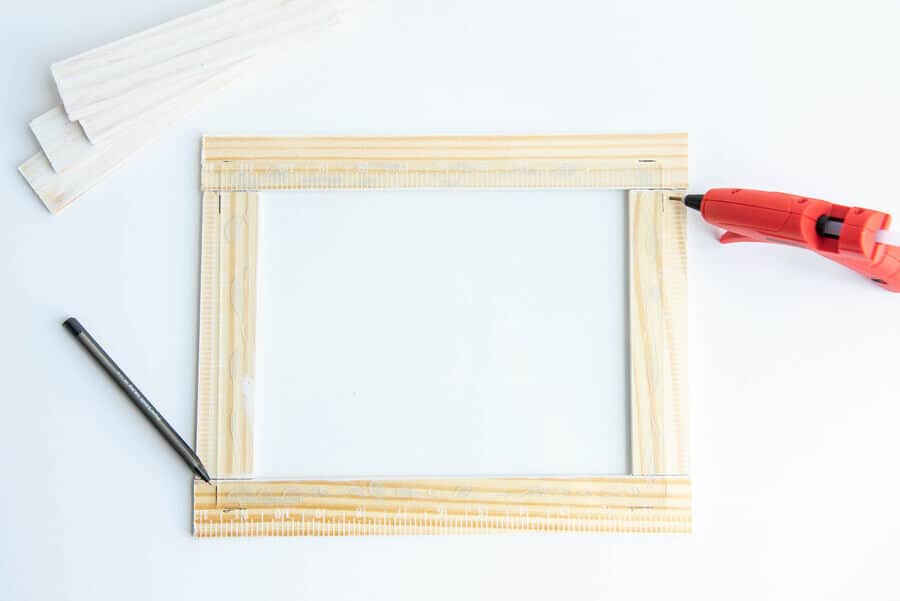
Using the pen markings as a guide, add glue to the inner most part of the frame. Add the glass and apply pressure until the glue is completely dry.
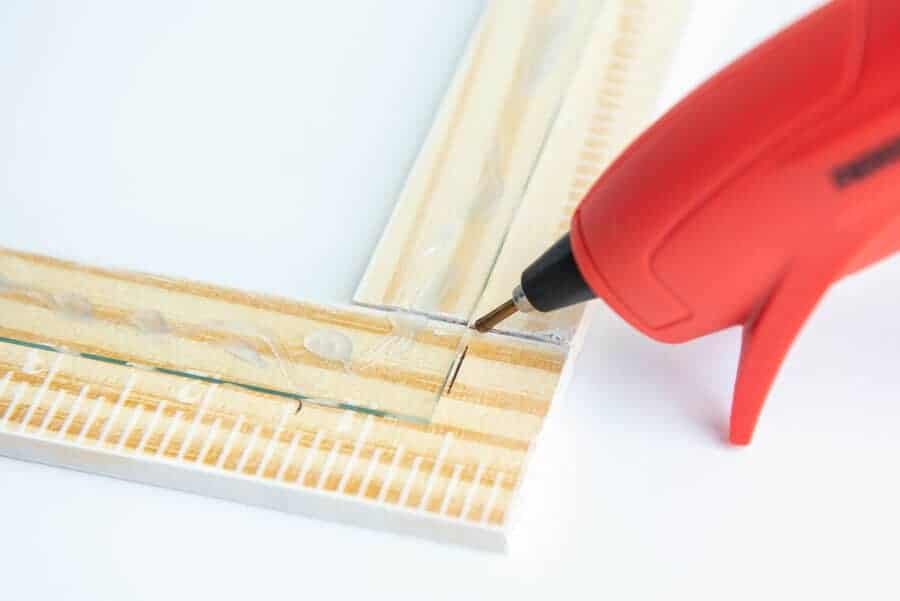
*NOTE: Work quickly so that you get the most hold and so that your hot glue doesn’t dry before you can properly apply the glass.
5. Attach back side of the frame
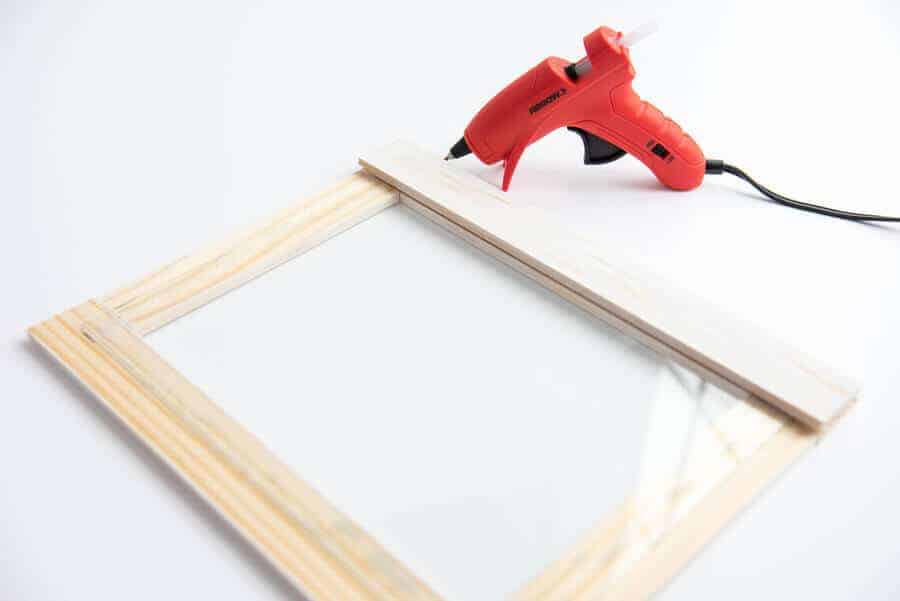
Next you need to enclose the glass by creating the back of the frame.
Add hot glue again to the inner most portion to the glass, just like you did in the previous step… You can see from the picture above that you want the glue to be near the edge of the glass, so that you can’t see it on your finished DIY Fall Sign.
Then, glue the paint sticks on to the glass one by one to create the frame backing, like this:
6. Prep the FREE Fall SVG
Now that your frame is done completely (YEAH!), you can start working on the vinyl part of this DIY Fall Sign with Cricut.
Click HERE to grab the FREE Fall SVG for this easy DIY Fall Sign with Cricut!
Import and upload the SVG file to Cricut Design Space, or your machine’s design program. Adjust the size of the SVG to fit the size of your sign.
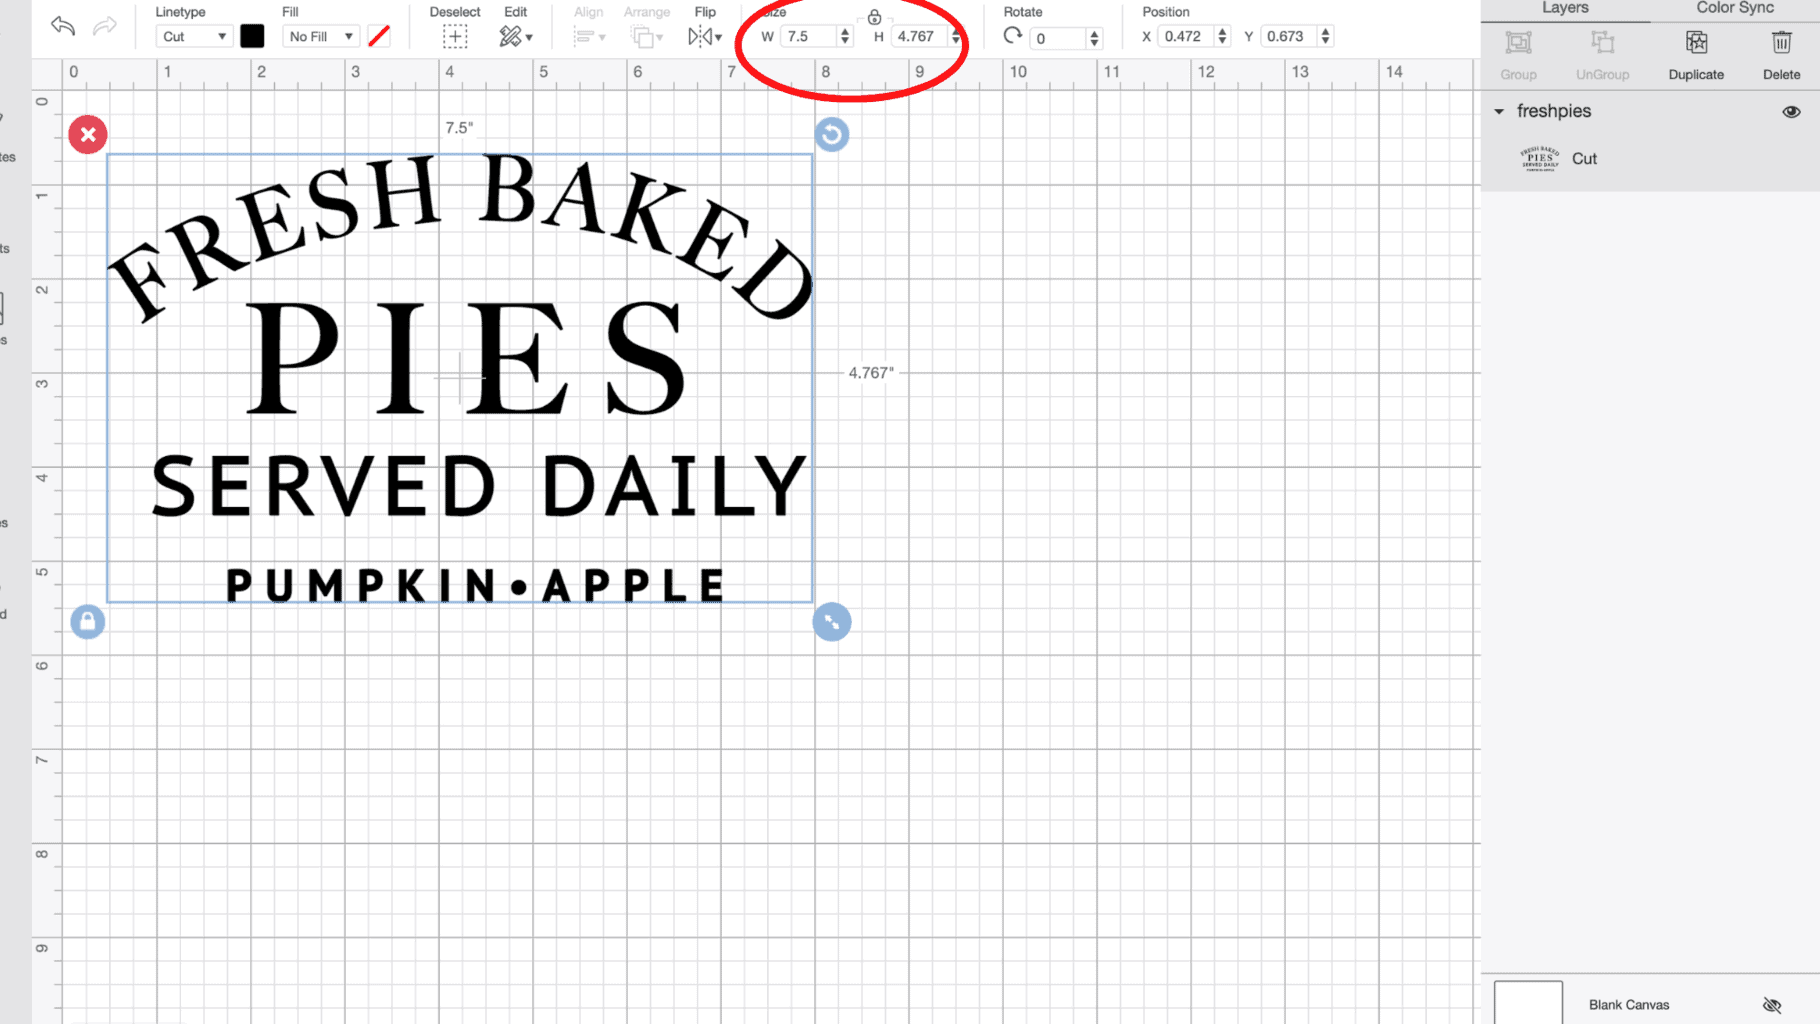
For my DIY Cricut Fall Sign, that was 7.5 W and 4.767 H.
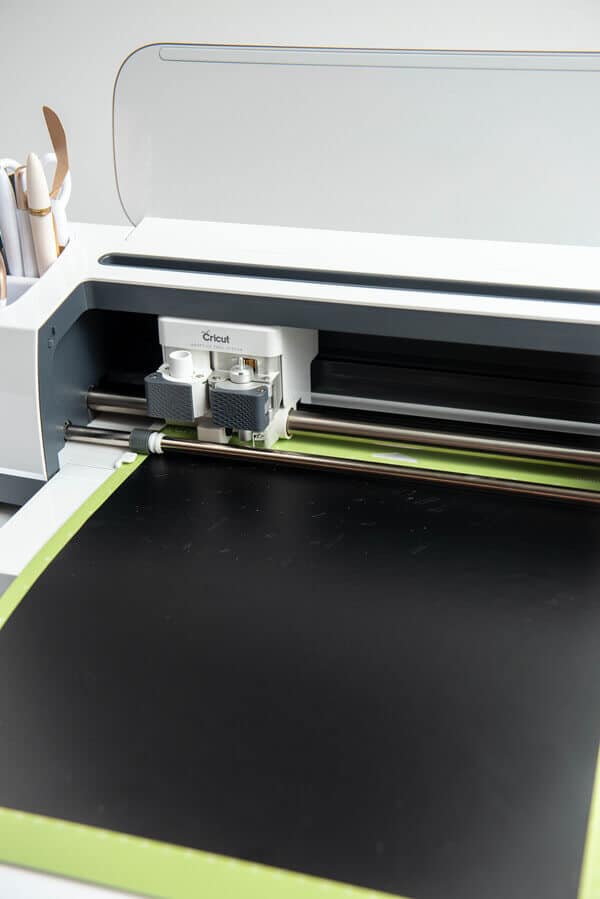
Once you’ve got the FREE Fall SVG sized to fit your frame, adjust the machine’s setting or material dial to vinyl. Then load the Oracle 651 (this is permanent vinyl) to your machine on the blue light grip mat and hit “go”.
7. “Weed” the vinyl for your DIY Cricut Fall Sign
After the cut is complete, use your weeding tool (it looks like a dentist pick), to pull the negative vinyl off and away from the letters. This process is called “weeding” and it’s a whole lot more fun than sitting in your garden in the 100 degree heat and pulling pesky plants out of the ground! 🙂
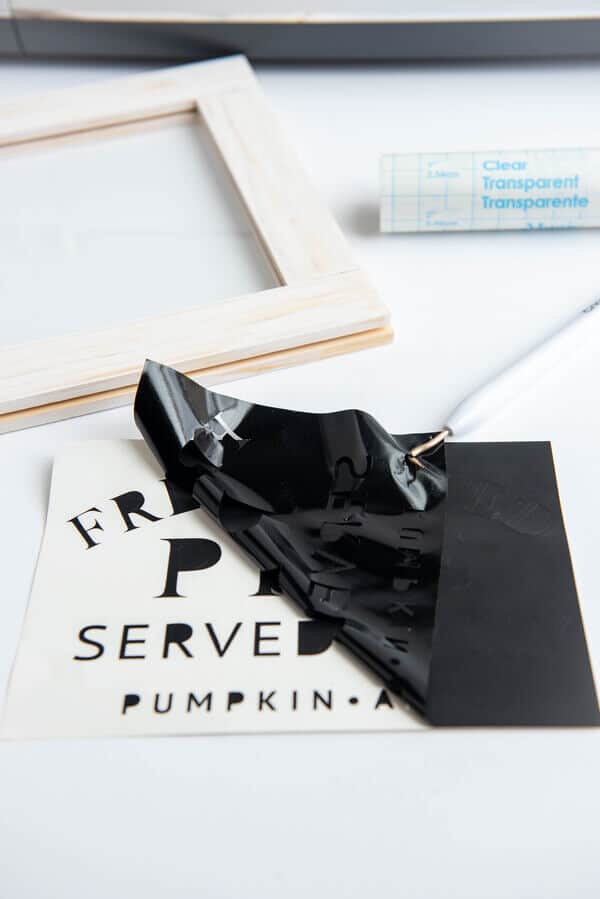
You will need to weed around the outside of the letters and any small parts inside letters that are enclosed like “a, e, o”.
8. Transfer the vinyl design to transfer tape
Now that the weeding is complete, cut off a piece of transfer paper the size of the cut vinyl and apply to the vinyl using pressure with the scraper tool. The transfer tape is necessary to get your Fall SVG design off of the vinyl backing and onto the surface of you DIY Fall Sign.
Here’s what this step looks like:
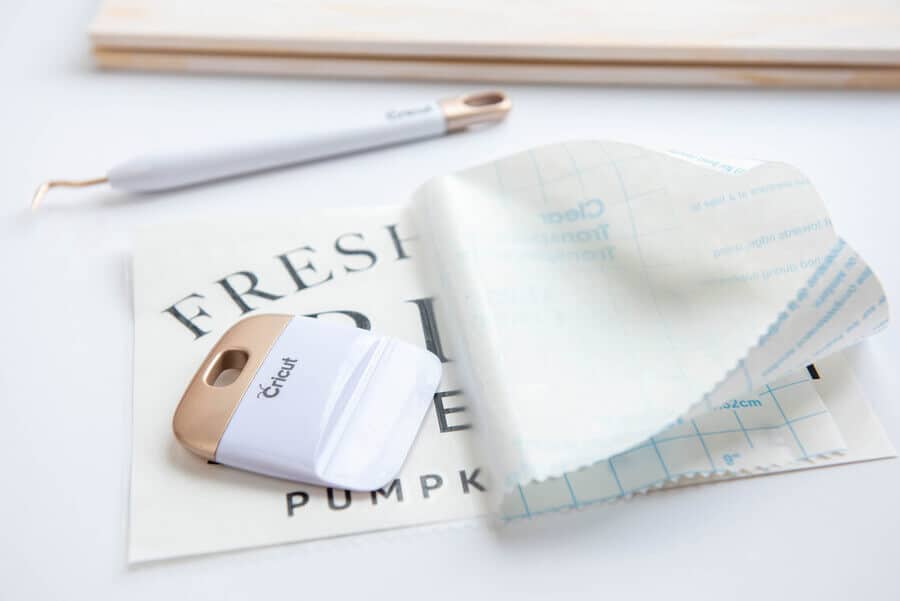
After the vinyl fall design has been transferred to your transfer tape, turn the entire design facing downwards and begin gentle pulling the vinyl’s plastic backing off and away from the transfer paper.
9. Apply vinyl design to your DIY Fall Sign
You’re in the home stretch! Your DIY Fall Sign with Cricut is just about done, and you’re about to be able to show off your handy work with the rest of your farmhouse Fall decor!
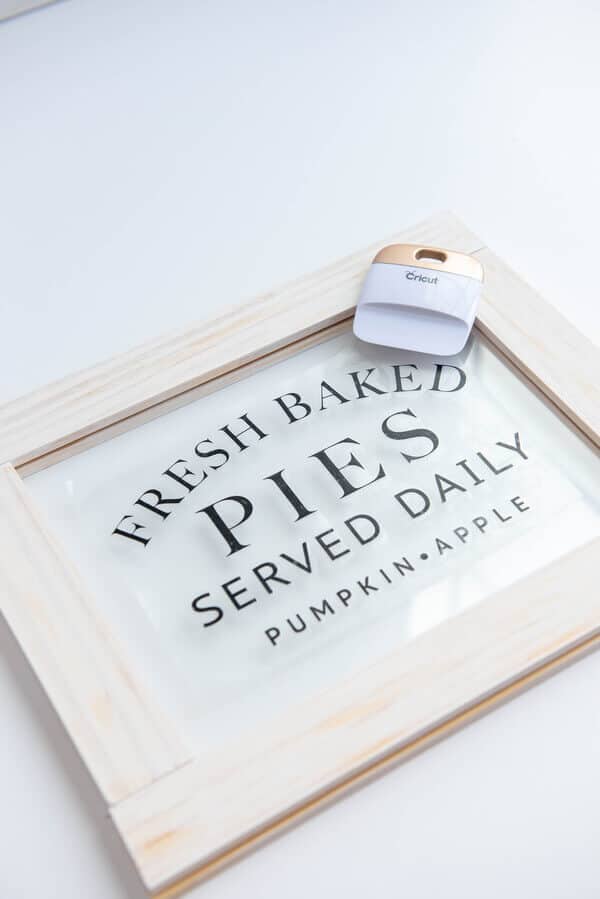
Okay, next find the middle of your sign by measuring the glass area (or you can just eyeball it!). Lay the transfer tape with the vinyl design lightly on top of the glass. Once you’re 100% happy with the location of the design, apply pressure and smooth over the design using the Cricut scraper tool (or a credit card works too).
Once enough pressure has been applied, slowly remove the transfer paper by starting at a corner and very carefully and slowly rolling it away and off the glass. The vinyl will remain on your cute DIY Fall Sign.
10. Add wire or twine to hang your DIY Fall Sign.
This step is completely optional. If you want to hang your Cricut DIY Fall Sign then add some twine or picture hanging wire to the top of the frame. Or, you could also just lean this cute fall sign up against the wall on a picture ledge or your fall fireplace mantel.
This easy fall sign is also a great addition to those trendy tiered centerpiece displays.
So stinkin’ cute, isn’t it?!
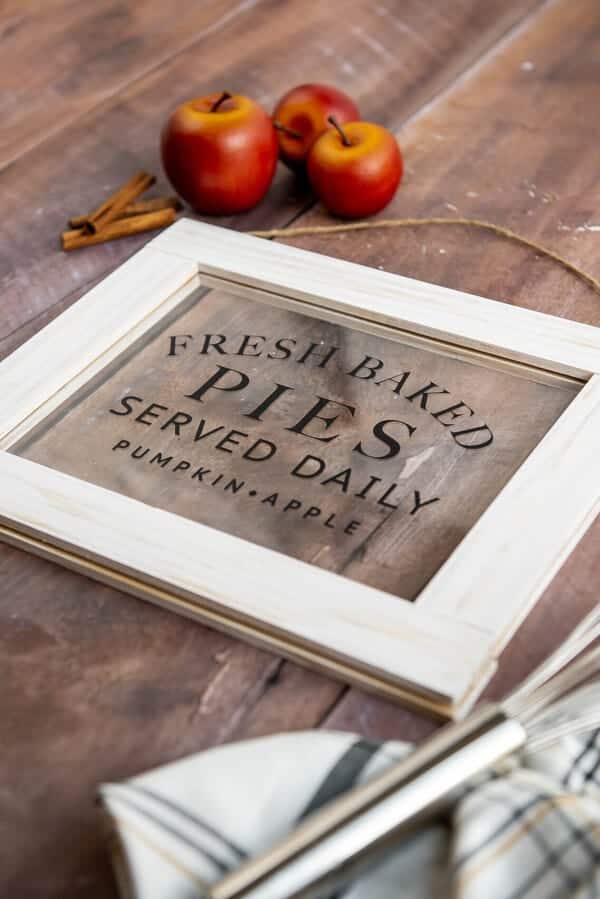
Here’s another view of the finished DIY Fall sign:

I don’t know about you, but a little DIY craft therapy is a GREAT way to take a little “me” time and relax. And you’ll have a super cute fall home decor piece to show for it!
Want an easy DIY Fall Home Decor Project that’s quicker to do and doesn’t involve a Cricut machine? Check out this SUPER EASY 5 minute Fall Burlap Banner!
Or, try this cute DIY Fall Wall Hanging to use as a pretty backdrop for your Thanksgiving meal spread!
Did you know that you can also find some cute fall home decor projects on the Cricut blog? Yup, go check it out!
And tell me… what is YOUR favorite thing about Fall? Leave me a comment down below! I’d LOVE to hear from you!
And happy nesting!

Comments & Reviews
What brand and type of industrial hot glue sticks do you have exactly? I’m using Gorilla but the back frame pops off. We assembled frame and added it as one piece on back. Would that be the problem?
Hi Jody! Yes, that could be the problem… You could also try E6000 glue – I know they sell it at Hobby Lobby. I’ve had success with that also. 🙂