If you’re looking for an easy way to make a small room feel bigger, then try painting horizontal striped walls! This painting tutorial shows you how to paint stripes on walls for a fun bedroom decor idea…
There’s something about painted stripes that I love…
Maybe it’s how a few, strategically placed stripes can make a room feel larger…
Or maybe it’s the fact that with just a few gallons of paint you can completely transform whole walls on a budget.

Whatever the case may be, when we bought our house about 2 years ago, I knew that we had to paint horizontal stripes on my daughter’s walls to make her teeny bedroom feel more spacious.
This is her bedroom before… Dark and dreary. FYI – her room is only 11 feet by 10-1/2 feet.
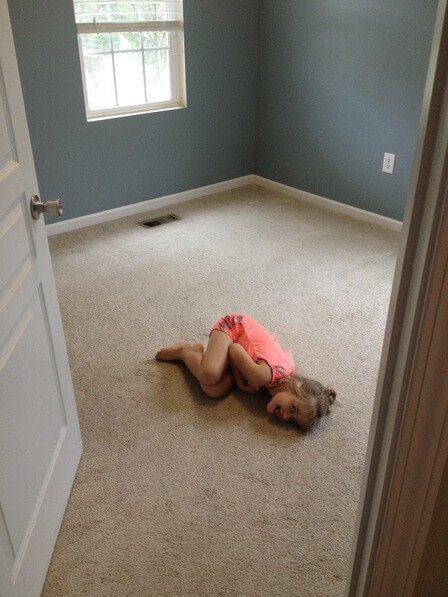
Funny enough, this is the only BEFORE photo that I have… it’s from the day that we closed on the house, before we even moved in, and all she wanted to do was lay in the middle of the floor of her new bedroom.
And here is her bedroom after we painted striped walls…
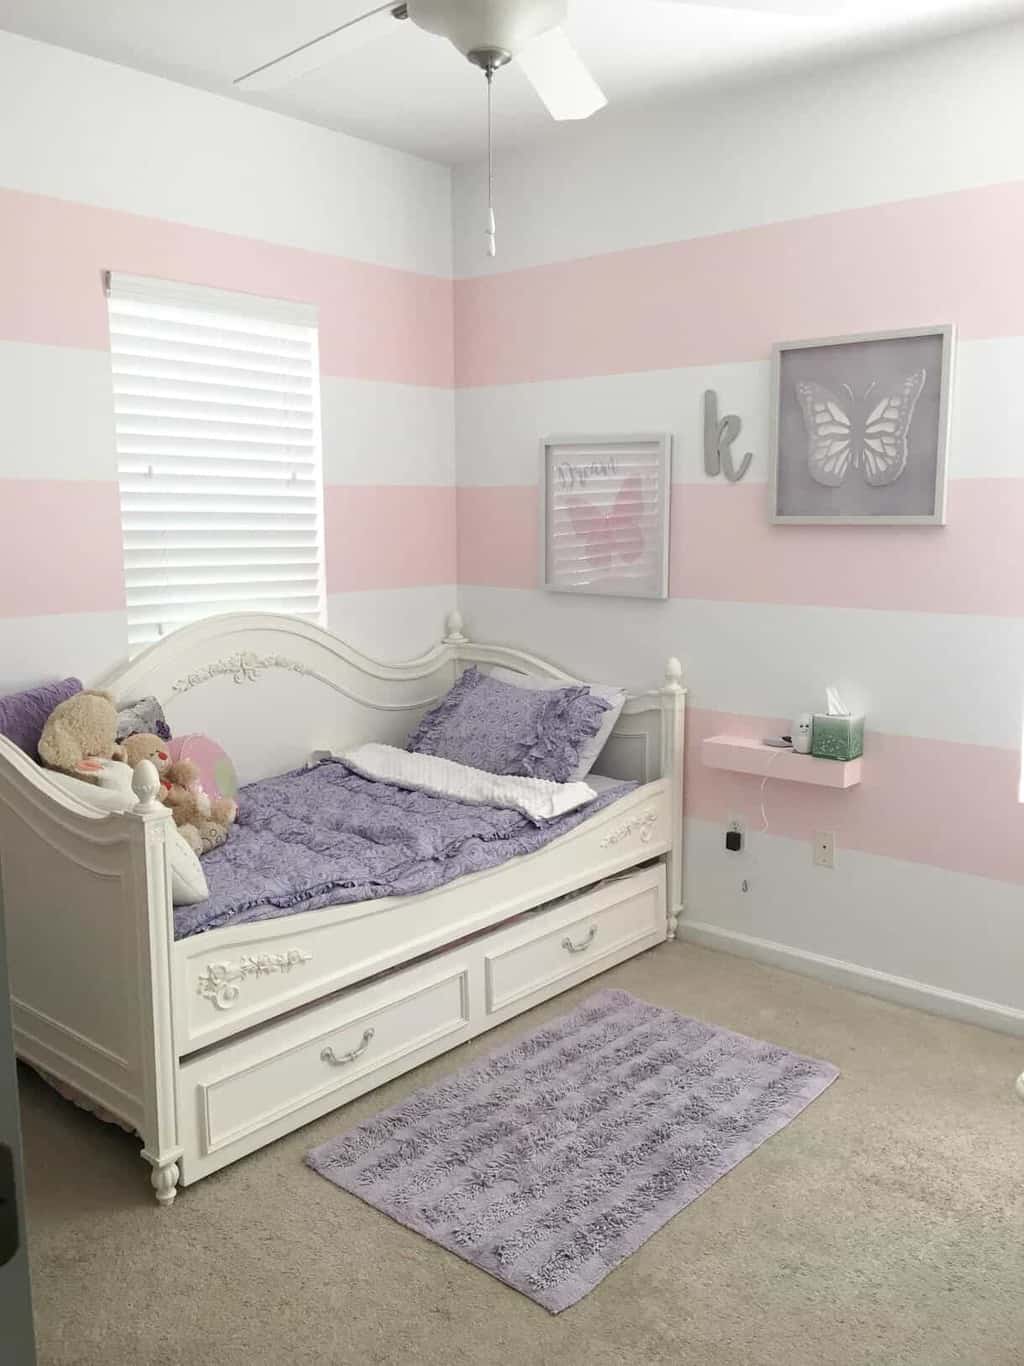
Such a BIG difference, right?!
*By the way – If your kids have bunk beds or daybeds, you absolutely NEED Beddy’s zipper bedding! My daughter’s zip up bedding is legit my FAVORITE thing in her room (besides the perfect painted stripes of course!)… Click HERE to read all about how zipper bedding works and my Beddy’s review!
Here’s how to paint stripes on walls so you can make a big impact in your small bedrooms, too:
*This post contains affiliate links, which means I may earn a small commission from these links at no additional cost to you. Read my full disclosure here.
Recommended Supplies to Paint Stripes on Walls:
- Frog Tape – A MUST-HAVE for how to paint stripes on walls! I recommend using the thicker version because it gives you more space to overlap your paint roller without getting paint on your adjacent stripe.
- Tape measure
- 4 foot Level
- Pencil
- Good quality paint roller
- Sturdy step stool – We have this one and it has been a LIFESAVER for lots of DIY home projects!
- Laser level – Some people recommend a laser level for painting striped walls, but I was able to get perfectly straight stripes without one, so it’s really just a matter of preference.
How to Paint Horizontal Stripes on Walls:
Step 1: Choose two paint colors for your horizontal wall stripes
I knew that small bedrooms need light and airy paint colors to make them feel bigger, and our daughter requested pink on her walls… so pink and white stripes it was.
We used Behr Ultra Premium paint in Frost and Cupcake Pink.
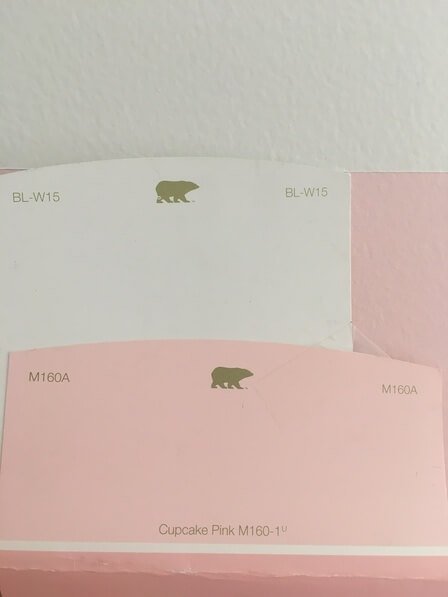
Step 2: Plan placement of your painted wall stripes
From the get-go, I knew that I wanted the top and bottom horizontal painted stripes to be white to make the room appear taller.
By painting the top stripe white (the same color as the ceiling), the eye doesn’t stop at the top of the wall. Similarly, we painted the bottom stripe white to match the baseboards so that the baseboards appear larger.
You know how fashion experts recommend wearing nude heels if you’re short, because it makes your legs appear longer? If you wear dark shoes, then it looks like your legs stop abruptly at your feet, accentuating your short stature.
Well, the same idea applies here… the white horizontal painted stripes give the illusion that the room continues up and down.
After I figured out the color of the top and bottom horizontal painted wall stripes, then I had to decide on the thickness of the painted stripes.
Since the room is small, I wanted to do thicker stripes so as not to overwhelm the size of the space with a busy pattern. And, truth be told, I wasn’t completely crazy about the bubblegum pink color (my daughter LOVED it!), so I wanted to limit the amount of pink.
One BIG THING to remember when deciding on your placement of your painted stripes… ODD NUMBERS are your friend! Try to have an odd number of stripes, because then the top and bottom stripes will be the same color (which gives you a much prettier finished wall).
I eyeballed my wall and decided that 7 stripes would be just right for the space. If I had gone with 5 stripes, then I would have only had two pink stripes which I thought would look funny. Remember, I had already decided to maximize the feel of the space by painting the top and bottom white.
This was probably the trickiest part of painting horizontal stripes on walls. I wanted to get my measurements correct so that I had perfectly spaced horizontal stripes, rather than having the tops and bottoms look like I had run out of wall space to complete them.
To get the measurements for your painted horizontal wall stripes, simply use this math equation:
(Height of your wall in inches – Height of Baseboard and Crown Moulding) / Number of stripes you want to paint = Height of each wall stripe
Here are the measurements that I used for our 9 foot walls:
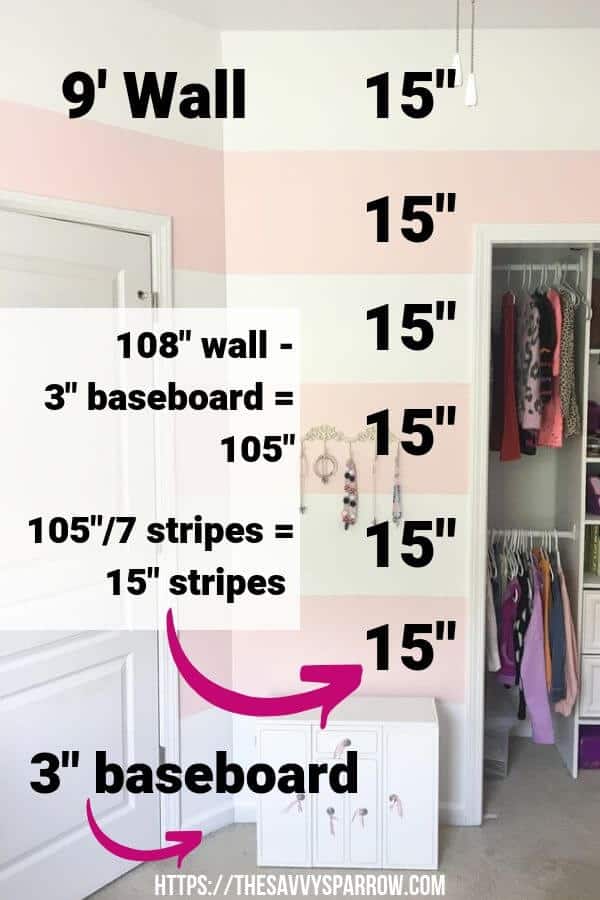
Step 3: Paint entire wall one color
The next step is to paint the entire wall one of the colors that you chose.
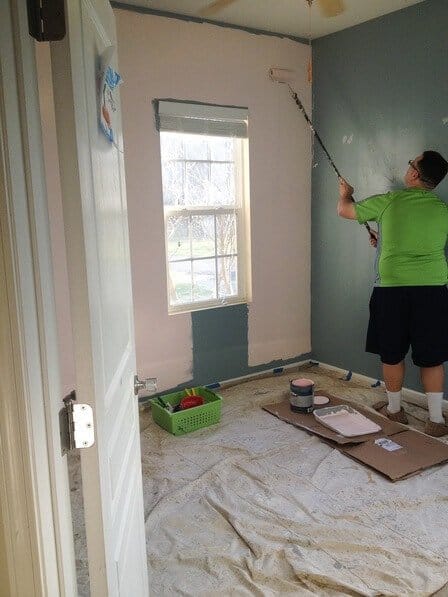
Here’s where you can learn from our mistake…
As you can tell from our after photo, we have MORE white stripes than pink stripes. So, in retrospect, we SHOULD have painted the base coat WHITE instead of pink.
This would have helped us in two ways:
First, we wouldn’t have had to be so precise about not getting paint on the ceiling and baseboards, because both are already white. If we had started by painting the entire wall white instead of pink, this would have saved us a TON of time.
Second, if we had painted all of the walls white FIRST, then we only would have had to paint THREE pink stripes. Instead, we had to paint FIVE white stripes.
Of course, my wonderful hubby likes to just jump right in to projects, and sometimes he doesn’t leave me enough time to actually plan how I want the finished room to look. Trust me, take a few extra minutes to PLAN your painted wall stripes to save yourself a bunch of time!
Step 4: Tape off painted wall stripes
I have two words for you… FROG TAPE!
Frog tape is an absolute must-have if you want to know how to paint stripes on walls. It’s not hard to miss at the hardware store… it’s bright GREEN just like a frog.
This is not our first go-around painting stripes on walls. Our first attempt was about 9 years ago when I was pregnant with our first daughter.
We decided to paint her nursery with vertical green stripes, and we used the BLUE painter’s tape…
Big Mistake!
The paint bled through the blue tape like crazy, and we had to spend hours doing touch-ups to make it look perfect. So, before we started this room, I did some research on how to paint stripes on walls, and a lot of people recommended Frog Tape, specifically for painting wall stripes.
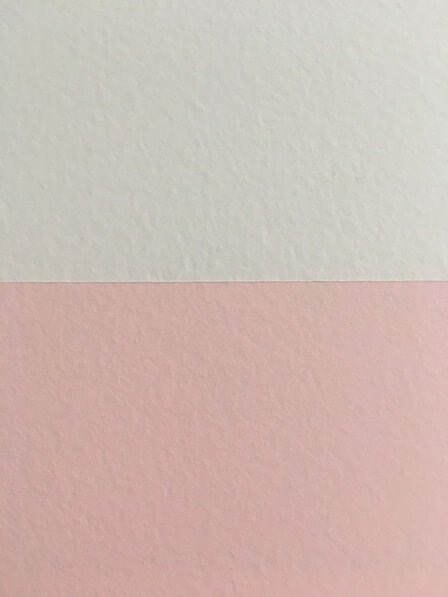
So, we tried it out, and we were AMAZED! We did not have to touch-up one single spot in the whole room! I have not bought any other brand of painter’s tape since. (And no, Frog Tape isn’t paying me to say that!)
Just look at how crisp and sharp this horizontal stripe is:
But, back to taping the stripes… After lots of trial and error, this is the best and easiest method that we found for taping straight lines:
How to Tape Horizontal Lines on Walls:
Let me start by saying that this was NOT a two-person job. My husband loathes taping for paint projects, so that’s completely my responsibility. So, trust me, if I can tape horizontal lines by myself, then you can too, Mama!
And let me apologize in advance for the awful lighting… I was so into painting wall stripes that I forgot to take decent pictures. 🙂
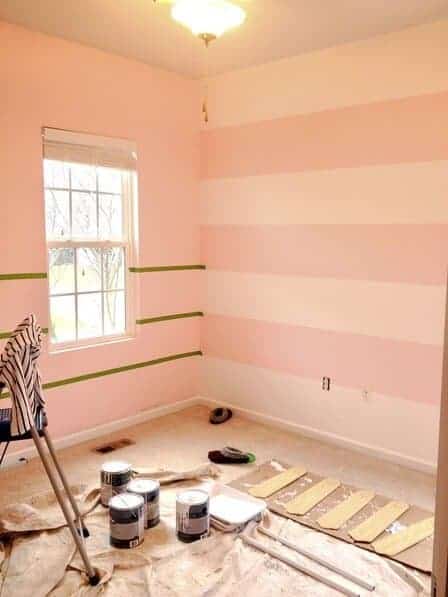
To tape horizontal lines for painting wall stripes WITHOUT A LASER LEVEL, you FIRST want to measure down from the ceiling and make small pencil marks approximately every 18 inches, starting in one corner. Measure down the height of your wall stripes that you figured out in Step 2 (for us that was 15″).
NEXT, put a 4 foot level on your pencil marks to double check that everything looks nice and straight.
THEN, start taping, lining up the edge of the tape with your pencil marks. Press down on the Frog tape by running your hand over top once it is in the correct position. I found that the pressure from my hand was enough to secure the tape, and I did not have to use a trowel or other tool.
REMEMBER, put the tape on the OUTSIDE of the stripe that you will be painting… I didn’t do this at first, and I had to re-tape two whole stripes. Not fun.
Here’s a picture to explain what I mean by that:
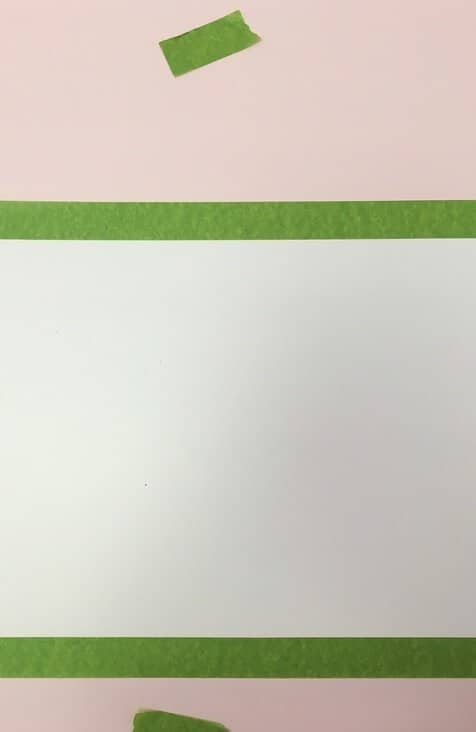
The green tape is ABOVE the 15″ mark and BELOW the 30″ mark. (I hope that makes sense… if not leave me a comment down below!) That way, you will end up with a full 15″ tall horizontal white stripe.
I also recommend that you try to NOT cut the tape as you move down the wall. I just let the tape roll hang while I moved my step stool each time. This makes it easier to get perfectly straight wall stripes.
Step 5: Paint striped walls by painting every other stripe
It helps to put a small piece of Frog Tape on the areas that WILL NOT be painted so that you don’t accidentally paint the wrong stripes.
We used a good quality roller to paint wall stripes, and it worked perfectly with the frog tape. (Here’s where the wider paint tape comes in handy!) Be sure to paint OVER the tape, but not too far over that you paint onto the adjacent stripe.
Step 6: Carefully remove tape when paint is still partially wet
This is the secret… You actually want to remove the Frog Tape BEFORE the paint dries completely! Very important!
This is how you get a perfectly smooth-edged line.
Some people suggest removing each line of tape immediately after you finish each stripe, but I was able to complete a whole wall of stripes and then remove all of the tape at once. If you’re a pretty fast painter, then this should work for you, too.
And that’s all there is to it! Now you know how to paint stripes on walls so you can start your own paint party!
And if you loved this tutorial, then check out some of these posts:
DIY Reverse Shiplap Wall for Under $75
6 Steps to Perfectly Apply Wall Decals in Straight Rows
DIY No-Sew Curtains from a Tablecloth
How to Paint Faux Subway Tile: A DIY Fireplace Makeover!


Leave A Reply!