
Organize paperwork with this easy filing system! If you’re overwhelmed by paper clutter, or you frequently lose important papers, then follow these simple steps to help with paper organization and get a HUGE list of sample categories to use when sorting your documents…
Utility bills, catalogs, coupons, insurance policies, credit card statements, birthday party invitations… The amount of paper clutter that comes into our house on a daily basis is crazy!
And without a good paperwork organization system in place (and some handy household paper organizers), that paper clutter can easily become overwhelming.
And paper clutter, just like regular household clutter, can cause major STRESS. Yup, it’s been scientifically proven by researchers at UCLA. Women, especially, are susceptible to higher levels of stress if they live in a cluttered environment.
So I give clutter the boot BEFORE it drags me down. By the way… if you’re just starting out on your decluttering journey, then I’ve got a GREAT and FREE 7 Day Decluttering Guide here!
If you want to tackle your paper clutter and start an organization system that WORKS, then let me help! I recently redid my paperwork filing system, and I’m going to share with you exactly how I did it in just a few short hours. 🙂
*This post contains affiliate links, which means if you click a link and make a purchase, I earn a commission at no additional cost to you. Read my full disclosure here.
Steps to Organize Paperwork with an Easy Filing System
Step 1: Gather organization supplies
If your budget allows, I strongly encourage starting fresh with coordinated supplies. In the past I have recycled old file folders and used mismatched hanging files, but that just contributes to the overall messy look of your files.
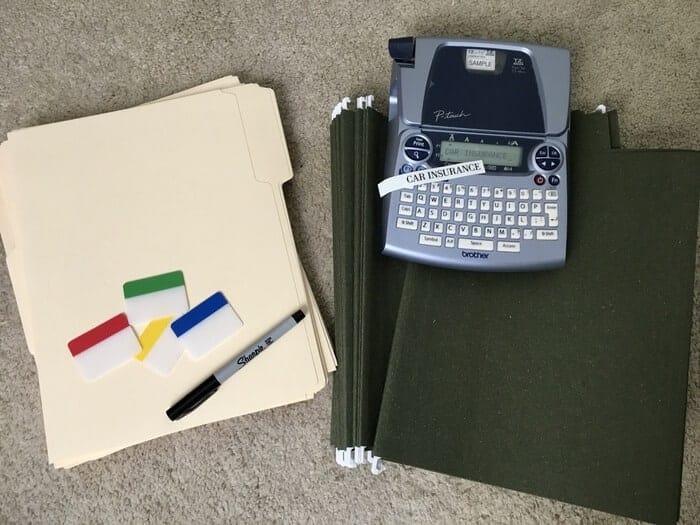
If you are going to take the time to declutter and organize paperwork, then you want the finished product to look as tidy as possible. Here are the supplies that I recommend for organizing important papers:
- Hanging File Folders – I prefer these that come in all the same color (affiliate), but you can also find them in bright multicolors. In my opinion, the dark green gives a clean, uniform look.
- Manilla File Folders
- Ultra Fine Point Sharpie – I like these Sharpies (affiliate) for organizing files if you don’t have a label maker, because the ink is dark and the ultra fine point makes handwriting look better.
- Label maker – I REALLY recommend using a label maker to organize paperwork files! I have the older model of this one (I’ve had it for over 10 years!), and I LOVE it!
Step 2: Decide where you will keep your paperwork
You will need to pick out a spot to store your paperwork, based on how much you have. If you don’t have that many papers to store, or if the majority of your important documents are in digital format, then a small plastic filing box could work for you.
If you have more papers to organize, then banker’s boxes are a great option. Banker’s boxes are more affordable than a filing cabinet, and they can easily be stored in a closet.
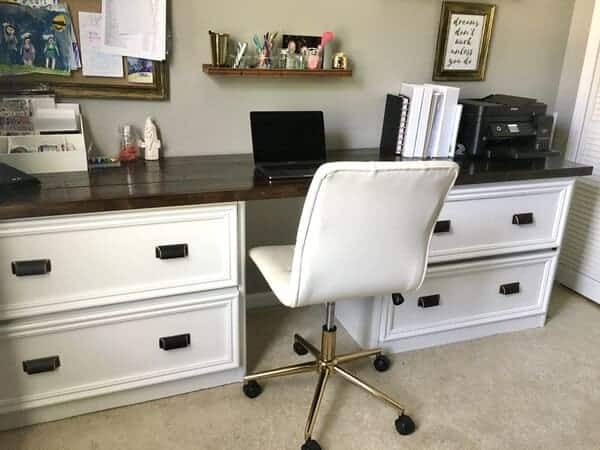
You can also DIY a desk area using short filling cabinets and a few pieces of lumber. I knew when I started planning my office space that I would need a lot of space for hanging files. My husband and I are both self-employed, so we have to store paperwork for two businesses along with our personal documents.
We found two awesome, heavy duty lateral filing cabinets on Facebook Marketplace. They were originally an ugly brown color and had plain fronts. I wanted them to look more like they belonged in a HOME rather than an office, so we painted them white and added trim and handles to the fronts.
Then, my husband just fastened together some stained 1″ x 6″ lumber to use as a desktop, and voila! I had a beautiful and functional desk with plenty of storage for our mounds of paperwork:
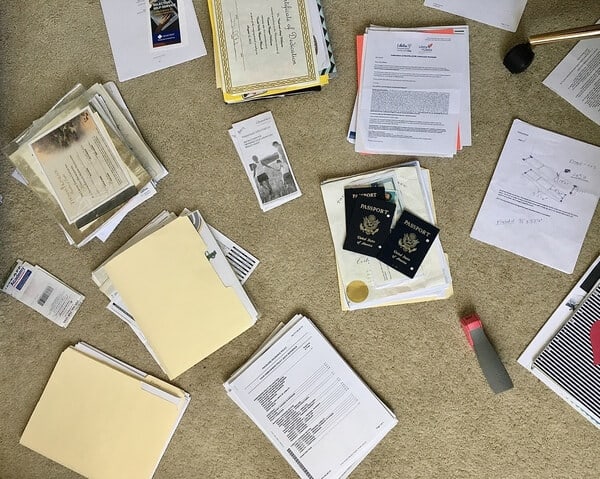
Step 3: Make a pile of ALL paperwork and important documents
Whenever I start decluttering and organizing ANY space, I like to remove EVERYTHING first. Whether I’m decluttering my kitchen counters or organizing my freezer, this is a crucial step.

The same goes with organizing paperwork. Take all of your papers out of their previous homes and stack them together in a pile. This allows you to get an idea of how much space you will need for your filing system.
Step 4: Organize paperwork by sorting into piles based on category
Once all of your important papers are together, it’s time to start sorting them into separate piles based on category. Group similar documents together in a way that makes sense to you.
I’ve got some great example categories that you can use when sorting your paperwork done below!
Step 5: Get rid of paper clutter by throwing away or digitizing papers that you don’t need
Not everything in your pile of papers will need to be kept. Some items will need to be thrown away because they are expired or no longer needed.
Here are some examples of paper clutter that you may need to throw away:
- Expired insurance policies
- Loan documents for loans that have already been paid off
- Expired coupons
- Product manuals and warranties for items you no longer own
- Car documents for vehicles you no longer own
- Receipts for everyday purchases – I throw away receipts for normal, non-tax related purchases after I enter them in my Finance Tracking planner.
- Old magazines and catalogs
- Old holiday cards, birthday cards, etc.
Organize Paperwork with these Sample Categories
Organize paperwork by broad category first. Then, determine how you need to organize those main categories into more narrow ones based on the papers that you have.
The main categories that I use to organize important papers are: Personal Documents, Financial Documents, Insurance, Medical Documents, Home Documents, Taxes, Sentimental.
When it comes time to file your papers in a filing cabinet or box, group files for main categories together so that you can find them easily.
I also like to use my label maker in a larger, all-caps font for main categories and a smaller font for the subcategories. Here’s an example:
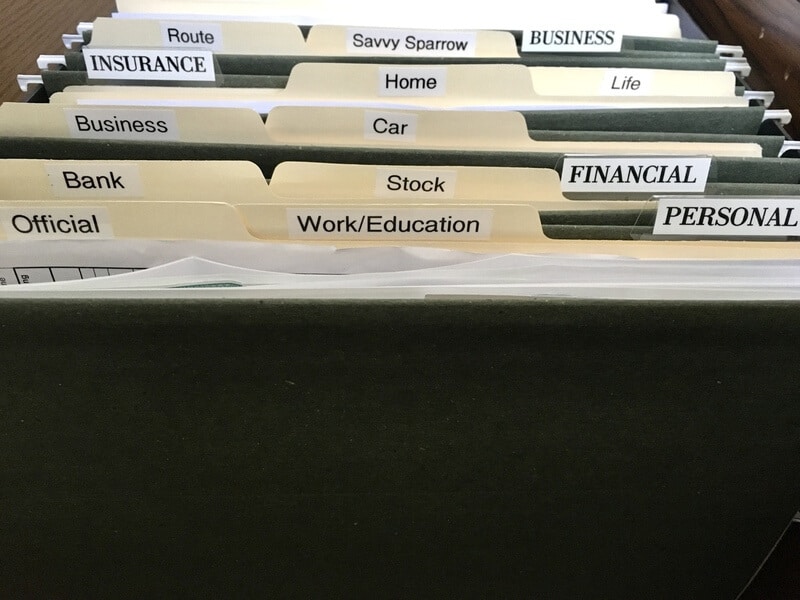
Below are examples of important papers that belong in each of the household paperwork filing categories:
Personal Documents
I prefer to keep all official personal documents together in one folder. These include:
- Birth certificates
- Social security cards
- Passports
- Marriage certificate
- Voter registration cards
- Vehicle title
- Property deeds
- Power of Attorney
- Copy of Will
In a separate folder, I keep all personal work and education documents. These include:
- Letters of recommendation
- College transcripts
- Diplomas
- Certificates for training completed
- Current resumes
Financial Documents
Financial documents can be filed in individual file folders for:
- Bank Documents – Bank statements, new account documents, business cards for bank contacts, etc.
- Stock Documents – Quarterly stock statements, stock certificates, etc.
- Investments – IRA documents, 401K documents, savings bonds, etc. If you have a variety of investments, then file them in their own labeled file folders.
- Credit Cards – Make one file folder for each credit card. Put all monthly statements, credit card terms, etc. into separate files.
*Note – Some people recommend switching to digital bank and credit card statements to reduce paper clutter, but I prefer paper statements for tax purposes. When tax time comes around, I just pull out my statements and highlight business income and expenses and personal tax deductions.
- Tax Returns – I keep 6 years worth of tax returns with each year’s necessary receipts/statements in a separate labeled file folder (“2019 Tax Return”).
*Note – Once I have my tax return completed for the year, then I file the paper copy with that year’s bank statements, credit card statements, medical bills, and receipts for tax deductions in the Tax Return file.
Insurance
Make separate folders for each type of insurance that you have. Then, file policies, claim receipts, agent cards, etc by insurance type. You should have a separate folder for each of these insurance types, if applicable:
- Car Insurance
- Life Insurance
- Health Insurance
- Home Insurance – Include a valuables inventory in here if you have one.
- Boat Insurance
- Any other insurance that you may have
Home Documents
Any documents related to your home should go in this category. Then, create subcategories based on the documents that you have, such as:
- Product Warranties
- Product Manuals – I only keep paper copies of manuals that are absolutely essential, because you can find most product manuals online in PDF format.
- Home Loan Documents
- Home Maintenance Records – I store all of my home maintenance documents in this Ultimate Home Maintenance Binder! I highly recommend that you have one of these for home resale purposes!
Medical Documents
- Medical records
- Vaccination records
- Current eyeglass/contact prescriptions
Tax Deductions
Personal Deductions
Keep a file of receipts/invoices for any personal expenses that you deduct on your tax return. These could include child care expenses, medical expenses, school expenses, etc. I find it easiest to label the top of each receipt with the proper expense category (like “Daycare” or “Medical”) before filing in my Personal Deductions folder.
Business Deductions
My husband and I are both self-employed, so we have to keep very detailed records of all of our business expenses. In order to do so, I have one file labeled with the name of his business, and one file for mine.
Within each file, I put all of the receipts for each of our businesses. Just like our personal deduction receipts, I label the top of each receipt with the proper expense category (fuel, office supplies, etc).
Sentimental
If you have kids, then chances are you’ve got a stack of papers that you’ve kept over the years for sentimental purposes. These could include:
- Sonogram photos
- Newborn foot prints
- Cards with weight/height/percentiles from visits to the pediatrician
- Art work from preschool or elementary school
- Mother’s Day cards and momentos that your kids have given you over the years
I group all of my sentimental papers in individual files based on child. For instance, I have one file labeled “Kaylee” and one “Kenzee”. I also have a separate file labeled “Family” for things like family vacations, photos, etc.
Tips to Keeping Your Important Papers Organized
After you’ve spent your time organizing your paper clutter, you want to make sure it stays tidy. Here are some tips to maintaining your paperwork organization system:
Designate spaces to keep paper clutter before it is filed.
Any and all paper clutter that comes into your house should have a designated temporary spot… and NOT on your kitchen counter!
All of our coupon mailers and retail store booklets that I want to keep for the near future go into a basket in our command center. My girls’ school papers (field trip permission slips, weekly newsletters, birthday party invitations) go into their assigned basket in our command center also.
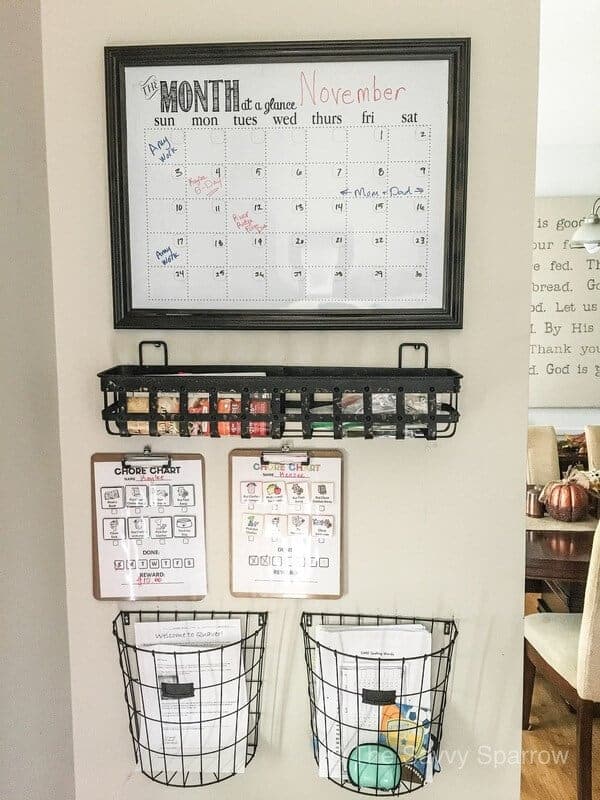
And any important documents that need to be filed go into a designated box on my desk, if I can not get around to filing them immediately.
Each type of paper clutter should have a temporary home, before it is filed in a permanent spot or is thrown away because it’s no longer needed.
Go through all incoming mail immediately.
When you get your mail each day, immediately trash or recycle all junk mail and sort important papers, bills, etc. Place bills to be paid in a designated spot and put other papers that need to be filed or stored in an “incoming” box.
Doing this will eliminate paper clutter that tends to pile up on your kitchen counters, and it will ensure that important documents don’t get lost and bills aren’t forgotten.
Make filing any new papers part of your daily routine.
Organize paperwork by taking 5 minutes at the end of the day to file any incoming papers from that day. This is where a “To be Filed” box comes in handy… If you collect all of your important papers to organize in one designated box each day, then you can quickly go through the box and organize paperwork in your files at the end of the day.
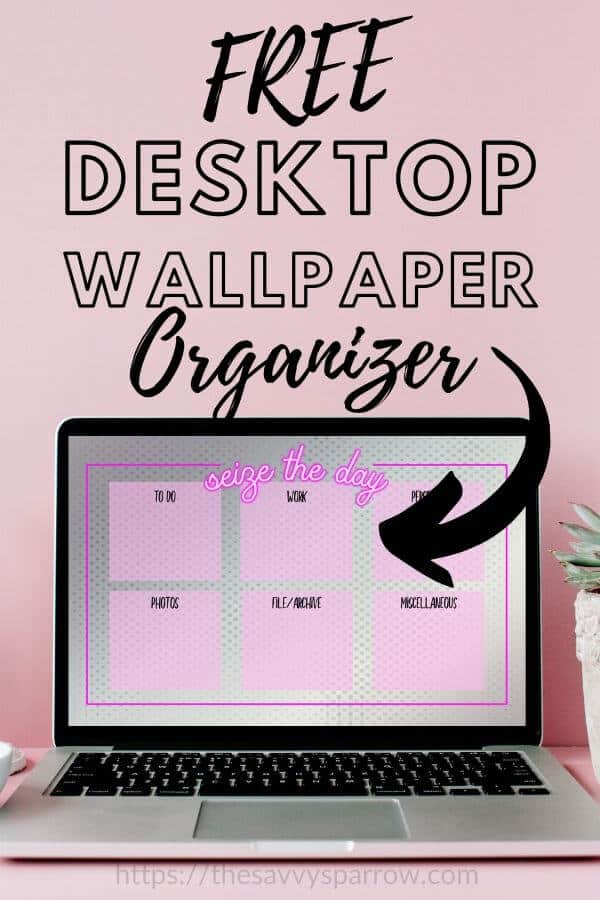
This method also works when organizing your digital files. As a blogger, I download a TON of documents every single day. At the end of each day, I take just a few minutes to move files out of my “Downloads” folder and into neatly categorized folders. Go HERE to read more about how to organize your computer files… Plus, I’ve got a FREE Desktop Wallpaper Organizer to help you!
And once you’ve got your paperwork organization system done, then be sure to check out this post for my FREE 7 Day Decluttering Challenge:

I hope you’ve been inspired to tackle your paper clutter and organize paperwork with these easy filing ideas! It may take you a few hours to complete, but imaging all of the stress and time that you will save if you’re no longer losing important documents.
I’d LOVE to know if you use these paperwork organization tips and how they work for you! Leave me a comment down below!
And happy nesting!


love these ideas.
Hi Amy,
I have not tried these out yet, but plan to soon. Thank you so much for making them available. You have so much information you should write a book. I am not organized by nature. It truly is a struggle for me. I describe myself as flexible and used to have a sign this mess is a place. Seeing all these nicely organized charts and files is very motivating. I do love to be organized and strive to be more so each year. It just does not come naturally and I often don’t know where to begin. With so many different seasons of change I have to rethink my strategy, or find a strategy that will work. Many of my changes became times of survival and who has time to organize. I know organization will help those times and I am hoping to improve. Thanks again!
Thank you for your filing and paper organizing tips and suggestions. This will help me to update and reorganize my filing system. Would like to have a printable of your outline.
very useful thanks
I really like your blog ! Great information.
thank you I really needed that it help me to fill my filing system paperwork perfectly.
I created a pdf of this if anyone wants a copy.
would like Pdf office categories.
I have not been able to print this post so I can use your suggestions on organizing my paper files. I have pin into Pinterest but would like a paper printed to set up all my categories and files.
Great article, but you should consider putting the passports and birth certificates in a fireproof safe.
Thank you! I have been stuck not knowing how best to label my files!!! This makes total sense to me and excited to get started!!! ❤️😁
Hi Deborah! So glad the paperwork organization ideas helped you! This system has really helped me keep everything organized so that I can find it super quickly. Thanks for your comment! 🙂
Wonderful article. Now I have to actually follow your plan! My Mother password away. What do I do with her paperwork? When I applied for her to get VA assistant, we needed my Father’s information (who already passed away) too. We have a family farm and had an estate plan. I also wonder what to do with family had written family ancestor’s research. Thank you for your help!
Hi Linda! I’m so sorry to hear about your Mom. I would suggest creating one file folder, 3 ring binder, or an entire “banker’s box” filing box to store all of her paperwork, depending on how much you have. That way it’s all together in case you need it in the future, but it’s also separate from your own files that you’ll probably need more frequently. You can also add a specific folder in your filing system for “Family Stuff”, “Family Documents”, or “Sentimental Documents” for your family ancestry research items. Hope that helps!
Curious which category you keep bills in (past, paid bills) or do you toss. I typically write my confirmation number for the payment (usually done by debit card) right on the bill then file away. I’m torn between making my own bills section or putting each bill in it’s category (medical, insurance, etc)
I’ve heard other people say that they only keep those paid bills until they see the payment clear their bank account. Unless it’s a tax related or credit card expense I’m not sure why you’d need to keep it.
Hi Regina! I keep my bills in folders based on what I need for taxes. For instance, I know that my utility bills are needed for my business tax return, because I’m able to deduct a percentage of them as a home office expense since I work from home. So those go in a folder titled with my business name/expenses. I only have a few medical bills/receipts during the year, so I just add those to my Personal Tax folder, just in case I am able to deduct them come tax time (usually I can’t). I agree with MJ – If you don’t need it for tax purposes, then I would just toss it so there’s less paper clutter. The main goal, though, is to find a system that you can stick to… So it needs to be easy enough to quickly file the papers that you want to keep. If that means creating a major category labeled “BILLS” (using a large hanging folder to group smaller folders together), and then creating smaller individual folders for things like “Medical”, “Insurance”, “Utilities”, etc., then by all means, go with that. 🙂
Hi Amy! I’m a single mom. Still have 2 at home. For my grown children, should I put anything to do with them in a file and give it to them? They don’t live at home, but also are not set up with their own homes. Living with S/O at family’s houses.
Also, I’m a self proclaimed paper hoarder. I have all my tax returns since 1991. 🤦🏻♀️🤦🏻♀️
Is it ok to shred them? Or should I just file in a box and put them up?
Thanks in advance,
Mel
Hi Mel! Wow… 1991! That’s a lot of paper clutter! Depending on which website you check, you’ll find that most people (including the IRS) recommend keeping either 3 years or 6-7 years worth of returns. So even if you wanted to be on the extra-cautious side, you could keep 10 years worth of tax returns and you’d still be able to shred 20 years of paper clutter. 🙂
Hi Amy,
I love your filing system. In the major INSURANCE category , are the subcategory folders (home, health, auto etc.,) put in major folder? Or are they filed in separate hanging folders? The types of insurances I have will not fit in one hanging file folder.
Thanks for your help.
Hi Marilyn! Mine are in 2 separate hanging folders, but they are still hanging next to each other. I personally find that using the all CAPS letters to label the major categories (INSURANCE, MEDICAL, FINANCES, etc) really helps to differentiate everything. For instance, I have a “Home” folder under my INSURANCE category, but then I also have a major category that is labeled HOME for things like “Manuals/Warranties” and “Projects” (receipts/notes for home projects, etc). As long as your folders are hanging in order, and you can easily see where one category ends and another begins with the CAPS LOCKS labels, then I think you’ll be fine. Hope that helps! 🙂
I like your tips. Gonna try them today!!!
Great! I hope they help you… I’ve been using this filing system for my family paperwork for awhile now, and it has really helped me to know exactly where everything is. Thanks for your comment!
I can’t wait to try your system. I have almost a room full of papers in plastic bins, some in 3 to 4 file cabinets, binders, receipts from 2005, photos, Bday and Christmas cards. It has been so stressful over the years that I have literally touched very little. I called a company to get a few hours of service. We got rid of a box of papers, some donations and now I’m stuck with a box of KEEP items I have to go through again. After 4 hours, now I have uncategorized piles and more papers and file cabinets to sort. This KEEP, DONATE, TRASH system was not enough for papers. Plus, I didn’t get a recommend system for new paper coming in, preventing this from piling up again. I have 2 Businesses, and I keep most receipts in including many non tax related ones. One question, because I have so many papers, I was going to use Banker’s Boxes as my filing system for existing and incoming papers using the High Level categories, what are your thoughts?
Waiting for reply as I’m in the same boat.
Hi! I think you can definitely use Banker’s Boxes since you have such a large volume of papers… I also have 2 businesses and a TON of paperwork to keep sorted. My husband brings home about 8 invoices every single day for his job, and we have to keep all of the invoices for about 6 months – so 8 invoices per day x 30 days per month x 6 months – it’s a lot! Since that is such a large volume for that one particular “category”, I just file them by date each day (with 7 days worth in one file folder), and then put the file folders in date order. All of those invoices are stored in a large bilateral filing cabinet drawer, which is probably the equivalent of 2 regular filing cabinet drawers. For tax-related documents and receipts for my businesses, I find it easiest to store those in a large 3″ 3-ring binder, separated by month. When I do my taxes at the end of the year, I give my accountant a spreadsheet that I make with all of my business income and expenses separated by month – and since my tax documents/receipts are already organized by month in my giant binder, it makes it easier for me. But in answer to your question, I would say definitely use Banker’s Boxes because they are cheaper than having to buy multiple filing cabinets or filing totes… I would suggest that you store your papers that you don’t have to access as frequently in the banker’s boxes, and then keep the papers that you have to get to often in an easier to reach/open filing drawer. Hope that helps! 🙂