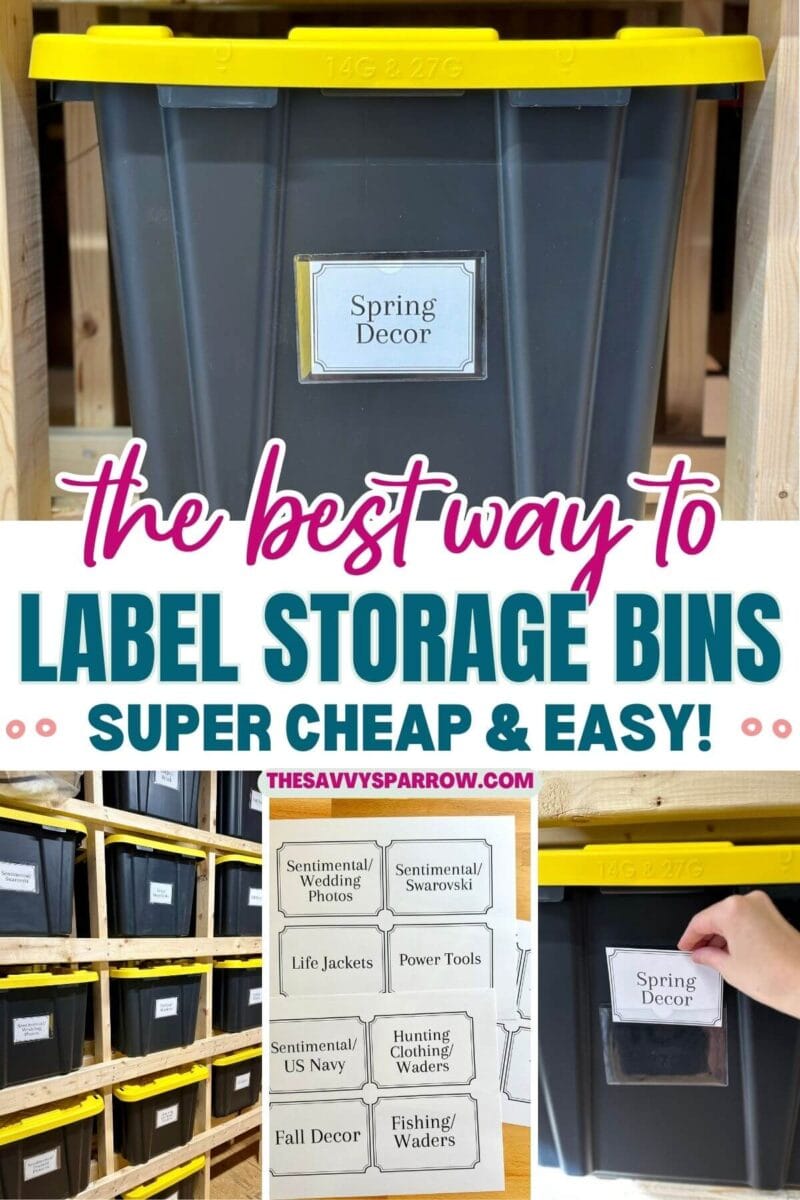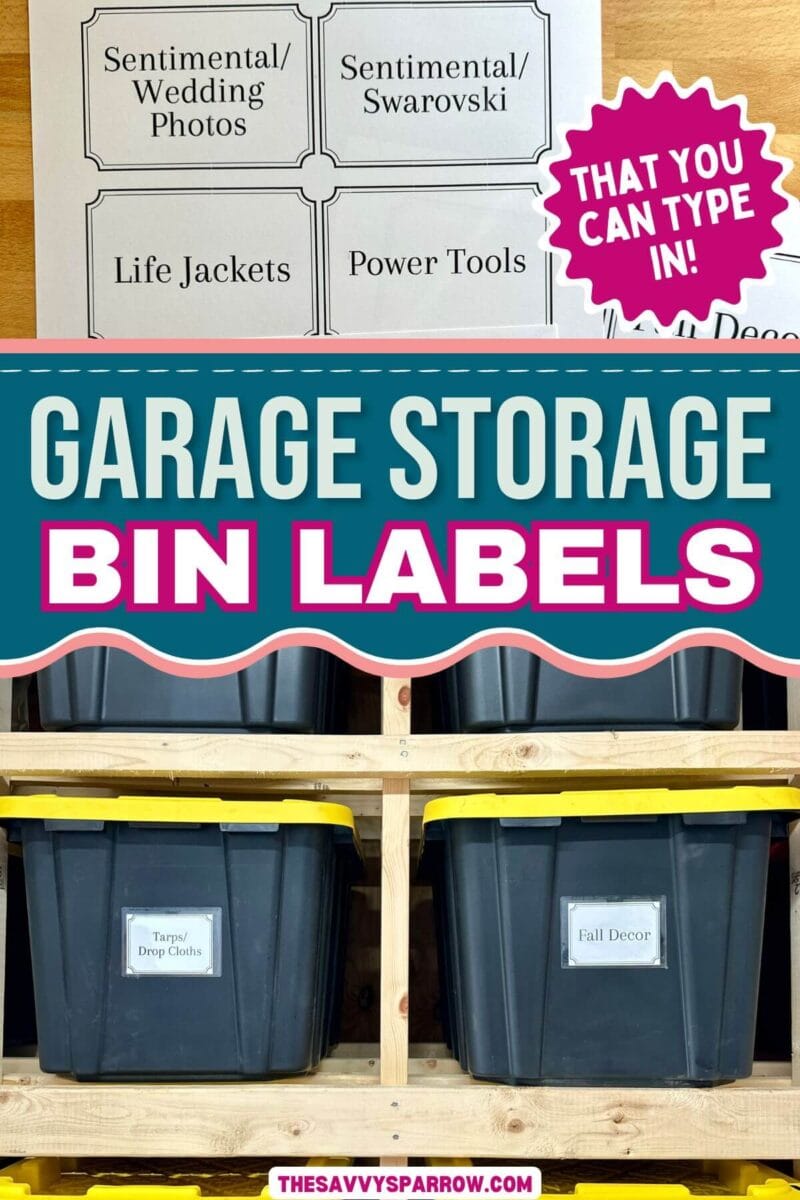
There are dozens of different ways that you can organize and label your garage storage bins, but after trying lots of different garage organization methods, this one is by far my favorite! With a few basic supplies and the free printable templates, you can create your own storage bin labels that are perfect for your garage storage totes!

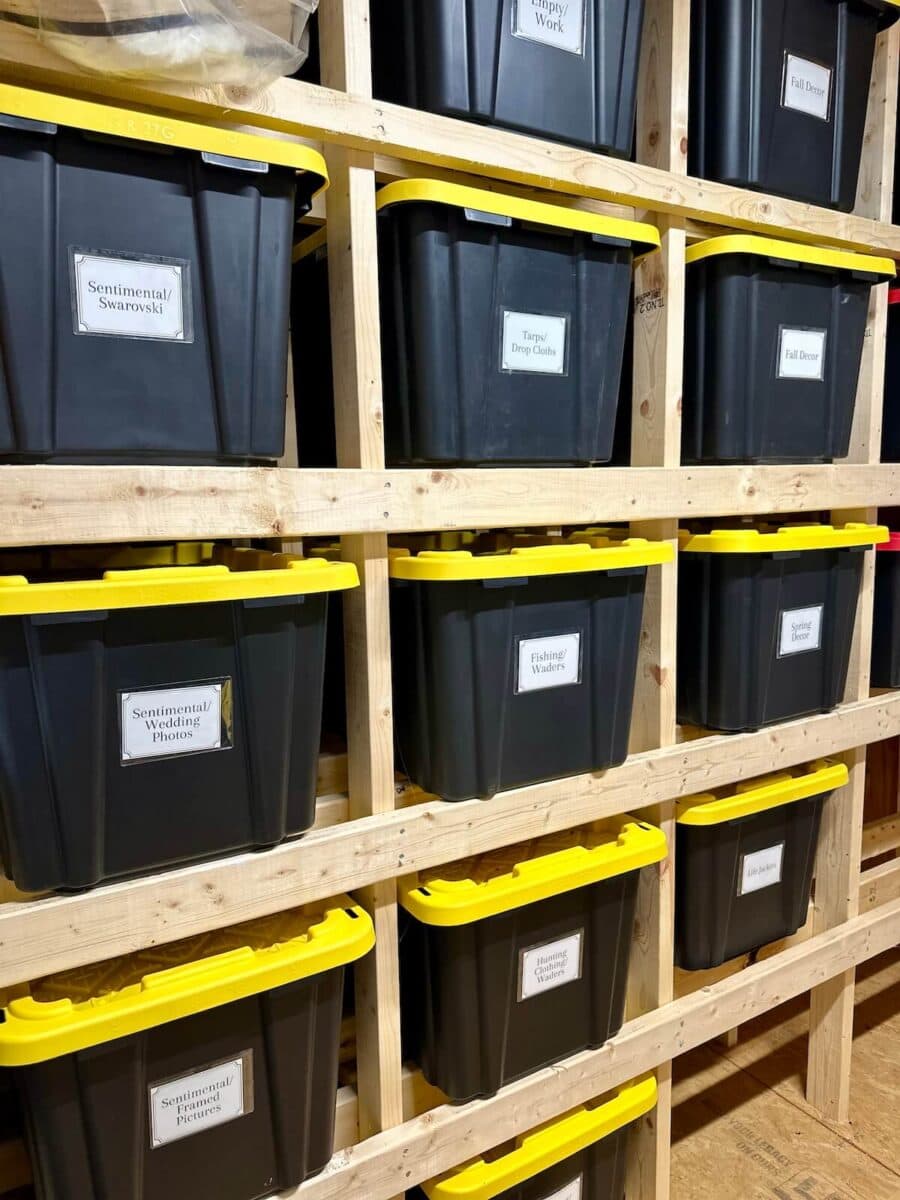
You know that moment when you’re standing in your garage, staring at 17 identical plastic bins stacked to the ceiling, trying to remember which one has the Christmas decorations versus the one with the Halloween stuff? And you’re pretty sure the camping gear is in that bin on the top left… or was it top right?
Yeah, me too. For years, I played this fun little game where I’d pull down multiple heavy bins, open them, realize they contained my daughter’s third-grade art projects (why did I keep all of those?!), put them back up, and repeat until I found what I actually needed. It was basically my cardio for the day, except way less fun than Zumba.
But here’s the thing – I finally found a labeling system that actually works. And the best part? When I inevitably change what’s in those bins (because let’s be honest, life happens), I can swap out the labels in about two seconds flat. No more trying to peel off those stubborn stickers that leave behind that awful sticky residue. No more crossing out old labels with Sharpie until my bins look like they’ve been through the wringer.
This system uses free printable labels that you can customize in Canva, print on cardstock, and slip into clear adhesive pouches. It’s genius, it’s flexible, and it’s saved me approximately 47 hours of digging through bins.
*And be sure to check out these free printable basket labels that are perfect for smaller bathroom storage baskets.
What You’ll Need:
- Free Canva account – This is the program that you’ll use to customize the labels for what’s in each of your storage totes.
- White card stock
- Clear heavy-duty adhesive pouches (index card size) – These are the ones that I use and love!
- Printer
- Scissors or paper cutter
How to Create Your Own Swappable Garage Storage Labels
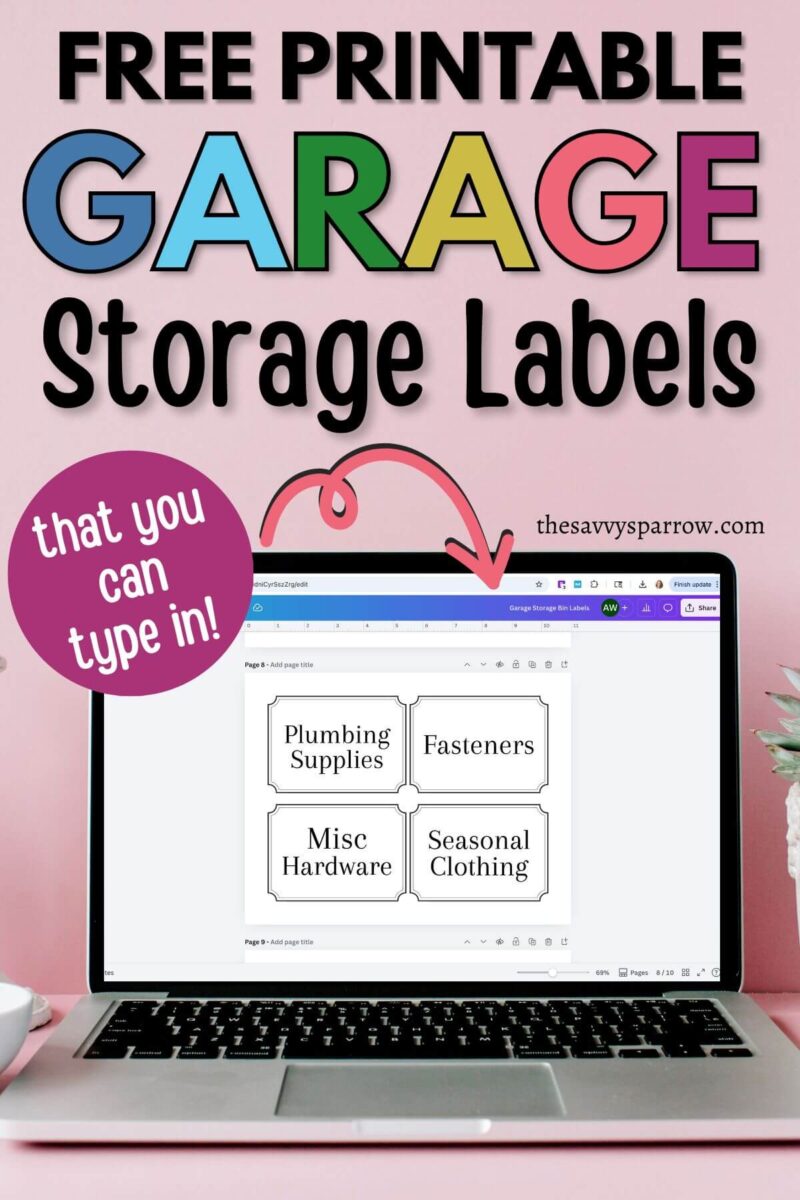
1. Customize the storage labels template in Canva
I’ve made these labels customizable using a program called Canva, so you can edit the text to fit your needs. For instance, if you want a label that says “Sentimental Items” or “Camping Gear” then you can just follow these steps to personalize:
- Click here to access the storage bin label template. Then, a new Canva window will appear. Just click “Use Template”.
- Sign up for a FREE Canva account, if you don’t already have one.
- The label template will open in Canva. To edit the wording on the labels, just click on the text that you want to change and type in your own. You can also change the font and text size if you wish.
- Once you have all of the labels customized how you want them, click “Share” and then “Download”. Change the file type to PDF Standard. Then click “Download”, and the file will download to your computer or device.
- Find where the labels PDF downloaded on your device, open it up, and select print.
*TIPS – Keep your font large and legible so you can read it easily from across the garage or on a high storage shelf. And don’t change the size of the actual rectangular labels – they are perfectly sized to fit the 3″ x 5″ adhesive pouches.
2. Print the storage bin labels on white card stock
After you’ve downloaded the storage tote labels, print them on white card stock. Don’t use regular printer paper because it’ll get all flimsy and sad-looking. White card stock gives a much neater look.
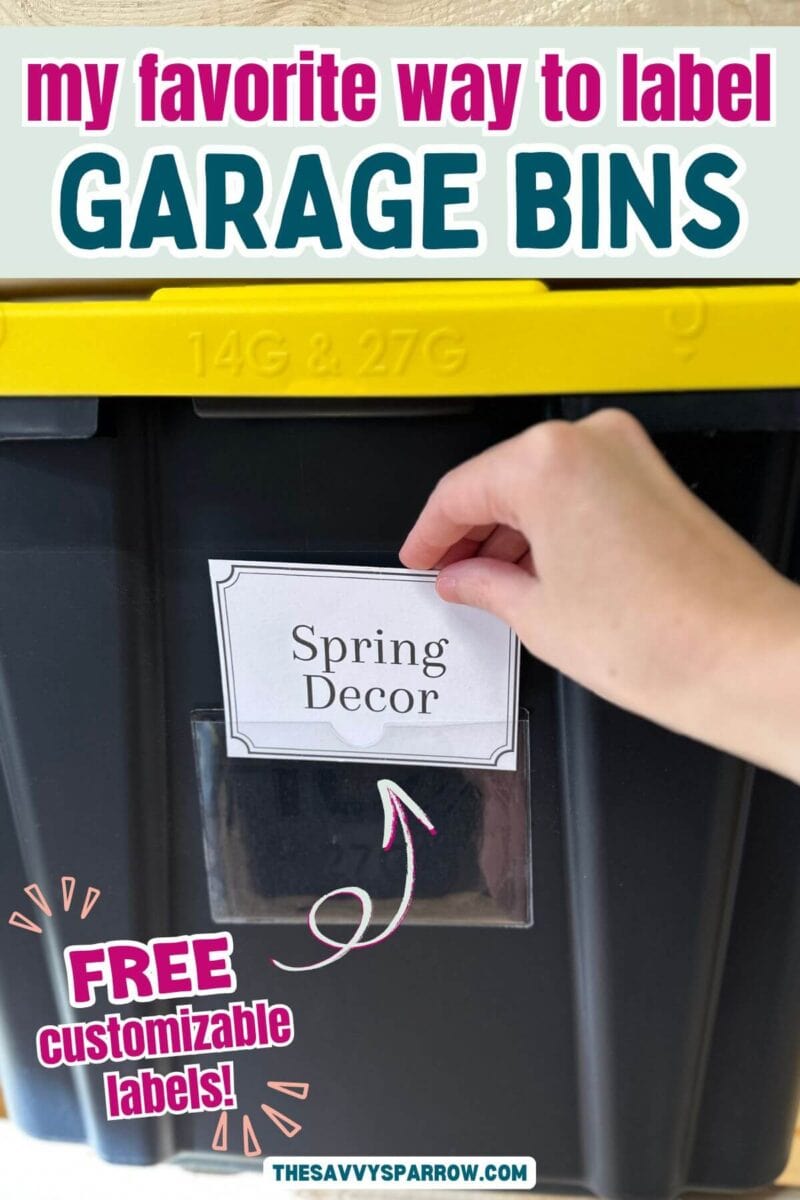
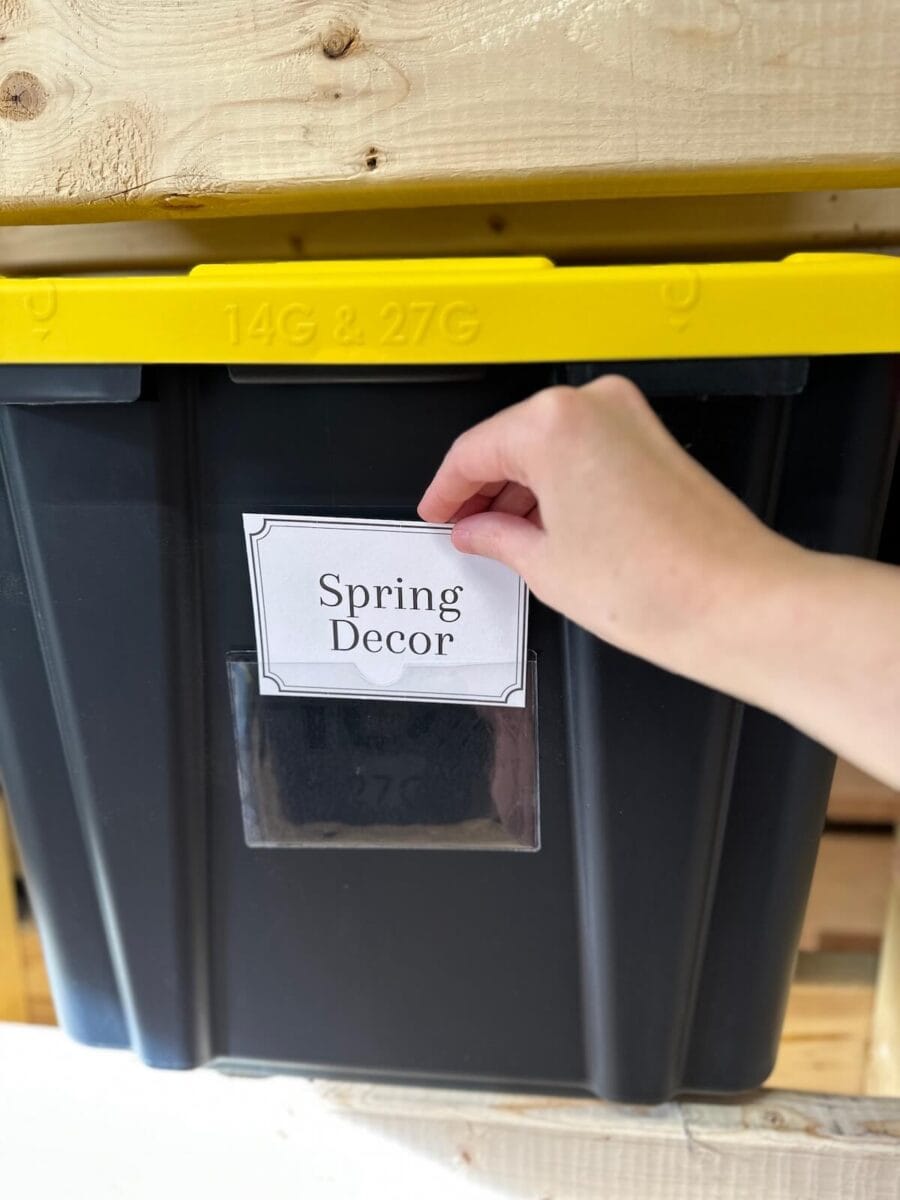
3. Attach the label pouches to your garage storage bins
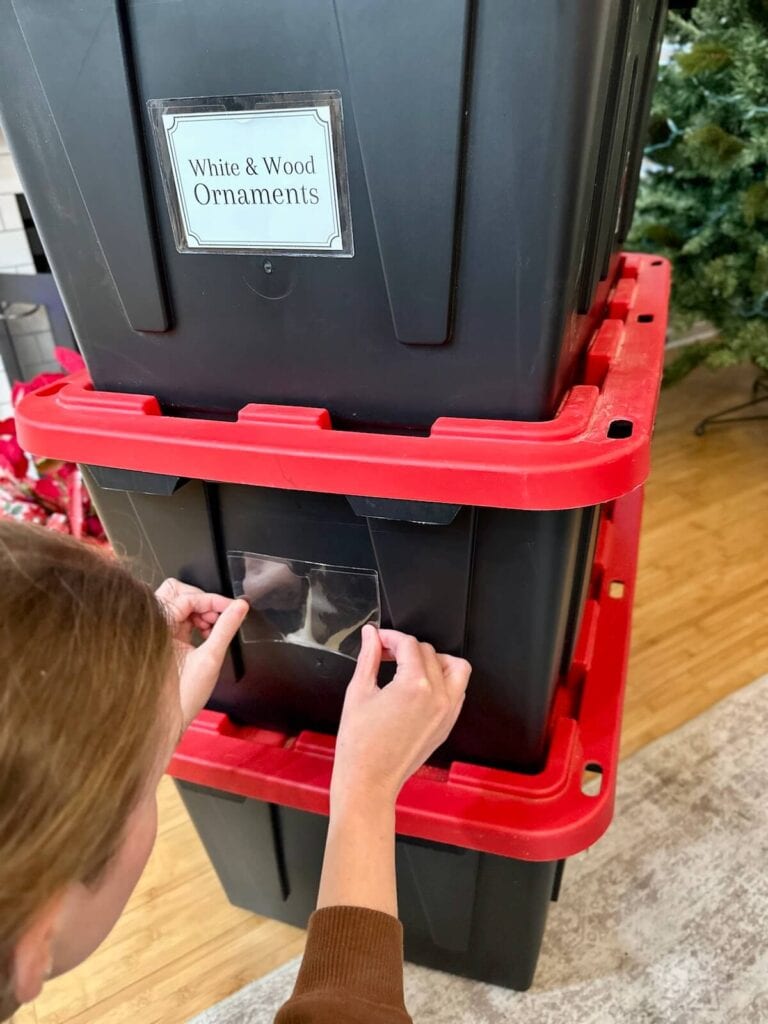
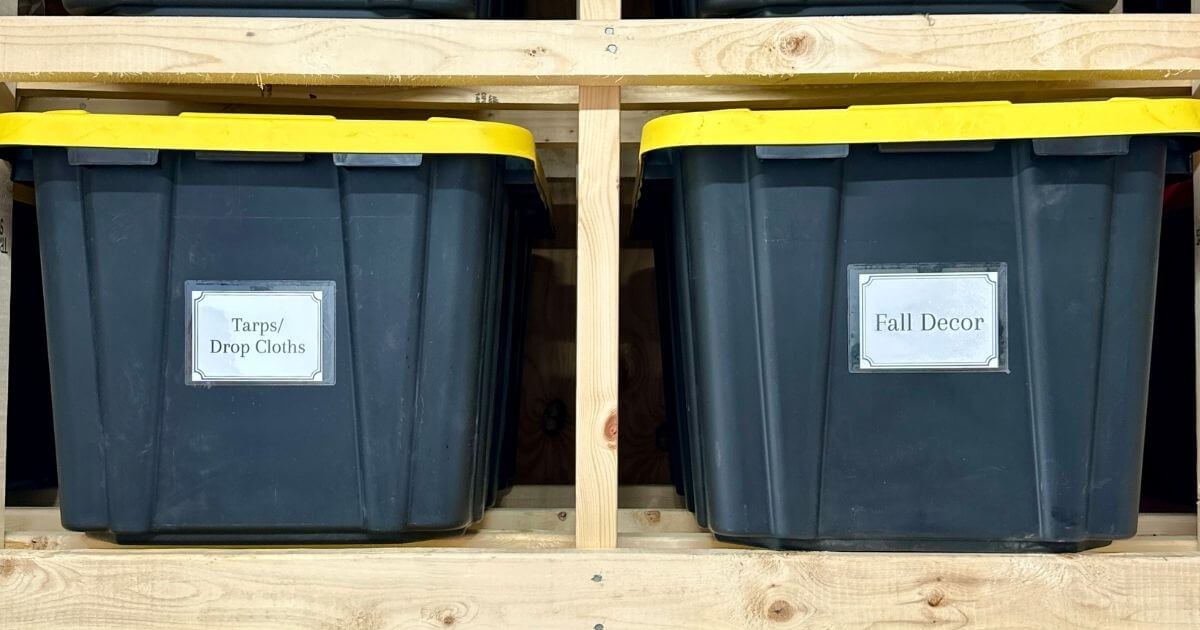
Peel the backing off your adhesive pouches and stick them to the front of your storage bins. I put mine toward the top center so they’re easy to see when the bins are stacked. Make sure the surface is clean and dry first, then just attach the sticker-backed label pouch where you want it on the storage tote.
4. Cut out and insert the labels
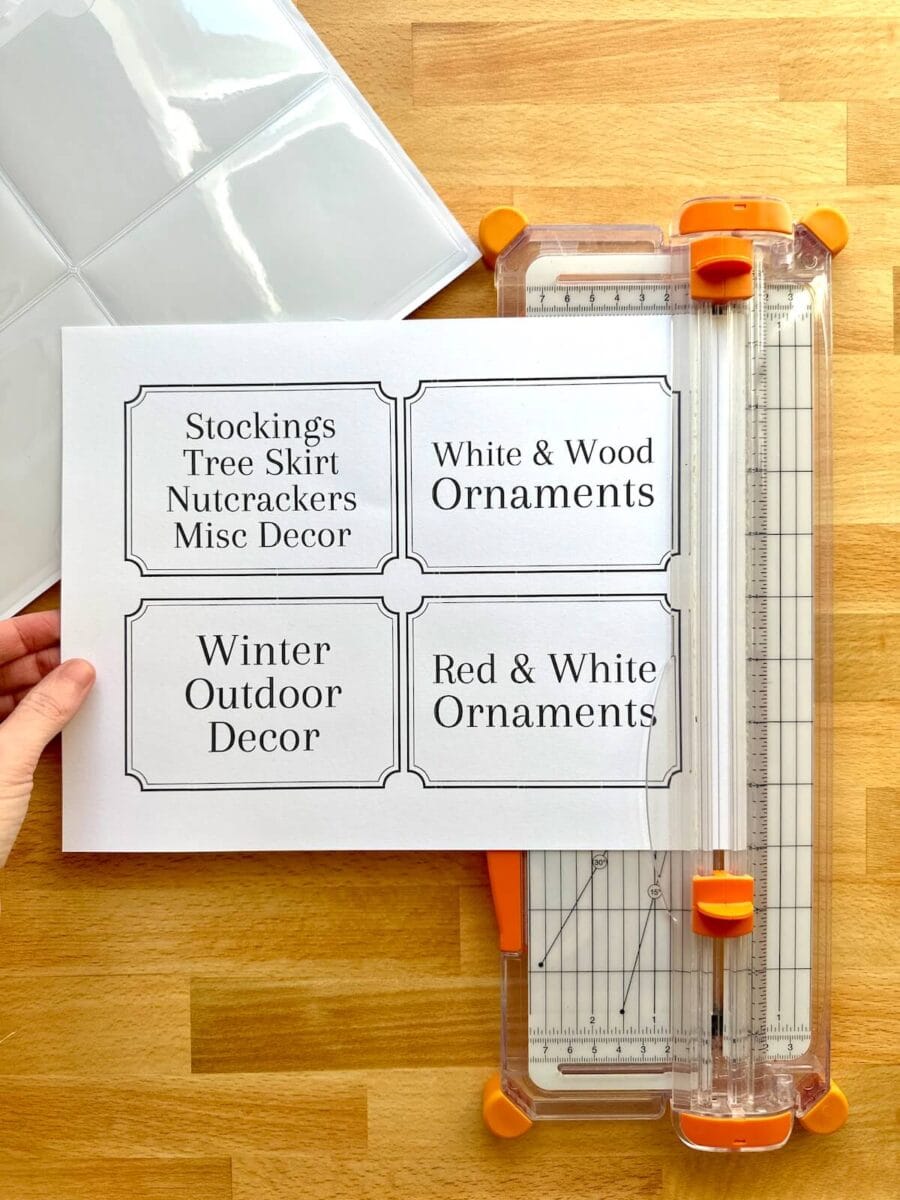
Use scissors or a paper cutter to trim your printed labels, then slide them right into the pouches. That’s it. You’re done.
Why I Love This Garage Storage Bin System
Here’s why this labeling method has become my absolute favorite:
- It’s completely flexible – When I reorganize my bins, I just print new labels and swap them out. No scraping, no residue, no crossed-out marker.
- It looks clean and professional – Those clear pouches give everything a polished look, like I hired a professional organizer.
- It’s budget-friendly – The pouches are reusable forever, and printing on card stock costs pennies per label.
- The labels don’t fade or peel – Protected inside those pouches, they stay crisp and legible. Unlike that time I used a regular marker on masking tape and everything faded to nothing within six months.
- You can get creative – Want to add cute graphics or color-code by season? Canva makes it easy to design labels that are both functional and pretty. Or just stick with basic text if you’re like me and like a cleaner look.
- It works on any type of bin – Whether you have fancy matching bins or a hodgepodge collection of plastic storage totes, these pouches stick to pretty much any plastic surface.
I hope you love these garage storage labels as much as I do! Be sure to check out some of my other favorite household label and organization solutions here:
- Free Printable File Folder Labels – These are how I label ALL of my household paperwork. So easy and my filing drawers look amazing!
- Free Printable Storage Basket Labels – These labels are great for smaller storage baskets like in your bathroom, pantry, or medicine cabinet.
- Top Shelf Closet Organization – These storage bins and free printable labels compliment each other perfectly – great for the top shelf of your master closet!
And don’t forget to PIN this post for later: