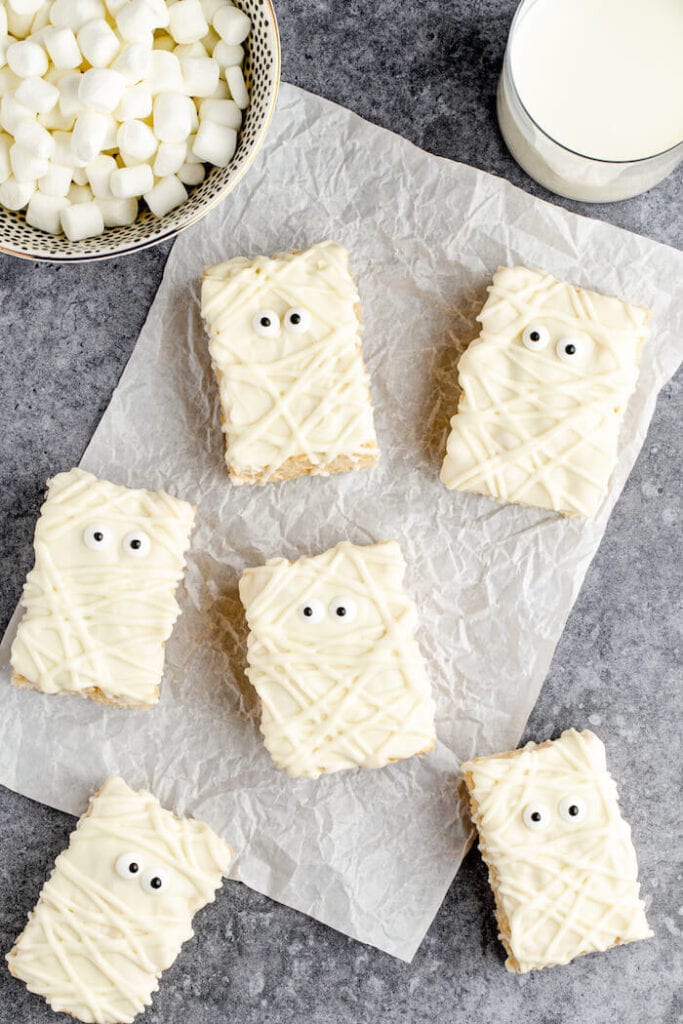
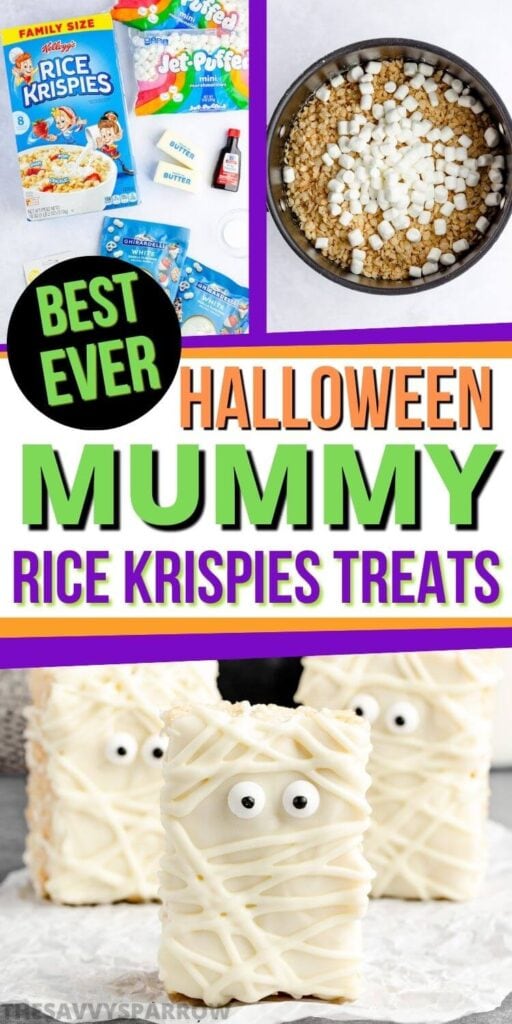
These Mummy Rice Krispie Treats are super cute Halloween desserts to make with your kids this year! Whip up a batch of the best Rice Krispies Treats and then decorate them with white chocolate to look like cute Halloween mummies!
When the holidays roll around, Rice Krispies Treats are a go-to dessert treat for our family! Not only are the no-bake crispy cereal treats super easy to make, but they can be decorated for any holiday. And you can even color rice krispie treats with food coloring to make the perfect seasonal treats.
So of course I had to whip out my best ever Rice Krispies Treats recipe once again to make these fun and cute Mummy Rice Krispie Treats for my daughters. They loved making these cute Halloween treats with me… almost as much as they enjoyed eating them!

Here’s how to make the cutest ever Halloween mummy Rice Krispies treats with your kids this year:
Ingredients for Mummy Rice Krispie Treats
These cute Halloween Rice Krispies Treats start out with your basic crispy cereal treats recipe. Here’s what you need for these easy mummy Halloween desserts:
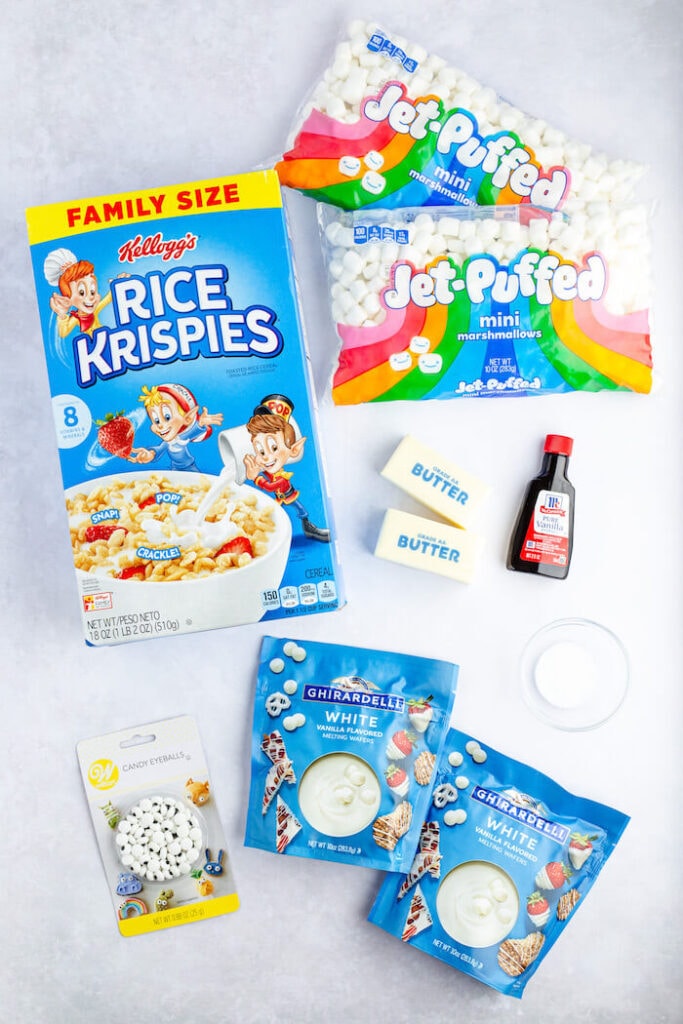
- butter
- salt
- vanilla extract
- two bags of mini marshmallows
- Rice Krispies cereal
- white chocolate melting wafers – I recommend the Ghiradelli white melting wafers.
- candy eyes
How to Make Mummy Rice Krispie Treats for Halloween
These mummy Rice Krispies Treats are super easy to make and you don’t even need to turn on your oven! Just whip up a batch of crispy cereal treats and decorate for Halloween. And if you want to make these Halloween treats even easier, then you can use store-bought rice krispie treats and just skip to the decorating part!
Here’s how to make these cute mummy Halloween treats:
Step 1: Make a batch of regular Rice Krispies Treats.
These Mummy Rice Krispie Treats start with my favorite ever Rice Krispies Treats recipe. The original recipe for Rice Krispies Treats that you can find on the back of the cereal box is great, but you can make it even better by adding some extra butter and marshmallows.
After all, if you ask your kids, there’s no such thing as too many marshmallows!
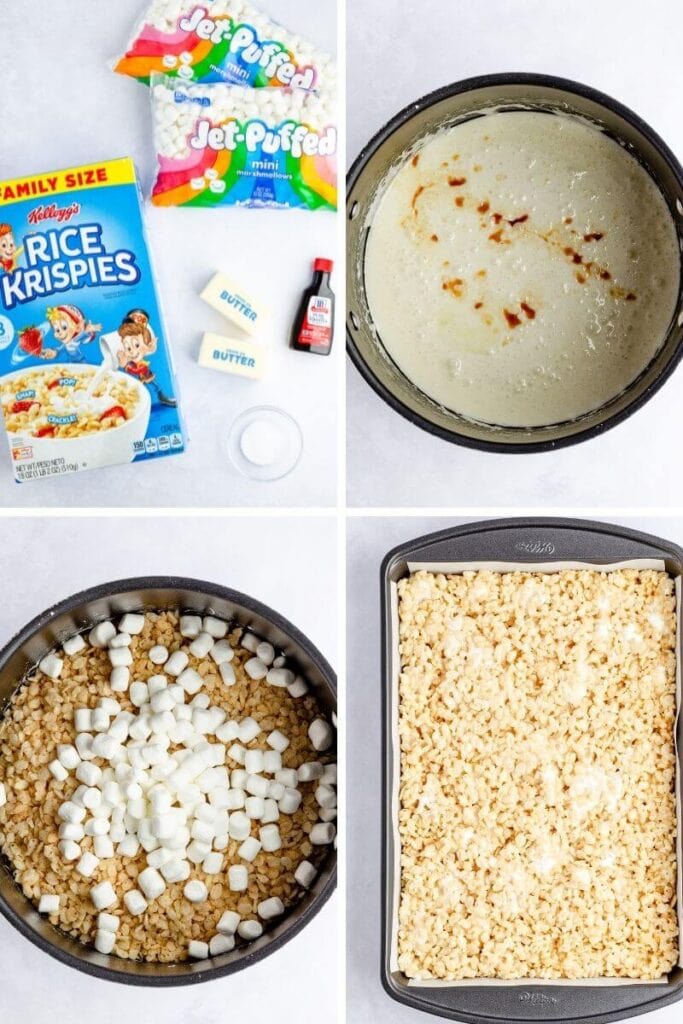
Start by melting the butter in a large pot on the stovetop. Then when the butter is melted, stir in the salt and all of the marshmallows, except for one cup that you will add later. Let the marshmallows melt into the butter as you stir frequently.
Then, remove the pot from the heat and stir in the vanilla extract. Add the Rice Krispies cereal and the reserved one cup of marshmallows and fold gently until everything is combined.
Pour the butter, marshmallow, and cereal mixture out into a 9×13 baking pan that has been lined with parchment paper. Then, lightly press down on the cereal treats to spread them out evenly in the pan. The secret is to not overpack the pan… You don’t want to press down too hard on the Rice Krispies treats or get them too thin, because then the treats will be harder when they set.
Once your cereal treats mixture is spread nicely in the pan, just leave it out on the counter to set for at least one hour. You definitely don’t want to refrigerate the Rice Krispies treats, because if you do then they’ll harden too much and be difficult to eat.
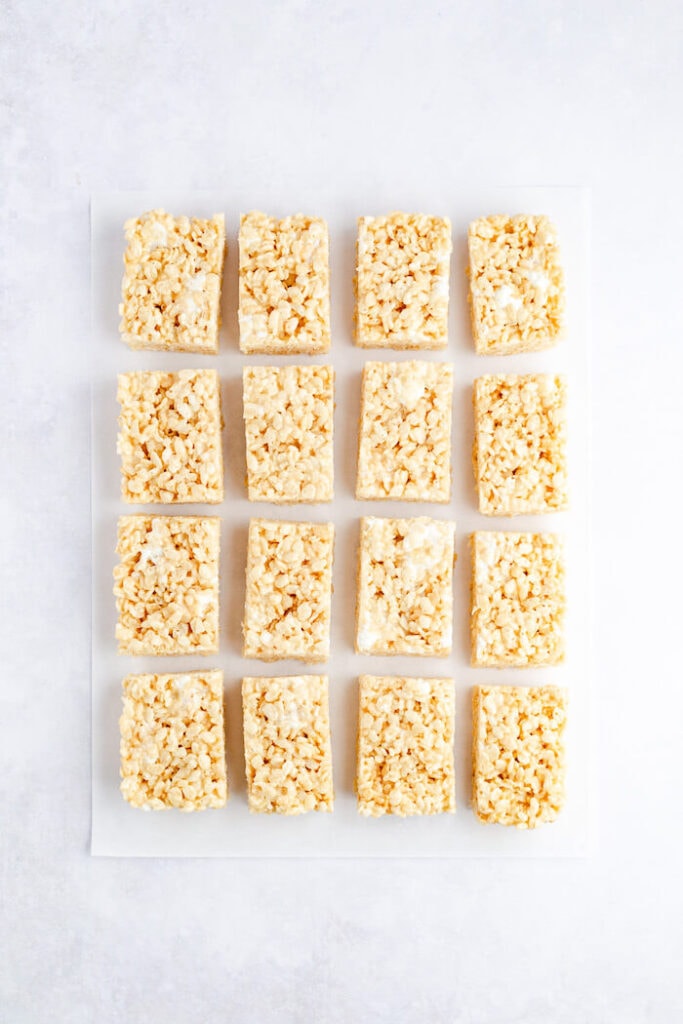
Step 2: Cut the Rice Krispie cereal treats into squares.
Once the Rice Krispie treats have had a chance to set up, it’s time to cut them for your mummy Halloween treats.
I cut mine into small rectangles, and I was able to get about 16 individual cereal treats out of the 9×13 pan:
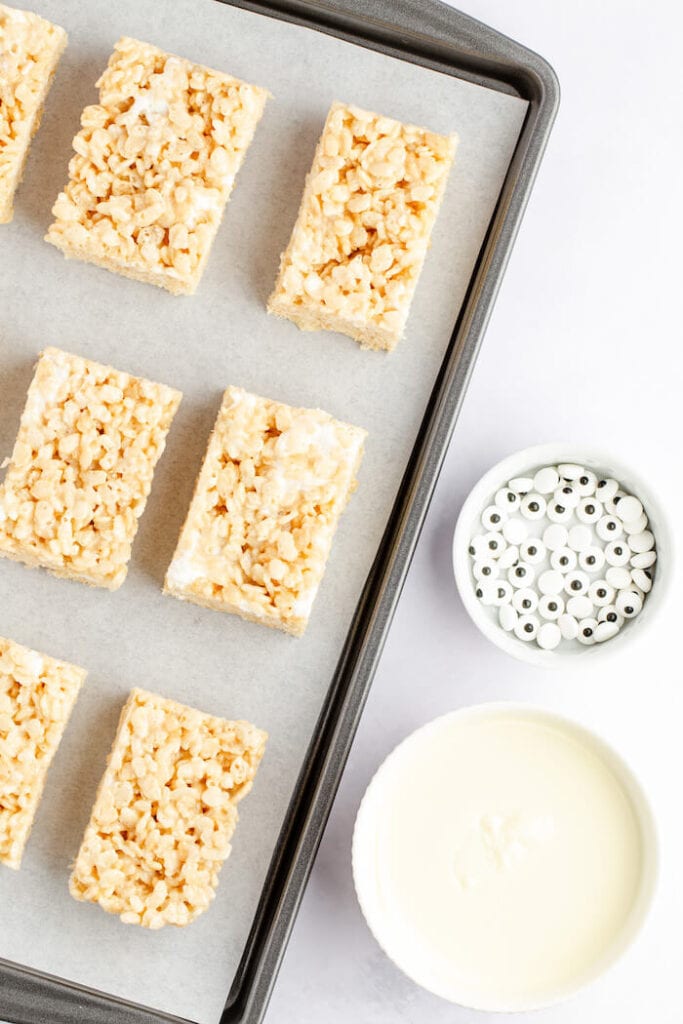
Step 3: Melt white chocolate melting wafers for the Mummy Rice Krispie Treats.
Melt the white chocolate melts according to package instructions. If you’re using the Ghiradelli white melting wafers that I recommend, then you will simply place them in a microwave safe bowl, heat on low for 30 seconds, then stir. If the wafers are not melted all the way, then heat them for an additional 15 seconds and stir again, repeating this process until the wafers are fully melted and smooth.
Just be sure that you don’t overheat the Ghiradelli wafers… that’s why it’s best to microwave in 15 second intervals.
Step 4: Decorate the Rice Krispies Treats to look like Halloween mummies.
After you’ve cut the Rice Krispies treats into individual portions and you’ve melted the chocolate, it’s time to decorate your Halloween Rice Krispie Treats!
First place the treats on a parchment paper lined baking sheet with about 2 inches of space in between them… You want to have enough space to be able to overlap the white chocolate drizzle so it looks like gauze or bandages on the Halloween mummies.
Then, spread about one tablespoon of the melted white chocolate on top of each Rice Krispie treat. While the chocolate is still wet, add two eyes to each treat. Allow that first coat of chocolate to set a bit before adding the white chocolate mummy bandages.
Next, add the melted white chocolate to a piping bag or a Ziploc bag with a small tip cut into the corner. Drizzle the white chocolate over top of the Halloween Rice Krispies treats in multiple directions, but don’t cover the candy eyes, like this:
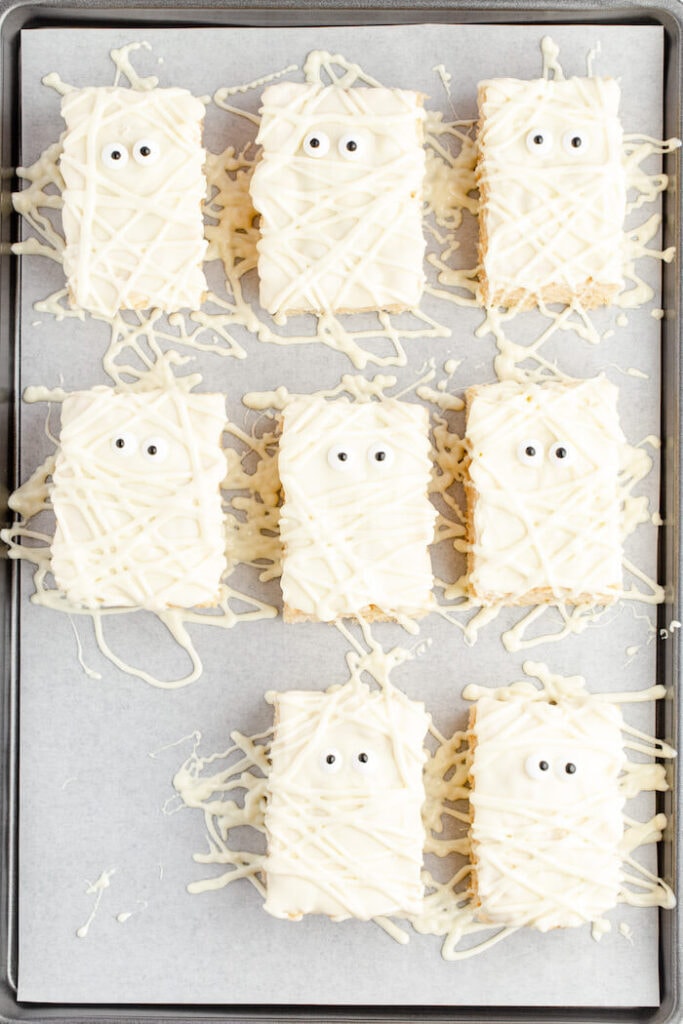
The mummy Rice Krispies treats look best when the chocolate drizzle is slanted diagonally at different angles. You may need to heat more chocolate to get the desired look for your Halloween mummies.
After you’re done decorating the mummy treats, let them sit out for another 30 minutes so the chocolate has a chance to harden. Then, you can peel them off of the parchment paper and serve!
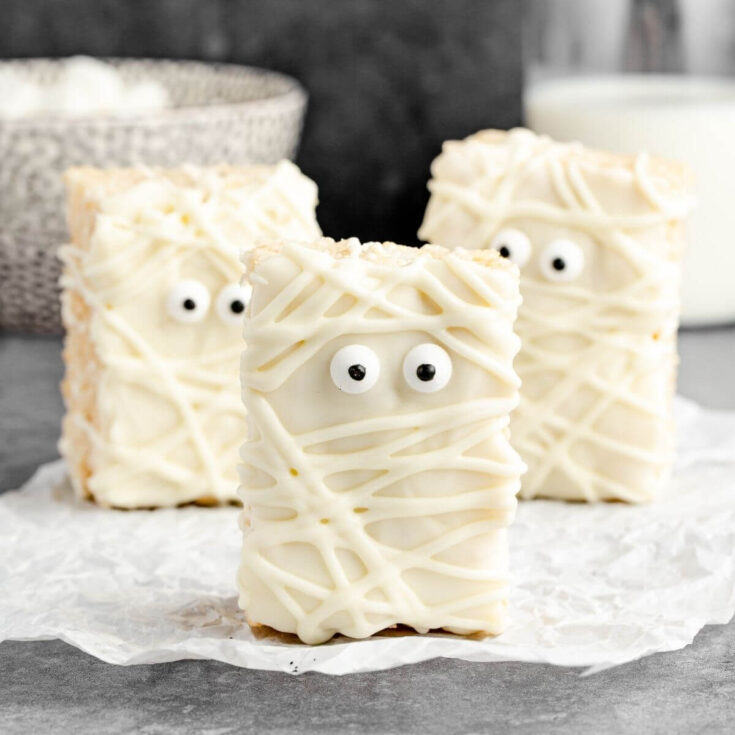
Aren’t these Halloween rice krispie treats so cute?!
They would look perfect on a Halloween dessert table, or you can make a batch for your kids’ Halloween parties at school!
FAQ’s and Tips for Making the Mummy Cereal Treats
How should I store the Mummy Rice Krispie Treats?
To keep your mummy Halloween Rice Krispie Treats fresh, store them in an airtight container at room temperature. You don’t want to refrigerate your crispy treats because then they will be too hard to enjoy.
How long will the Mummy Rice Krispies Treats stay good?
As with any Rice Krispie Treats, these mummy cereal treats are best eaten fresh. They’re best when enjoyed within 1-2 days of making them.
If you need to, box some up and deliver to your neighbors for fun Halloween gifts! You could even include some of these homemade Halloween treats in a “You’ve Been Boo-ed” gift box!
How much white chocolate do I need to decorate the Mummy Cereal Treats?
How much white chocolate you need really depends on how you’re going to decorate your mummy desserts. You have two options: covering the top of the treats completely in white chocolate and then drizzling on the “bandages” or just doing the strips of white chocolate bandages without covering the entire bar first.
If you’re just going to drizzle on the chocolate gauze or bandages over the Rice Krispies then you’ll probably only need one bag of white chocolate wafers. If you’re covering the Mummy Rice Krispies like I did and then decorating them with extra chocolate bandages, then you’ll need almost two bags of white chocolate melts.
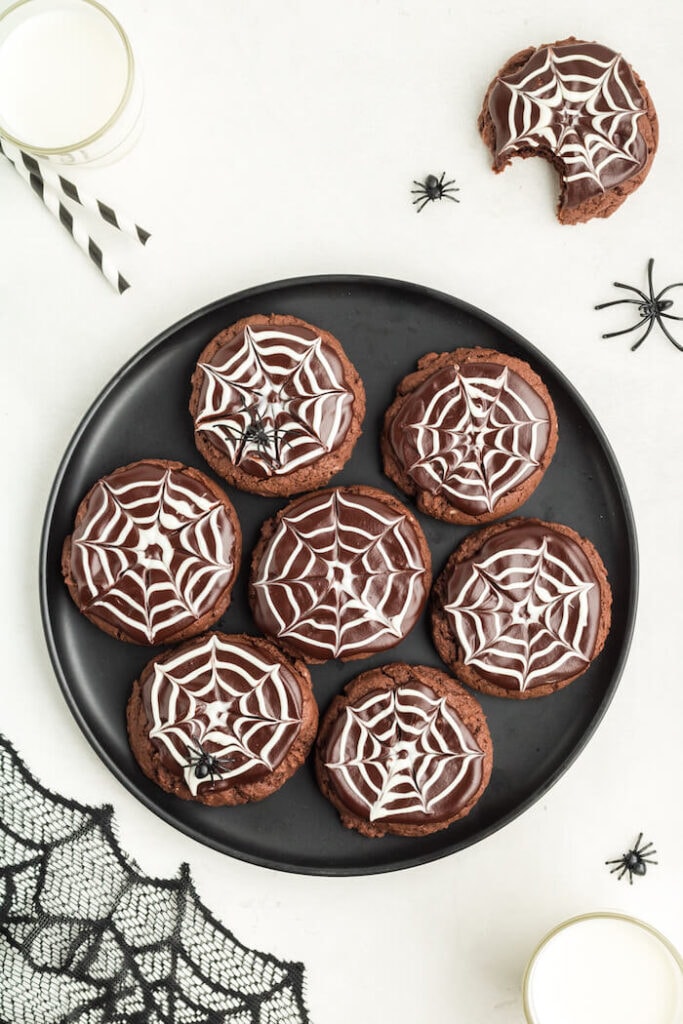
With the leftover white chocolate, you can make these cute spider web cake mix cookies!
The black design of the candy eyes smeared… How can I fix it?
If you haven’t worked with the Wilton candy eyes before, then you may not know that the black part of the candy smears easily. To help prevent this you can use tweezers to place the eyes on the mummy cereal treats, and be sure that your hands are clean and dry before decorating your Halloween treats.
If the black does smear, then use a slightly damp Q-tip to clean it off the candy eye.
I don’t have a piping bag… Can I still make these Halloween treats?
Absolutely! After melting the white chocolate wafers, you can simply use a spoon to drizzle on the mummy bandages or add the chocolate to a Ziploc bag with the corner tip cut off. If you’re using the spoon drizzle method, then I recommend only adding a small bit of chocolate to the spoon at a time to better control the thickness of the white candy bandages.
I can’t find candy eyes… What else can I use for Mummy Halloween treats?
Mini chocolate chips or even decorating icing would work well for the mummy eyes also. Or, check Amazon for the Wilton candy eyes.
Hope you guys LOVE these easy Mummy Rice Krispie Treats… and I hope that your kids love helping you make them, too!
Check out some other Halloween ideas here:
- You’ve Been Booed – Printable Tags for Booing Neighbors this Halloween!
- Easy Halloween Poke Cake Cupcakes with Orange Buttercream Icing
And don’t forget to PIN this post for later:
Mummy Rice Krispie Treats Recipe
Use this printable recipe card to print my best ever Rice Krispies Treats recipe and add it to your recipe binder:
Mummy Rice Krispie Treats
These Mummy Rice Krispie Treats are a fun Halloween treat to make for your kids! Make the best rice crispy treats with extra marshmallows and more butter, then use white chocolate to decorate them to look like mummies!
Ingredients
- 9 Tablespoons butter
- 1/8 teaspoon salt
- 1 teaspoon vanilla extract
- two 10 oz bags mini marshmallows, divided
- 9 cups Rice Krispies cereal
New Group
- For the Mummy Topping:
- 2 bags white chocolate melts
- 1 package candy eyes
Instructions
- Line a 9x13 inch baking pan with parchment paper. Set to the side.
- In a large pot over medium heat, melt the butter. Once the butter is melted, add salt and stir to combine.
- Set 1 cup of mini marshmallows to the side to save for later. Then add the rest of the marshmallows (2 bags minus the 1 reserved cup) to the melted butter. Stir continuously until marshmallows are melted.
- When marshmallows are melted, remove the pot from the heat and quickly stir in the vanilla extract.
- Gently fold in the Rice Krispies cereal and the 1 cup of reserved marshmallows until well combined.
- Turn the Rice Krispies treats mixture out into the prepared pan and spread out into an even layer. Don't press too hard or overpack the pan or the treats will become hard once set. Set the Rice Krispies treats out on the counter for at least one hour. Do not refrigerate.
- Once the treats are set, cut them into equally sized bars and place them on a baking sheet lined with parchment paper with about 1-2 inches of space in between each bar.
- Pour the first package of white chocolate melts into a microwave safe bowl and microwave according to package instructions. Do not overheat.
- Spread about 1 tablespoon of melted chocolate on each bar. Immediately add two candy eyes before the chocolate has a chance to set. Repeat until all mummy Rice Krispie treats have eyes.
- Microwave the second package of white chocolate melts if needed. (You may have enough chocolate leftover to make the bandages.) Pour melted white chocolate into a piping bag. Snip the tip of the piping bag to your desired thickness for the mummy bandages.
- Drizzle the white chocolate haphazardly across each bar, right to left and diagonally, to make the mummy bandages. Do not cover the eyes.
- Once all of your mummy Rice Krispie treats are decorated, allow them to sit out on the counter for about 30 minutes for the chocolate to harden. Then remove them from the parchment paper and serve. Enjoy!
Notes
- Use the back of a wet spoon or fork to gently press the Rice Krispies treats mixture into the corners of the prepared pan. You can also use your wet fingertips, but it may be more messy.
Nutrition Information:
Yield:
16Serving Size:
1 barAmount Per Serving: Calories: 289Total Fat: 10gSaturated Fat: 6gTrans Fat: 0gUnsaturated Fat: 3gCholesterol: 19mgSodium: 187mgCarbohydrates: 49gFiber: 0gSugar: 28gProtein: 2g
Nutritional information is provided as a courtesy and is an estimate only. Different online calculators may calculate nutritional information differently. Also, the addition of optional ingredients and varying brands and products may change the information. For the most accurate data, you should calculate the nutritional information with the actual ingredients that you use.