Need a gift for that person on your list that’s impossible to buy for? Say “Merry Christmas” with this DIY Christmas candy bar poster! The perfect gift for Dad, grandparents, co-workers, or anyone with a sweet tooth!
Okay, these adorable candy gram posters have officially become my go-to gift! I’ve made a birthday candy poster for my Grandpa’s 94th birthday gift, and I gifted my husband one that says “Best Dad Ever” for Father’s Day. So when I was trying to figure out what to get my younger brother this holiday, I immediately thought to make a Christmas candy poster! Probably because I recently observed him eating three different candy bars at the last school basketball game.
Not only is this Christmas candy sign easy to make with a tri-fold project board and the printable candy bar sign template, it’s the perfect gift to give the person on your list who seems to have everything.
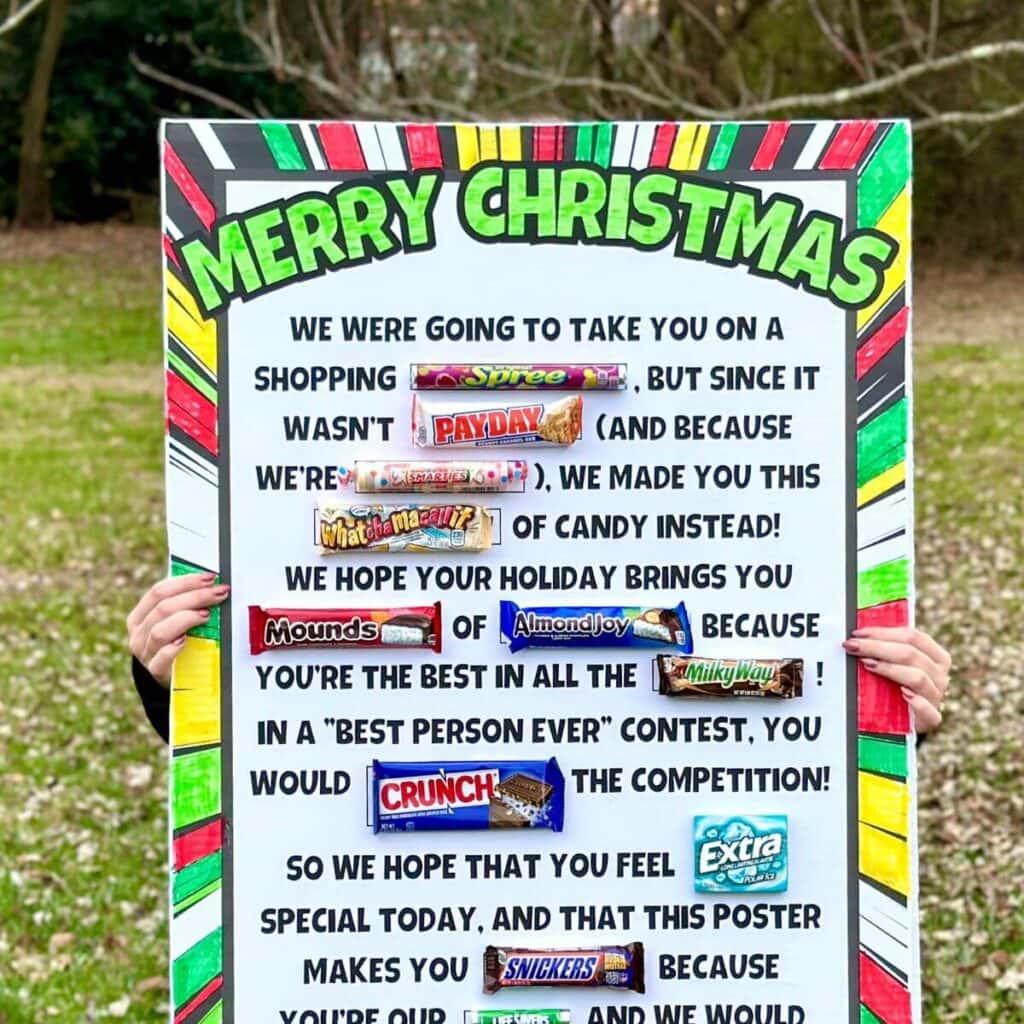
This giant 24″ by 36″ poster template holds a huge variety of candy bars, hard candy, and gum, and the fun sentiment is full of candy puns that will make everyone “Snickers”!
Here’s how to make your own Christmas candy posters for gifts this year:

Supplies Needed
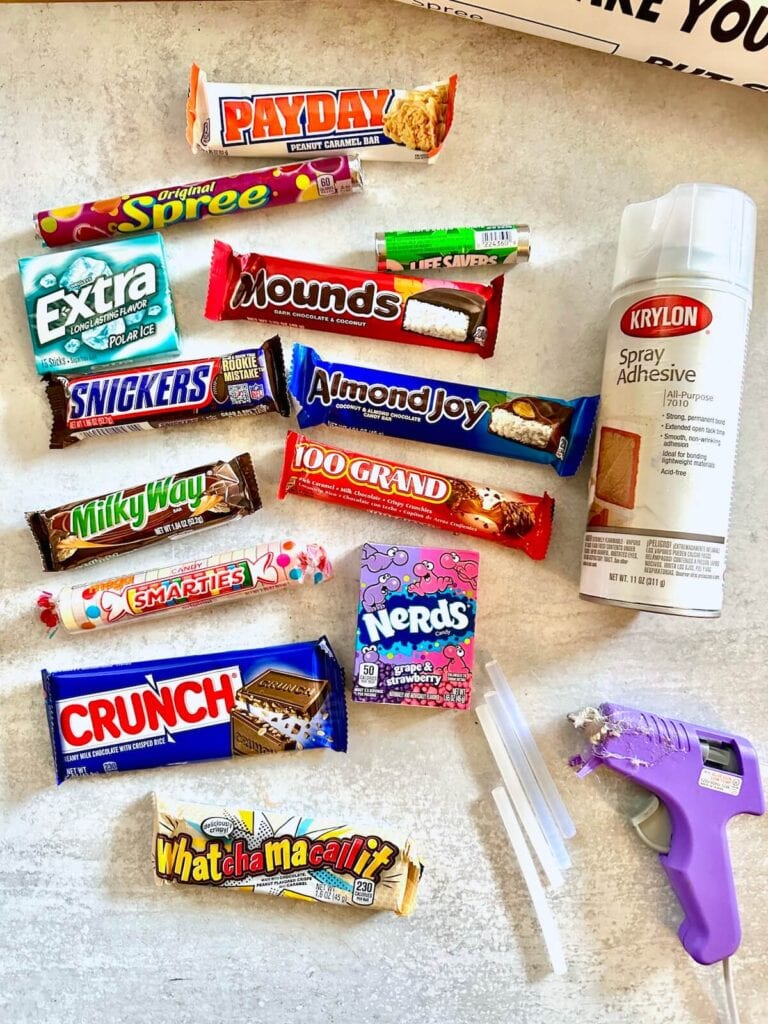
After making six different candy bar posters for different gift-giving occasions, I’m kind of a professional at it now. Here are the supplies that I use for every candy bar poster:
- cardboard tri-fold project board – The printable template prints as a 24″ x 36″ poster, so you’ll need that size cardboard or foam board as the base. If you use a regular thin poster board, it will bend and fold with the weight of all of the candy bars. The most economical option that I’ve found is a tri-fold cardboard project board from Walmart or an office supply store. You can cut off the two side panels for the perfect sized board, or use a large piece of cardboard from an old shipping box.
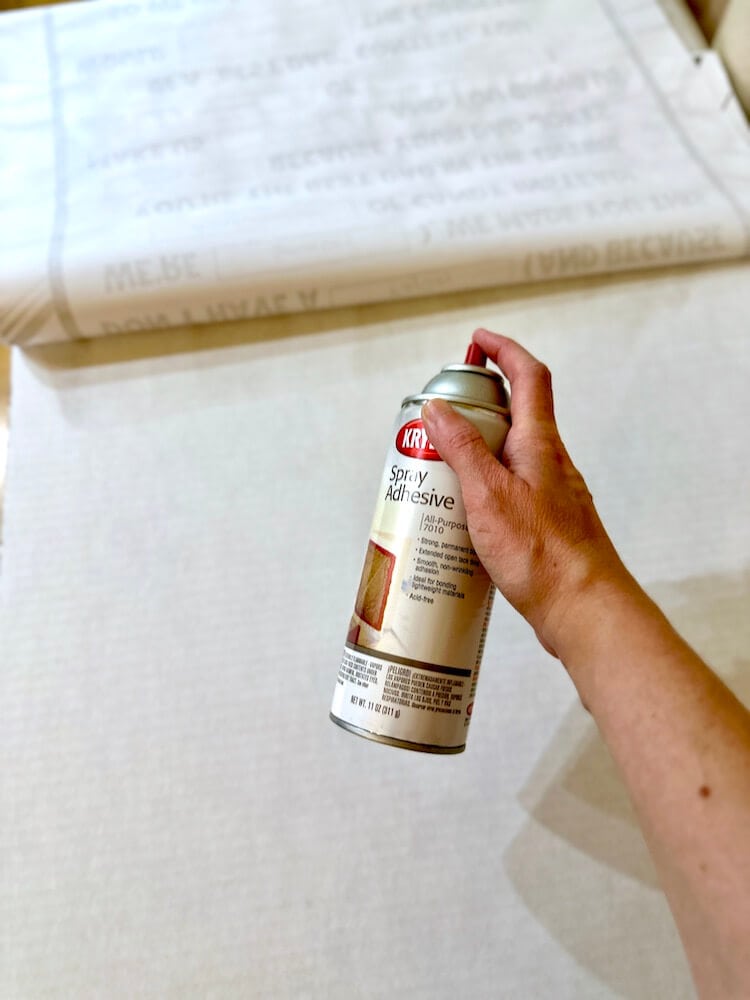
- spray adhesive – This is what I have always used to attach the printable candy template to the project board. It’s very easy to use, but be sure to lay down some newspaper or old cardboard to protect your work surface from over spray. I like the Krylon brand.
- hot glue gun and glue sticks – This is the best way that I have found to attach the heavy candy to the poster board.
- markers or crayons – The template comes in black and white to save on printing costs, so you’ll probably want to color in the “Merry Christmas” and the side pattern to make your gift really pop.
- candy bars, gum, and hard candies – All of the sweet treats that you’ll need are pictured below. *Be sure to check out the next section for my best tips for buying the candy!
- printable Christmas candy bar sign PDF – Available in my SHOP! Just click the link down below to check it out.
Click HERE to see the Christmas Candy Bar Sign in my SHOP!
Tips for Finding the Candy
You may need to visit a few different stores to find all of the necessary candy items. The printable candy poster template is perfectly sized to fit regular sizes of the candies listed, so for the nicest looking gift, be sure to get the correct sized candy. Here are my best tips:
- Walgreens seems to have the best priced candies, especially when you can catch them on sale. Most of the regular sized candy bars were on sale for 2 for $2, even cheaper than Dollar Tree.
- After getting as much of the candy as you can from Walgreens or CVS, I would check at a gas station next for the harder to find items.
- The roll of Spree candies (for the “shopping spree” pun) were probably the hardest to find – you may have to check at a few different gas station convenience stores for those.
- I can usually find the larger rolls of Smarties at either Dollar Tree or a grocery store near the front registers.
How to Make a Christmas Candy Bar Poster
Step 1: Print the Merry Christmas Candy Bar Sign
The PDF template is sized for 24″ x 36″, so you obviously can’t print that large of a paper at home.
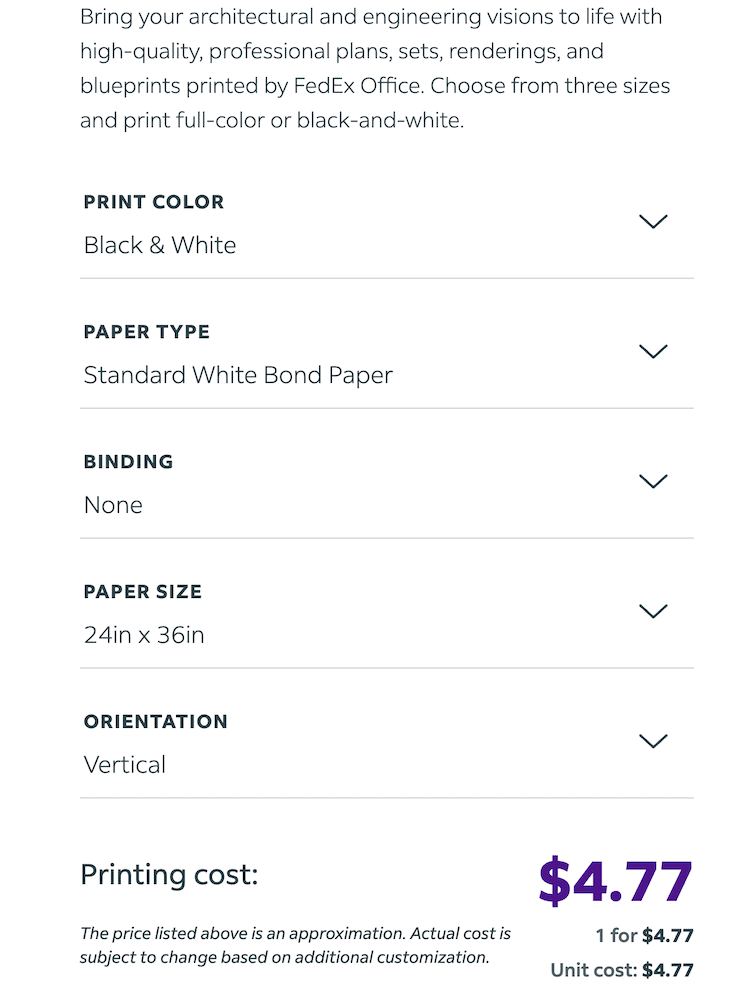
For the cheapest printing option, I suggest printing the file as an architectural blueprint at FedEx Kinko’s or an office supply store. I have had all of my candy signs printed at FedEx Kinko’s for about $4.75 plus tax each. A great value for such a large print!
You can upload the file on their website to place your order, and then pick it up from the store when it’s done. It’s a very easy process, and I have had multiple items printed as architectural prints – like my favorite giant wall calendar! Here’s a screenshot of the correct settings for ordering your print online at FedEx Kinko’s:
Click HERE to see the Christmas Candy Bar Sign in my SHOP!
Step 2: Glue the Christmas candy bar sign to the cardboard base.
Next, use the spray adhesive (or folded over packing tape if you prefer) to attach the printable to the project board base. If you’re using the same trifold cardboard project base as I did, then you will need to cut the two side panels off first so that you have a perfect 24″ x 36″ piece of white cardboard.
The easiest way to glue the sign to the board is to work in small sections. Starting at the top, spray about a 10-12″ strip of the board base with the spray adhesive. Then, line up the top edge of the sign with the board and press down to secure it in place.
Try to get it as straight as you possibly can to start, so that the poster will be lined up correctly on the cardboard. The great thing about using the spray adhesive is that you have about a minute to pull it up and reposition the paper to get it just right.
Then smooth out any wrinkles, fold the remaining non-glued portion back, and spray another strip. Continue to move down the board until the full sign is glued in place.
Then, allow the adhesive to dry for at least 30 minutes. If you notice the corners of the sign pulling away from the project board, you can also add a few pieces of folded over packing tape to the corners to hold the candy bar sign in place.
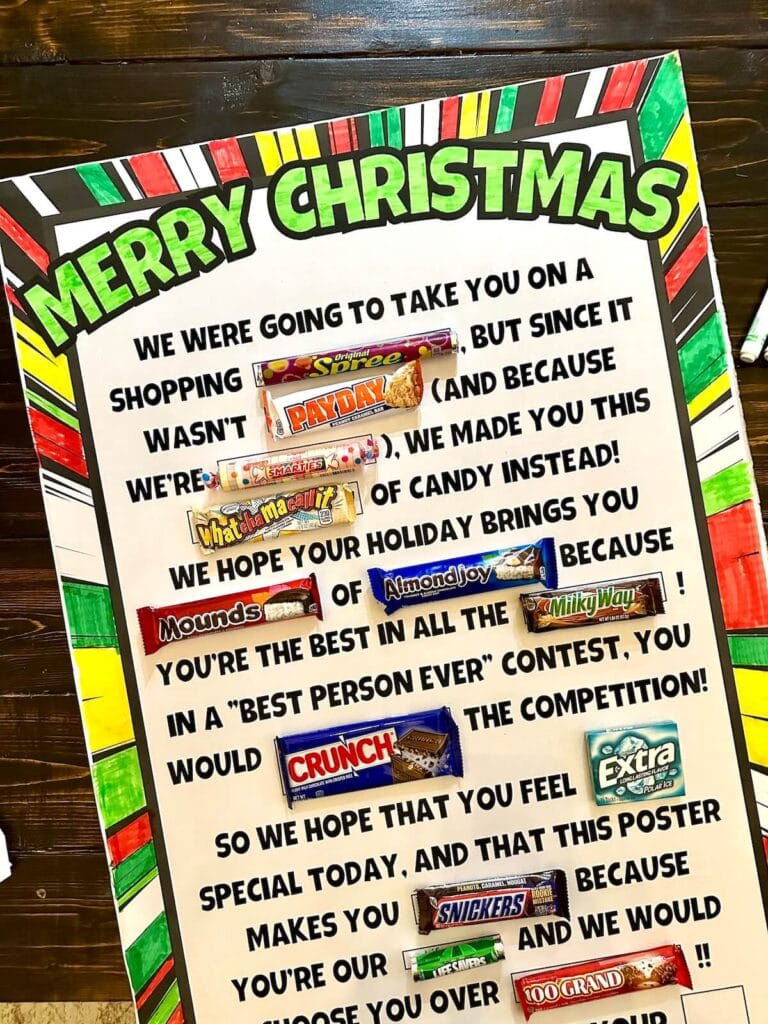
Step 3: Use markers to color the Merry Christmas candy sign.
This step is optional, but highly recommended. And it really doesn’t take long to do! I was able to color the full poster in less than 10 minutes. Or you can put your kids to work to color in the sign!
*TIP – To make your letters stand out at the top of the sign, choose a lighter color like yellow or neon green. The lighter colors will look better against the black outline of the letters.
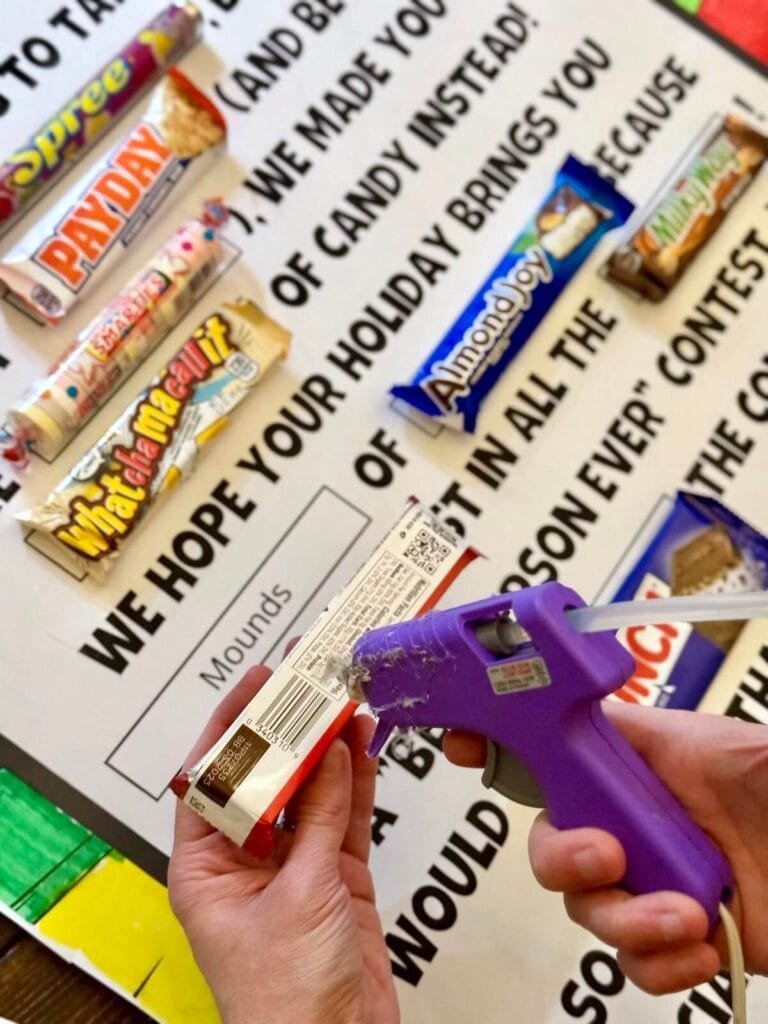
Step 4: Hot glue the candy to the board.
The last step is to glue the candy bars to the Christmas poster. Working one candy at a time, apply hot glue to the back of the candy bar and place it on the sign in the correct position. Allow the hot glue to dry fully before moving the sign.
And then your DIY Christmas candy sign is ready to gift!
I suggest wrapping it up in one of those large plastic bags, similar to a trash bag, that you can find at Dollar Tree for very large gifts. If you were to wrap it in wrapping paper, the recipient might accidentally rip the paper of the sign as they’re tearing through the gift wrap.
Click HERE for the Printable Christmas Candy Sign in my SHOP!
Project Tips:
- PDF is black and white to save on printing costs, so you will need to color with markers to make it look like the photos.
- Color the “Merry Christmas” letters with a lighter color marker like yellow or neon green for best results.
- Use spray adhesive to glue the printable sign to the project board. Start at the top and attach about 1/3 of the sign at a time until done. Smooth as you go.
- Hot glue candy in place.
- Only use regular size candy, NOT King Size or theater boxes. The outline boxes on the sign are the perfect size for the candy.
- I used a trifold project board that I found at Walmart for about $3.75. I cut off the two side panels, and I was left with the middle piece which measures 24″ x 36″, the perfect size base.
Other Candy Bar Poster Ideas
If you loved this Christmas candy poster gift, then be sure to check out my other candy bar posters:
- “Best Dad Ever” Candy Bar Poster – The perfect Father’s Day or birthday gift for Dad!
- Birthday Candy Bar Poster – Great for kids, teens, or even your 90 year old grandpa! The general “Happy Birthday” sentiment is perfect for a wide range of people!