

Drop cloth curtains are super easy to make with iron on adhesive and a little bit of paint! Make these DIY drop cloth curtains for outdoors in just a few simple steps, and get instant privacy on your porch or deck! Or hang these easy DIY curtains inside for a rustic farmhouse look.
We recently built a big, beautiful deck on to the back of our house. The original deck could barely fit a dining table, let alone my husband’s collection of grills, and we were a few rusty nails away from a tetanus shot, so it was time.
And, of course, after the deck was finished, we had to invest in a new outdoor dining table and some comfy club chairs to enjoy some back porch sittin’. We DO live in the South, after all!
We were going to DIY a table and chairs, but we decided to bite the bullet and just buy outdoor furniture instead… which meant that my budget for “extras” like curtains and planters was pretty much zero.
So, I decided to try some DIY Drop Cloth Curtains for outdoors, and I LOVE how they turned out!
I had already made DIY No Sew Curtains using Tablecloths for my dining room (that still look AWESOME by the way!), so I had an idea of what I wanted to do already. I just had to pick out fabric and come up with a simple design plan, and I was ready to create the curtains of my dreams!
Here’s how I did it:
How to Make DIY Drop Cloth Curtains
Step 1: Gather supplies for your DIY Outdoor Curtains
*This post contains affiliate links, which means if you click a link and make a purchase, I earn a commission at no additional cost to you. Read my full disclosure here.
Here are the supplies that I used to make my outdoor drop cloth curtains:
- Drop cloths – I used these drop cloths, sized at 9′ tall by 12′ wide. They fit my space PERFECTLY, and I was even able to cut one drop cloth in half to make two curtain panels and save money. *These are the same drop cloth brand that I used to make this DIY farmhouse wall art, and they have held up great!
- Heat ‘n Bond – This is the same stuff that I used to make these No Sew Farmhouse Curtains!
- Black acrylic paint – You can find small bottles at craft stores for around $1.50.
- Paint brush
- Yard stick or 2″x4″ board to use as a spacer
- Water repellent fabric spray – We used this one.
- Iron and ironing board
- Curtain clips – Since these DIY drop cloth curtains are no-sew then you will need some sort of curtain clips to hang them up (unless you can figure out a way to do grommets without a bunch of fancy tools!). These are the curtain rings that I used for both my outdoor drop cloth curtains AND my DIY curtains from tablecloths.
Step 2: Cut the drop cloths to the size that you need.
My DIY drop cloth curtains needed to span 12 feet for my deck space, so the drop cloths I purchased were perfect. I just used scissors to cut the drop cloth in half, so I was left with 2 “panels” that were each 9 feet tall by 6 feet wide. So, I was able to get two full curtains out of one drop cloth, which was a BIG money saver!
Step 3: Iron your drop cloths.
Your drop cloths will probably have creases from where they were folded up in the package. Ironing them now will help the next few steps go smoother, and make it easier to get straight “hems” and painted stripes.
Step 4: Faux hem the ends for a finished look.
Using iron-on adhesive, “hem” the cut line. We used this Heat n bond product and it worked really well! The finished edge looks like it was hemmed with a sewing machine.

This iron-on adhesive couldn’t be easier to use.
You simply unroll the adhesive and place the adhesive strip on the area that needs to be hemmed, leaving about 3/4″ of fabric to the side of the strip so that you can fold it over on top of the adhesive. See the white adhesive strip in this photo:
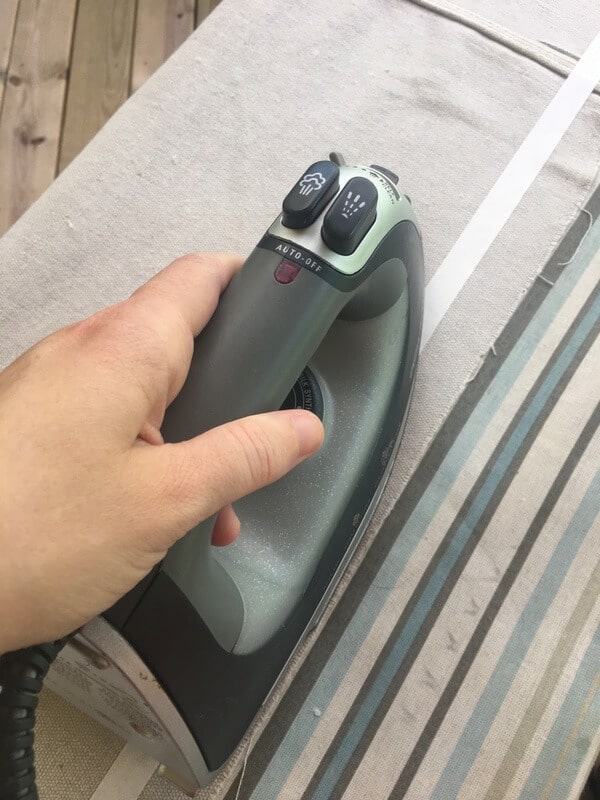
Then, after you’ve ironed it in place, you just remove the paper backing (that’s the white showing in the picture above), fold the extra fabric to the side of the strip on top, and iron again.
Step 5: Paint black pinstripes on your drop cloth curtains, or hang as is.
This step is completely optional, but I wanted our curtains to have a little pizzazz, and I wanted to tie in the black accents of our outdoor furniture and decorative accessories.
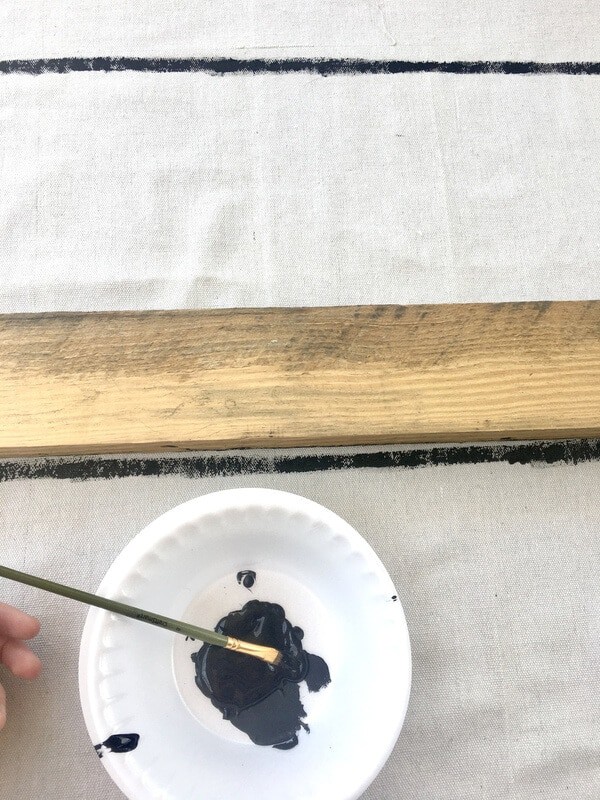
To paint the black pinstripes, I just laid by hemmed curtain panel out flat and measured to see where I wanted my stripes to go. Then, I laid an 8 foot long 2″x4″ down on the drop cloth to use as a guide and to make sure that my finished lines would be straight.
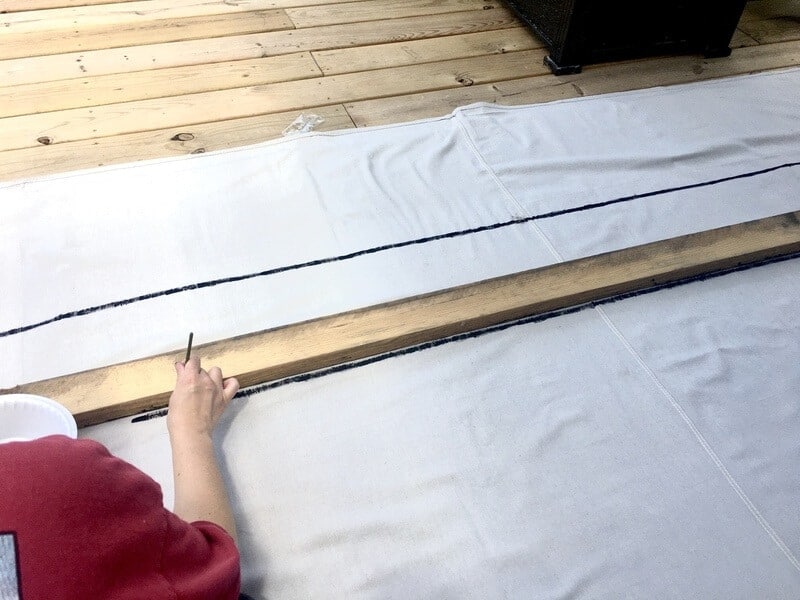
I quickly discovered that it’s a bit difficult to paint perfectly smooth stripes on the fabric with this method, so I call this look ORGANIC PERFECTION. You can see from this photo that the black pinstripe lines are STRAIGHT, but they’re not very smooth because of the way that the paintbrush glided across the fabric.
I didn’t want to fuss with taping off the lines to get them perfectly straight, and I’m glad because I absolutely LOVE the finished, hand-painted look of my drop cloth curtains.
Step 6: Hang your DIY Drop Cloth Curtains with curtain clips.
The greatest thing about these DIY curtain is how easy they are to make! But, since these are NO SEW drop cloth curtains, that means your hanging options are very limited.
There are no grommets or rod tabs in these drop cloth curtains, so I used these clip curtain hangers which worked great!
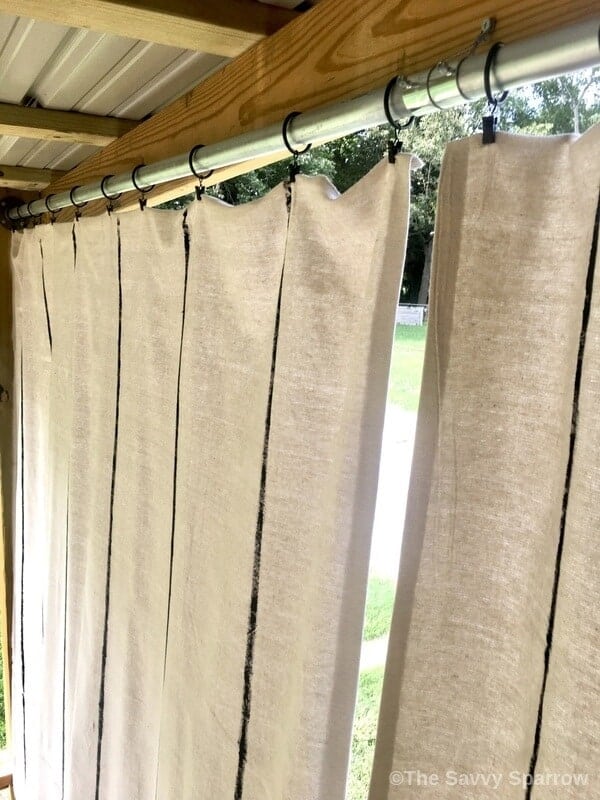
Just slide the curtain rings on to your curtain rods, and then clip your curtains to the rings. This is the easiest way that I’ve found to hang DIY curtains, and these are the same rings that I used for my no sew curtains in my dining room.
*If you want to add grommets to your curtains, go here for a great grommet tutorial.
Step 7: Treat your drop cloth curtains with waterproofing spray.
I found it easiest to hang my curtains first, and then spray them down with a waterproofing spray, because each panel is so large.
Be sure to test whatever spray that you use on a small section of the fabric to make sure it doesn’t smear the black pinstripes or bleach your curtains. And follow the directions on the bottle for optimal results.
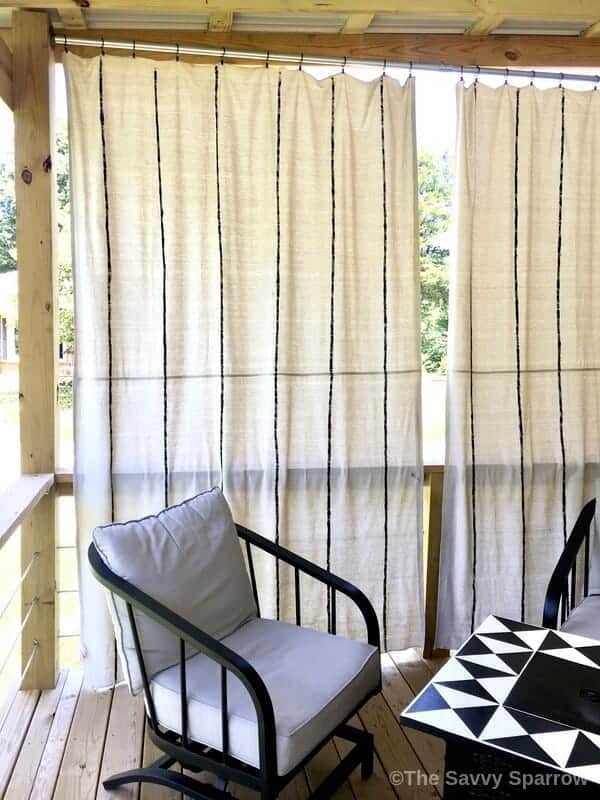
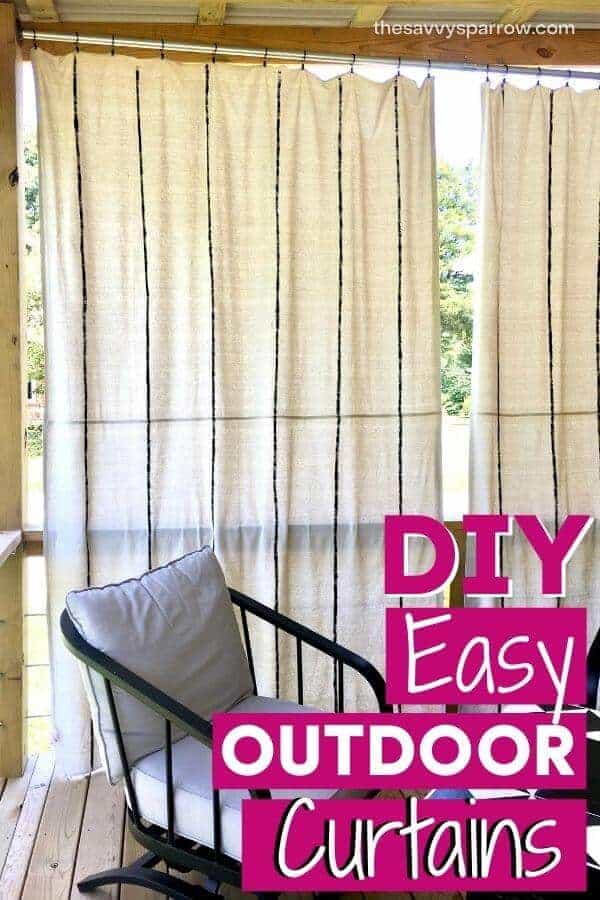
And you’re done! Now it’s time to enjoy the privacy and open-air living room feeling of your deck!
I couldn’t be happier with how these curtains turned out! Our neighbors have a beagle, and if you know anything about dogs, you know that beagles bark ALL THE TIME. Now when my husband and I are sitting on the deck in the evenings, we just close the curtains and the dog doesn’t even know we’re there. Silence!
Want to try another easy drop cloth DIY project? Check out this DIY Large Farmhouse Wall Art that I made for my dining room!
Or, see how I turned tablecloths into no-sew Farmhouse curtains here!
And happy nesting!


Can you show me how you hung the rod. I also have an uneven area and I’m trying to decide how to make this work?
What did you use for a curtain rod?
What a great way to get outside and enjoy the lovely weather without worrying about getting burned or too hot! Those DIY drop cloth curtains are perfect for providing shade for the whole family.
Hi Scarlet! Yes… I was just sitting out on our deck tonight and thinking about how much I LOVE my new curtains! And they were so easy to make, too… now I’m thinking I need another set for the other side of our deck, too. Thanks for your comment! 🙂