
These DIY storage boxes are a great way to repurpose all your cardboard shipping boxes! Put those Amazon boxes to good use and learn how to make your own DIY decorative storage boxes the quick and easy way!
If your house is like mine, then you’ve always got at least one Amazon box sitting in the corner of your foyer waiting until trash day.
We probably get an average of 2 packages from Amazon every single week. Excessive?… Maybe.
But, a lot of times it’s just easier to type in to the Amazon search box “body pillow cover” or “black shoestrings” or “square art canvas”, than it is to actually drive to the store and look for those things.
And with Amazon Prime, whatever we need arrives on our doorstep in 2 days. By the way… check out this post on Benefits of Amazon Prime that You May Not Know About for even more reasons why we love Amazon!
So, needless to say… we have a lot of old cardboard boxes.
So when I needed some cute decorative storage boxes to put inside the awesome buffet that my husband built me, I decided to try my hand at a little DIY.
Decorative storage boxes can be EXPENSIVE if you buy them in the store, so a few old cardboard boxes and some supplies that I picked up at Hobby Lobby on sale for 50% OFF were a great alternative!

*This post contains affiliate links, which means if you click a link and make a purchase, I earn a commission at no additional cost to you. Read my full disclosure here.
And my DIY storage boxes came out super cute!
Here’s how to make your own DIY decorative storage boxes using your mountain of excess cardboard:
And don’t miss the VIDEO for these easy DIY decorative boxes at the end of this post!
How to Make DIY Storage Boxes from Old Cardboard Boxes
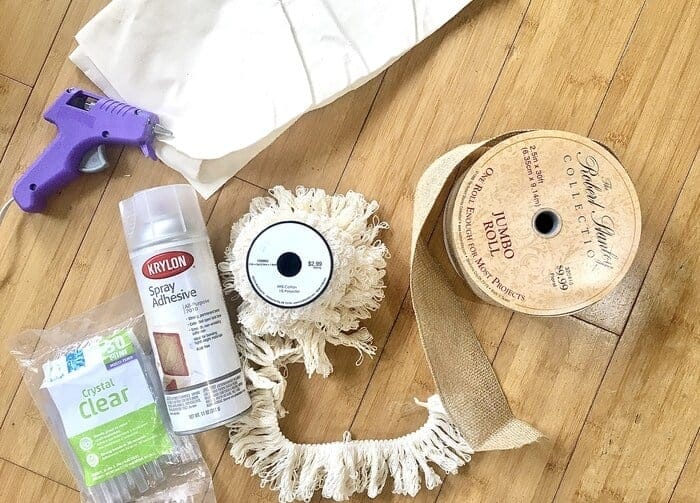
Step 1: Gather Your Supplies
Cardboard box
Try to use a box that doesn’t have a bunch of printing on the outside. If your box DOES have a lot of designs on it, you may want to paint over them with brown acrylic paint.
Fabric
Thicker fabrics work best for these DIY storage boxes, because then you can’t see the cardboard box through the fabric. I used a cream colored, canvas-like fabric that I found at Walmart for about $3.00 for 2 yards.
If I were to make more of these boxes, I would choose a darker color fabric like black or navy blue for the liner, because then the wrinkles from the spray adhesive would not be as visible.
Spray adhesive
We used this spray adhesive (affiliate), and it worked great!
Wide ribbon
I used a 2.5″ wide burlap wire ribbon from Hobby Lobby. A tightly woven ribbon that you can’t see through too much works best for these DIY storage boxes, so that you don’t see the cardboard through the ribbon.
Trim
My super cute tassel trim is from Hobby Lobby. You can also find cute tassel trims HERE (affiliate).
Hot glue gun and glue sticks
Make sure you have a good stock of glue sticks on hand. I used about 8-10 glue sticks on one box.
Step 2: Fold box flaps down inside the box
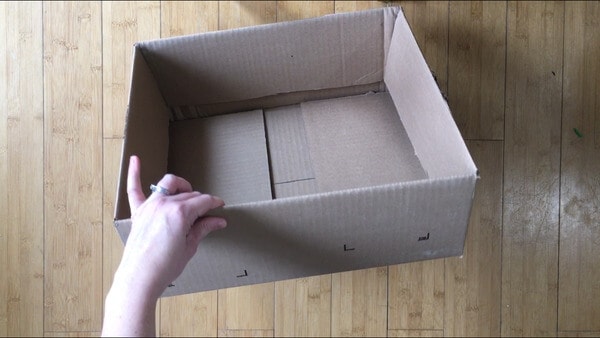
I had to trim the top flaps just a bit to get them to fold flat inside the box. This step adds some strength to the sides of your finished DIY storage box.
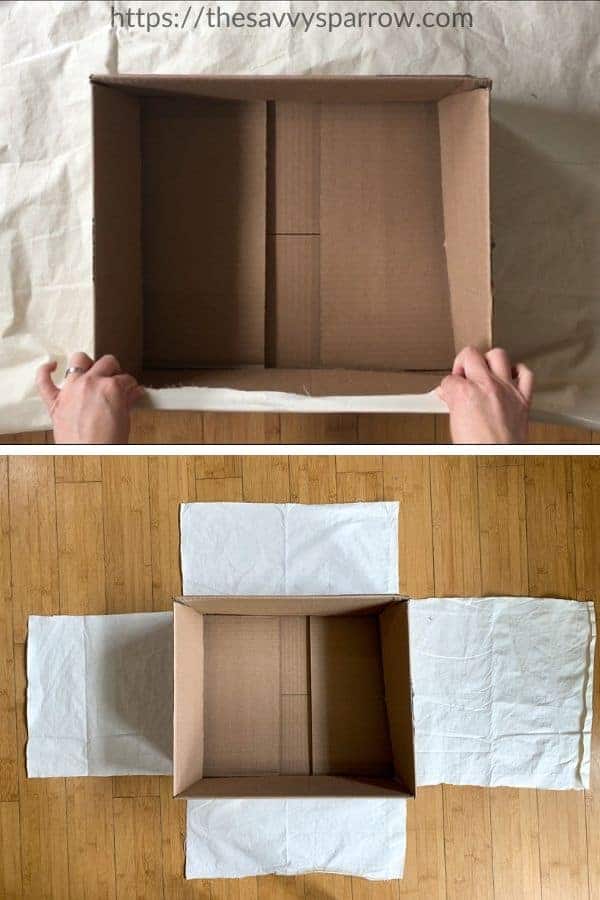
Step 3: Cut fabric in a plus sign shape
Lay your fabric out on the ground and set your cardboard box on top of it. Then, position your box so that the fabric will fold up and over to the inside of the box. You only need about 1-2″ of fabric to extend past the top of the box:
Step 4: Glue fabric to inside bottom and sides of box using spray adhesive
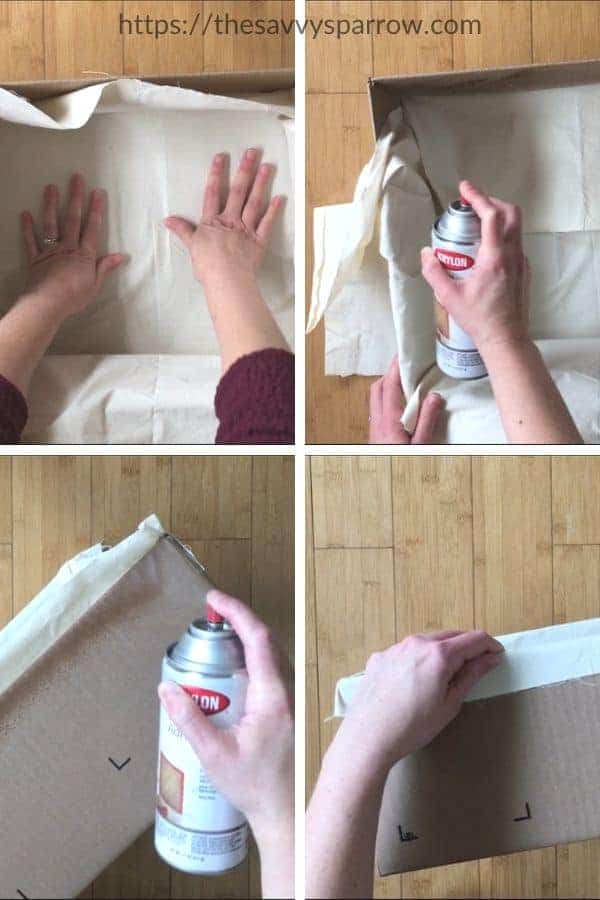
First, spray the bottom of the inside of the box with the spray adhesive. Then, position the fabric on top of the adhesive and press down as you smooth out any wrinkles.
Once the bottom is in place, spray adhesive on to one of the sides inside the box, and smooth fabric up the side (one of the sides of your plus sign). Let the 1-2″ of excess fabric hang out the top of the box for now.
Glue fabric to all 4 sides of the inside of the box.
Then, apply spray adhesive to the top edge of the outside of the box, and fold the 1-2″ of excess fabric on top. Press down to secure.
Yeah! Now you’ve got the interior liner all done! Time to cover the outside of your no-sew DIY storage box…
Step 5: Hot glue ribbon to the outside of the box
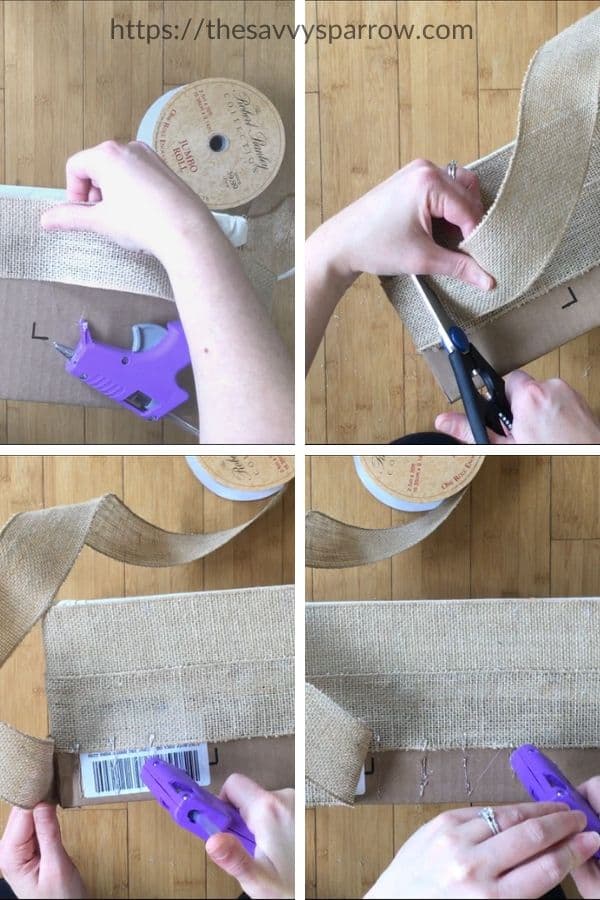
Hot glue the end of your ribbon to the upper left corner of one side of the cardboard box. Continue to glue the ribbon all around the top of the box by running strips of hot glue every inch or so, and pressing the ribbon down on top of the glue.
Continue until the entire top edge of the box is covered. Then, trim the ribbon and hot glue it in place to finish that row.
Skip down to the next row and hot glue the ribbon in place, overlapping the top ribbon row just a tad. Continue to glue the ribbon all around the second row, pressing down firmly as you go.
Keep gluing the ribbon on to the cardboard box, overlapping the previous row just a tad, until the entire box is covered. Next comes the fun trim…
Step 6: Glue trim to the top of the DIY storage box
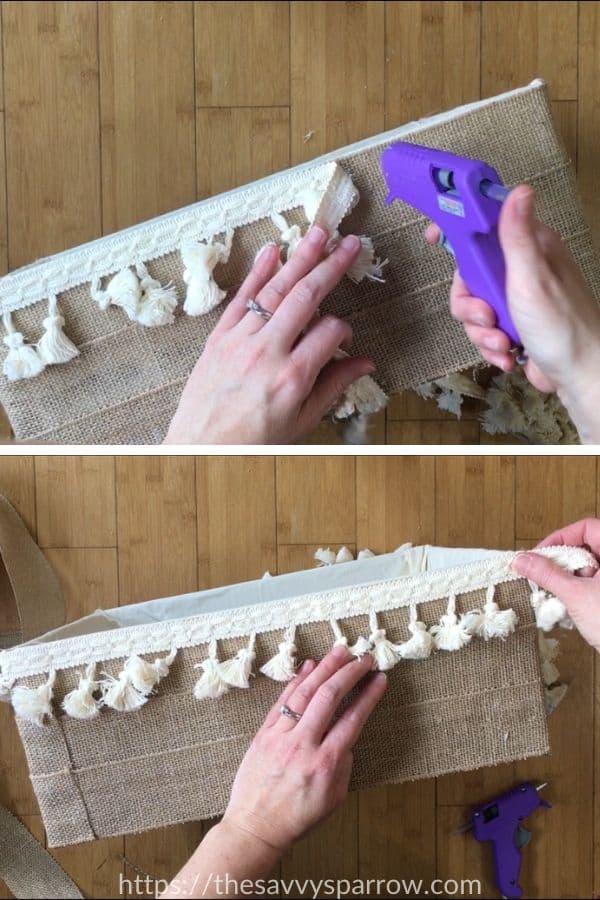
Start at one corner and run a line of hot glue down the top of the box. My trim was fairly thin, so I just used a single line of glue. For wider trim, you can use a few horizontal lines of glue, or vertical lines of glue every few inches like you did in Step 5.
Continue to glue trim to the DIY storage box until finished.
For my taller box, I used a second row of complimentary trim because the proportions looked off with just the top trim.
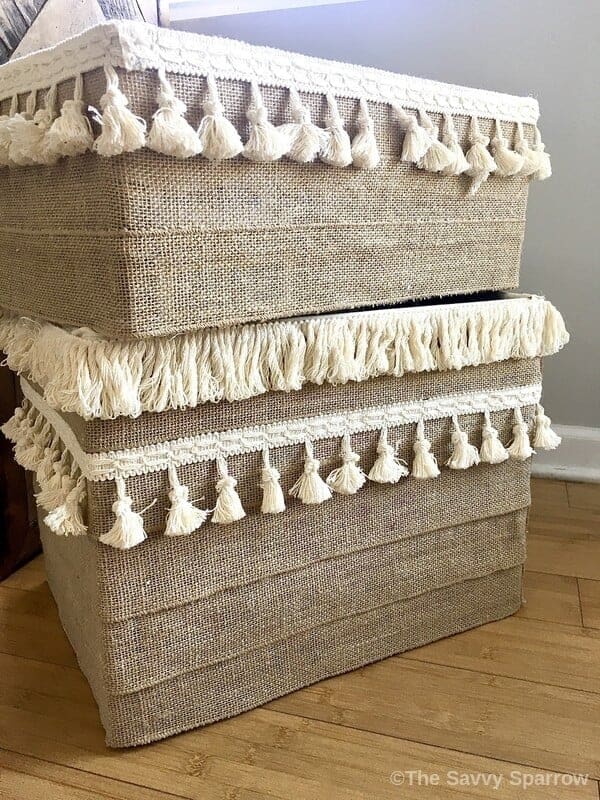
And, VOILA! You’ve got cute, inexpensive, and easy DIY storage boxes!
I’m SO happy with how these DIY decorative boxes turned out! What a great use for all of those old cardboard shipping boxes, right?!
And for those visual learners… I made you guys a video of this fun and easy DIY home decor project:
Be sure to PIN this post for later… when you’ve got Amazon boxes coming out of your ears!
Want another easy no-sew DIY home decor project?! Check out this post to learn how to make your own DIY No-Sew Farmhouse Curtains from a Tablecloth!
Then hop on over HERE to learn how to make DIY Farmhouse Canvas Art without Power Tools!


What a beautiful project you have made from a recycled cardboard box + imagination. Kudos to you. I am going to give it a try.
I have so many boxes I could use!!!
These are
Awesome! Just the tip I needed. I’ve been saving coffee boxes because they’re study and not too big and not too small.
What a really cute idea . I love the simplicity and a great way to put the empty boxes to use fashionably . Thanks for sharing .
Excellent pin, can’t wait to get at that pile of boxes and turn them into storage boxes. Glue gun here I come. Will come back once I have finished.
Very cute!
Amei 😍 vou fazer!!