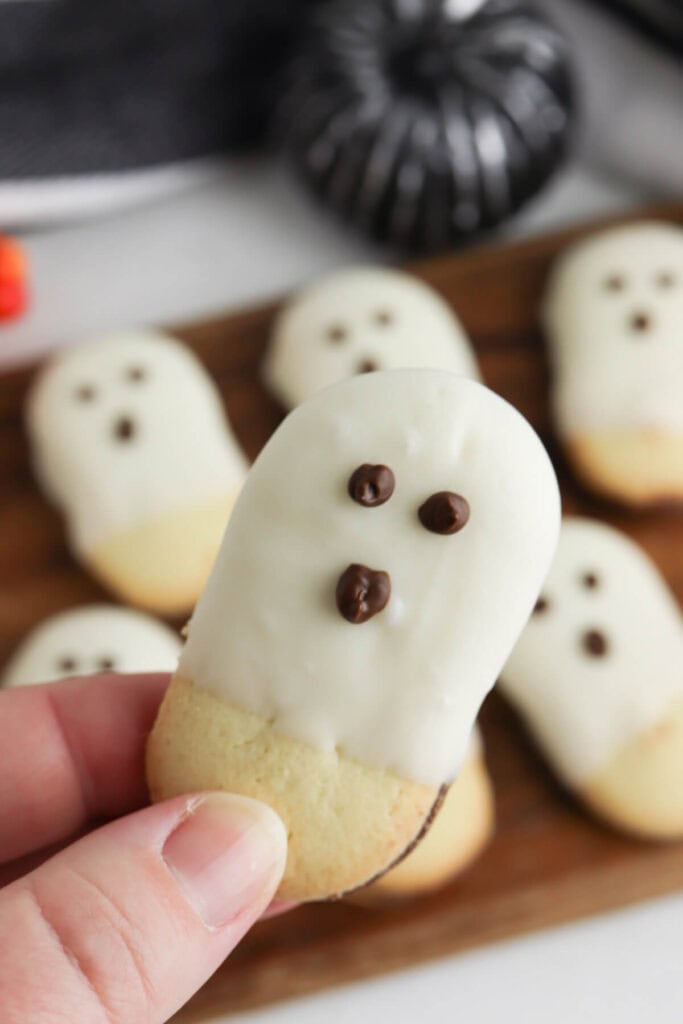
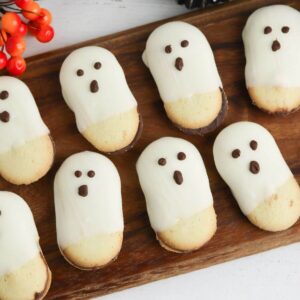
With just a few simple ingredients, these No Bake Milano Ghost Cookies are a hauntingly delicious and festive treat for your spooky Halloween celebrations! Dipped in white chocolate and adorned with chocolate “eyes” and “mouths,” these Halloween ghost cookies are as fun to make as they are to eat.

Get into the Halloween spirit by whipping up a batch of these easy Ghost Cookies! Kids and adults alike will love assembling this no bake recipe and watching them come to life on the baking tray.
Serve them at your Halloween party alongside Spooky Cute Halloween Cookies with candy eyes, Cherry Pie Mummy Cookies, or Brownies with Marshmallow Ghosts for the perfect Halloween dessert spread. They make great holiday gifts, too!
Requiring no baking and hardly any prep work, these no bake Halloween desserts are the perfect last-minute addition to your ghostly gathering. Simply melt, dip, and decorate – it’s that easy!
Whether you’re looking for a fun activity for the kids or spooky treats for class Halloween parties, these easy Halloween cookies are guaranteed to be a graveyard smash.
*If you love fun holiday-inspired recipes, be sure to check out this collection of Halloween dinner ideas that are almost too spooky to eat!
Why You’ll LOVE these No-Bake Ghost Cookies:
These spooktacular No-Bake Ghost Cookies are the ultimate Halloween treat, transforming ordinary Milano cookies into hauntingly delicious no bake treats. If that’s not enough, here are more reasons to love them:
- Quick and Easy. With just 3 ingredients and no baking required, these adorable ghost cookies come together in no time at all.
- Make Ahead Friendly. The cookies are super convenient because they can be made a few days in advance and stored in an airtight container until you’re ready to serve them.
- Versatile Decorating. While chocolate faces are traditional, you can get creative with different colors and decorations for the ghosts. Make them your own!
Ingredients for Milano Ghost Cookies
All the ingredients for these No-Bake Milano Ghost Cookies can be found in most grocery stores. You may even have them in your pantry already! Here’s what you’ll need to make them:
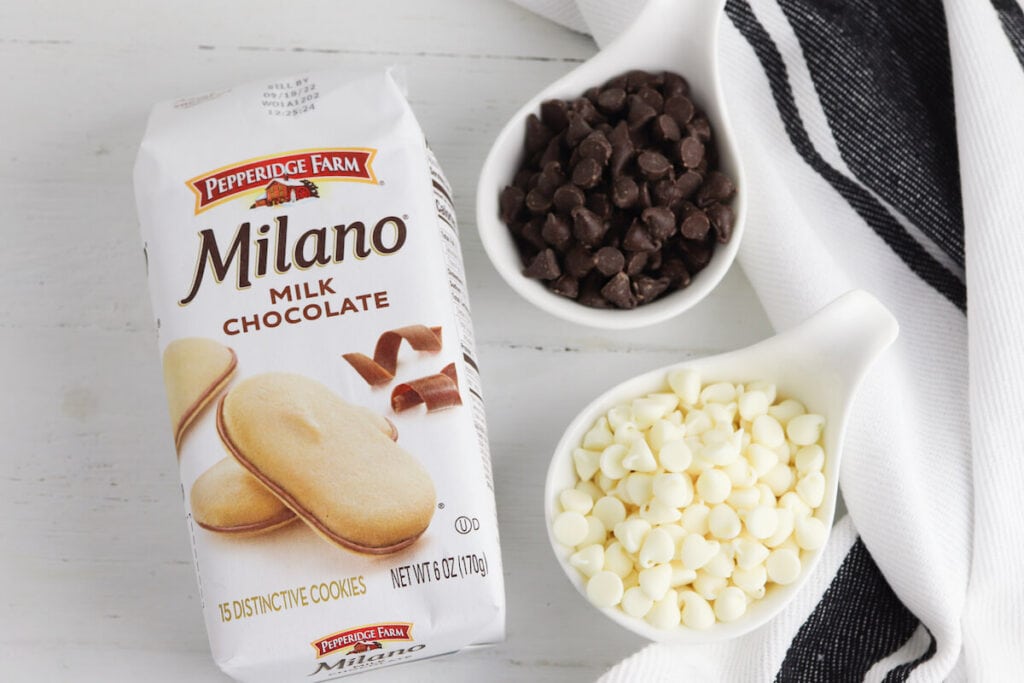
- Milano Cookies – Pepperidge Farm Milanos are crisp, oval-shaped cookies with a chocolate-flavored center. These cookies are the key to creating the ghost shapes. You could also make them with Nutter Butter Cookies if you prefer, but if you’re taking them to a class party be sure to check the school’s peanut policy first.
- White Chocolate Chips – Look for high quality white chocolate chips or baking wafers for melting and dipping the cookies.
- Semi-Sweet Chocolate Chips – A small amount is melted to decorate the ghosts’ faces. Milk chocolate or dark chocolate chips also work, or you can use colored candy melts if you want to add a bit of color to the faces.
That’s it! With just 3 main ingredients, these easy Halloween treats could not be more simple. Feel free to get creative with decorations like sprinkles or colored chocolate for the faces, too.

How to Make Halloween Ghost Cookies with Milanos
These cute little ghost cookies come together quickly with no baking required! Follow these simple steps:
Step 1: Melt the White Chocolate
Place the white chocolate chips in a microwave-safe bowl or measuring cup. Microwave in 20-second intervals, stirring well between each interval, until completely melted and smooth.
Tip: Be careful not to overheat the white chocolate or it can seize up and become unusable. Microwaving in short bursts helps prevent this. You can also use a double boiler if you prefer.
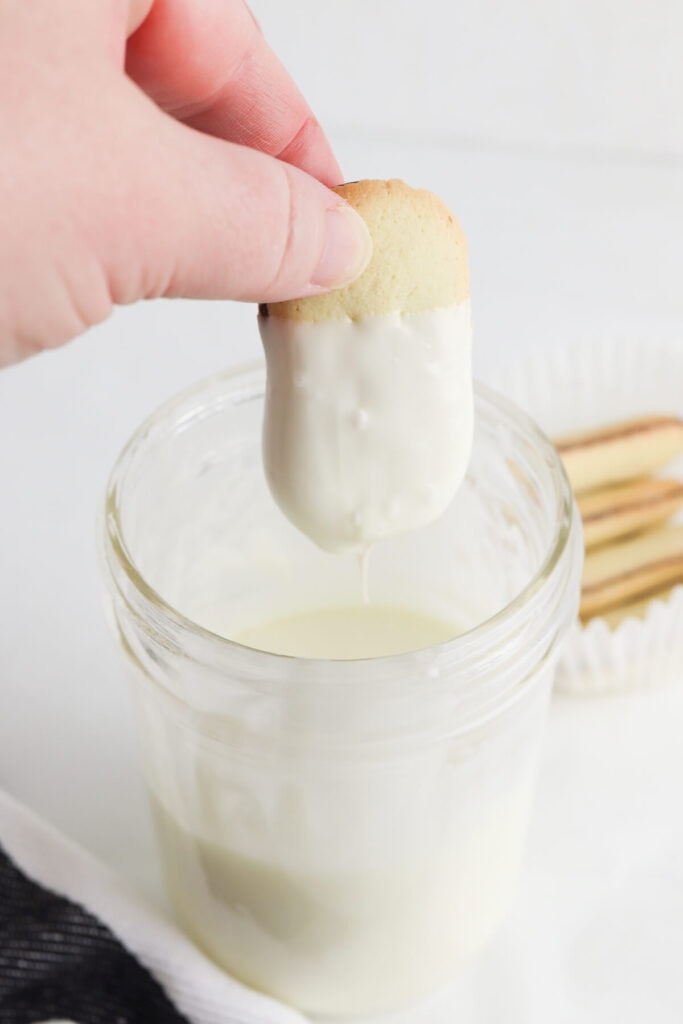
Step 2: Dip the Cookies
Holding a Milano cookie by one end, dip it into the melted white chocolate, submerging about 3/4 of the cookie. Gently shake off any excess chocolate.
Transfer the dipped cookie to a baking sheet covered with a piece of wax paper or parchment paper and repeat with the remaining cookies, spacing them a few inches apart.
Tip: Work quickly when dipping to prevent the white chocolate from hardening. If it starts to thicken, microwave for 10-15 seconds to re-melt it before moving on.
Step 3: Let White Chocolate Set
Allow the white chocolate coating to fully set and harden on the cookies, about 30 minutes to 1 hour, depending on room temperature.
Tip: You can place the dipped cookies in the refrigerator to speed up the setting process, about 15 minutes.
Step 4: Melt Semi-Sweet Chocolate
Once the white chocolate has hardened, melt the semi-sweet chocolate chips the same way as the white chocolate – in 20 second intervals in the microwave, stirring well each time.
Transfer the melted chocolate to a piping bag or zip-top plastic bag. Snip a tiny corner off if using a plastic bag.
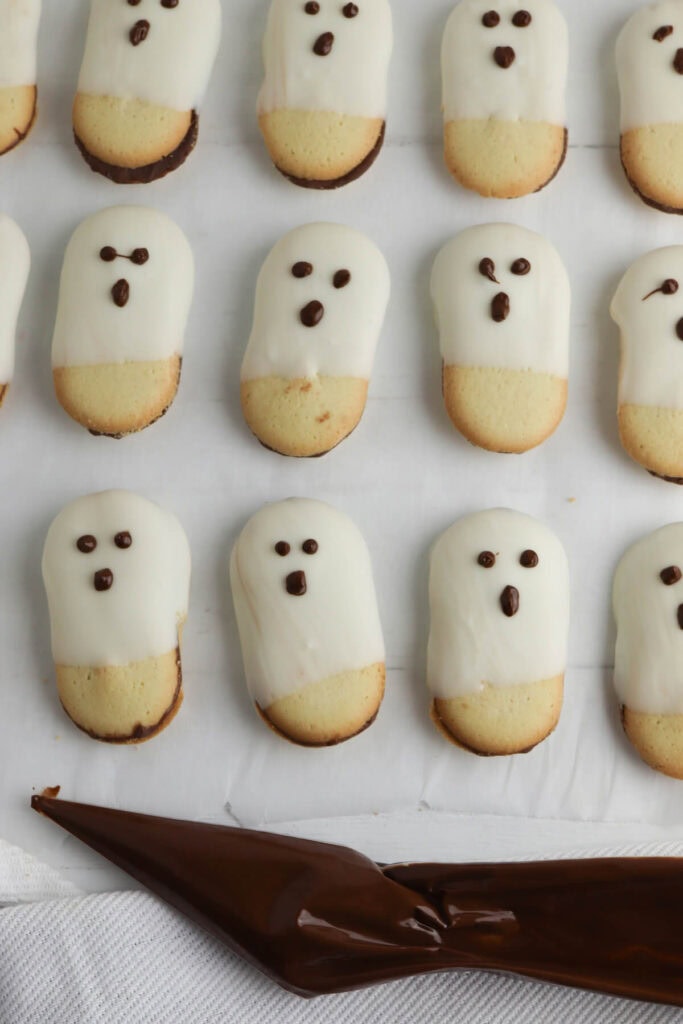
Step 5: Decorate the Ghosts
Now for the best part. Pipe two dots of chocolate towards the top of each cookie to create eyes. Then pipe an arc underneath to form a mouth, creating a ghostly face.
Work quickly before the chocolate starts to set. If it firms up too much, reheat for 5-10 seconds.
Tip: Get creative with the facial expressions! Add chocolate sprinkles or other decorations if you like.
Step 6: Allow Chocolate to Set
Place the finished ghost cookies back on the wax/parchment paper and allow the chocolate decorations to fully set and harden, about 30-60 minutes.
For best results, store the little ghosts in an airtight container at room temperature for 3-5 days. For longer storage, refrigerate for up to 1 week.
Tip: Get creative with your presentation of these frightful ghost cookies! Serve them on a platter decorated with fake cobwebs and other cute treats, or serve them as an edible dipper for hot chocolate!
Other Halloween Cookies to Make
Be sure to check out these other posts for more easy Halloween cookie ideas:
25+ Spooky Cute and Easy Halloween Cookies – A huge round-up of the best decorated Halloween cookies. These adorable treats are perfect to make with your kids during the month of October. Great for Halloween classroom parties or just a casual Tuesday treat.

Spider Web Cookies made with Cake Mix – These yummy spider web cookies are made with cake mix and a few simple ingredients. Your kids will LOVE decorating the spider web designs on top!

Halloween Ghost Milano Cookies
Ingredients
- 2 packages Milano cookies
- 12 oz package white chocolate chips
- ¼ cup semi-sweet chocolate chips
Instructions
- Add the white chocolate chips to a microwave-safe bowl. Microwave the chocolate in 20 second intervals, stirring between each interval, until fully melted.
- Dip one Milano cookie into the melted white chocolate, covering about 2/3 of the cookie. Lay on a piece of wax paper to cool. Repeat for the other Milano cookies.
- Once the white chocolate has hardened, melt the semi-sweet chocolate chips in a microwave-safe bowl, and transfer the melted chocolate to a piping bag.
- Cut a very small tip off the piping bag. Pipe two dots of chocolate towards the top of each cookie to create eyes. Then pipe an oval shape underneath to form a mouth, creating a ghostly face.
- Allow the chocolate decorations to fully set and harden, about 30-60 minutes.
Notes
- Heating white chocolate –Be careful not to overheat the white chocolate or it can seize up and become unusable. Microwaving in short bursts helps prevent this.
- Dipping the Milano cookies –Work quickly when dipping to prevent the white chocolate from hardening. If it starts to thicken, microwave for 10-15 seconds to re-melt it before moving on.
- Storage – For best results, store the little ghosts in an airtight container at room temperature for 3-5 days.
The nutrition facts provided are calculated using a third-party tool and are estimates only. Actual nutritional content may vary based on the ingredients and brands you use, as well as portion sizes. For accurate results, please consult a registered dietitian or nutritionist.