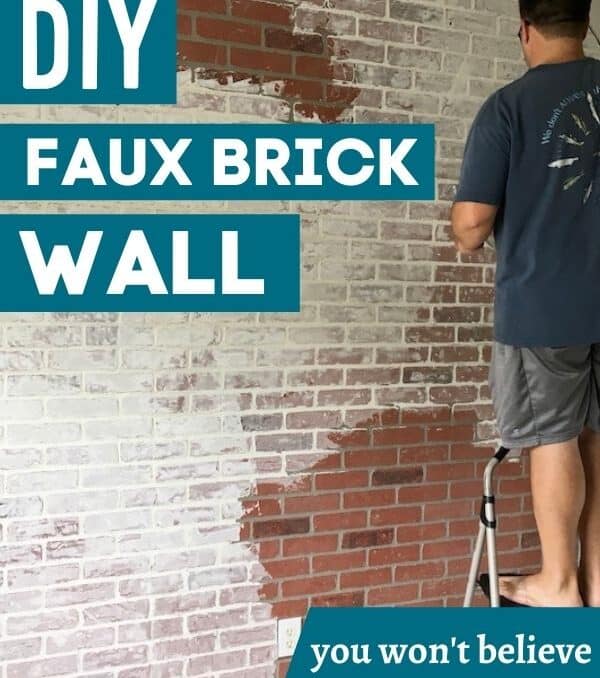
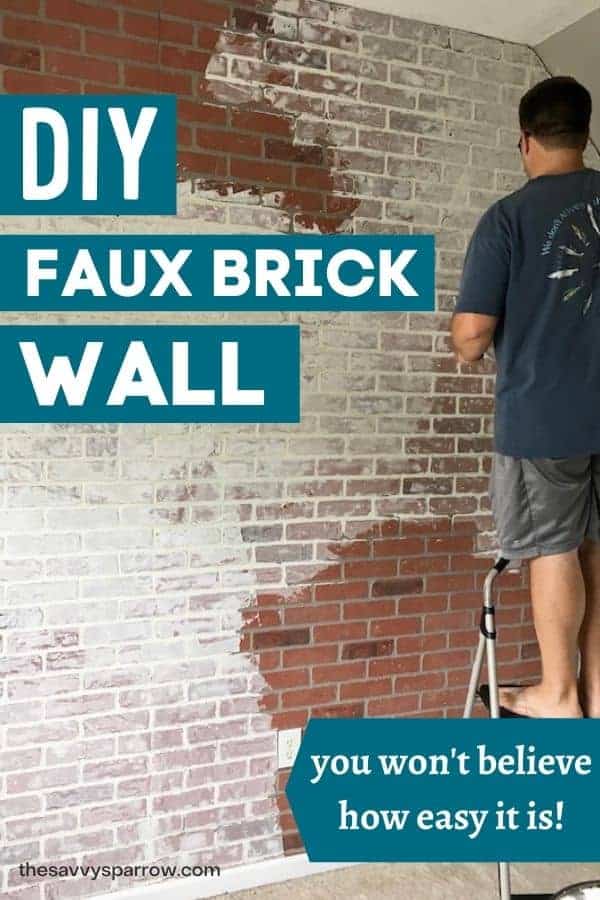
This DIY faux brick wall is an easy and inexpensive brick accent wall for your rustic decor! Learn how to make a brick wall indoors with faux brick wall panels in under 4 hours!
We just completed a total office makeover, and I am IN LOVE with this new farmhouse style, perfectly neutral but still textured wall treatment! Yes, our DIY faux brick wall is SO gorgeous that I can’t stop looking at it. I think it’s actually making me less productive…
I type a few sentences and then glance up at my gorgeous whitewashed brick wall… type a few more sentences… “oooh” and “aaah” over my brick accent wall.
I just can’t help myself! The new, pretty wall is such an improvement from the plain old storm cloud gray wall that I used to stare at.
And it was SUPER easy to do! I’m telling you… if you’ve been afraid to try some of my other projects like this faux subway tile fireplace makeover or this DIY mudroom wall, then you should REALLY try this one!
Making your own faux brick wall out of 3D faux brick panels and some joint compound is SO easy to do. We actually finished our wall in less than 4 hours… that’s start to finish AND making cuts for an outlet and a funky diagonal ceiling. My husband even commented that he couldn’t believe how easy this accent wall treatment was to do.
So, are you ready to make your own 3D accent faux brick wall? Here’s how to do it:
*This post contains affiliate links, which means if you click a link and make a purchase, I earn a commission at no additional cost to you. Read my full disclosure here.
Supplies to DIY a Faux Brick Accent Wall
3D Faux Brick Wall Panels
The wall panels we used are from Home Depot. They are 4′ x 8′ 3D panels that look exactly like a red brick wall. They are priced at about $35 per panel, and we used 4 panels.
*Note – When you’re picking out your brick panels at the store, be sure that the ones you select have “bricks” and “grout lines” that line up evenly. It will make your DIY faux brick wall MUCH easier to install!
Liquid Nails
This is the type of Liquid Nails (affiliate) that we used to hang the brick panels. We used one bottle per full panel.
Nail Gun and Brad Nails
This is the nail gun (affiliate) that we used, with 18 gauge 2″ brad nails.
Skilsaw and/or Jigsaw
You’ll need a Skilsaw or a similar saw to cut the brick wall panels to fit your wall. If your wall has any outlets or switches, you’ll also need to cut around those. The jigsaw made the smaller cuts for our outlet much easier!
Chalk Line
The chalk line is not completely necessary, but it WAS helpful with getting long straight cuts. We snapped our chalk line on top of one of the faux brick wall panels to cut it down to size more easily with the Skilsaw.
Tape Measure
Level
You’ll need a level to be sure that the panels are nice and straight as you nail them to the wall. The last thing you want is lines of “bricks” that aren’t perfectly straight across.
Joint Compound
We used USG All Purpose Dry Wall Joint Compound. It was about $7.00 for 3.5 quarts, and we used almost the whole container. The joint compound on top of the bricks makes your wall look EXACTLY like real brick!
Plastic trowels
We used a 3 pack of plastic trowels. The smaller sized trowel made it easier to get the joint compound out of the bucket, and the larger ones were used to put the compound on the wall.
How to Make a 3D Faux Brick Wall
Step 1: Plan where your faux brick wall panels will go.
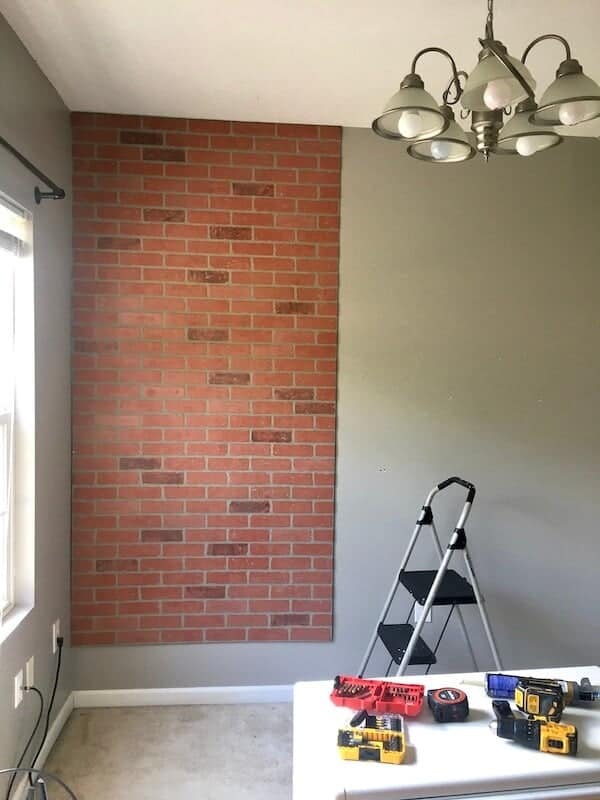
The first step is to do a little planning. You’ll want to measure your wall, and figure out how your panels should go up with the least amount of cuts and seams.
Our ceilings are 9 feet high, and the faux brick wall panels are only 8 feet long, so we had about 1 foot that we had to “patch” in. We knew that my desk would be pushed up against the faux brick wall, so we decided to have the extra 1 foot at the bottom, because any seams would be hidden by the desk.
We also chose to nail our faux brick wall panels into the studs, though I don’t think that’s necessary, especially if you use Liquid Nails AND a nail gun.
Step 2: Optional, if hanging shelves on your brick wall – Find and mark the studs.
Once you get your faux brick wall installed, it will be difficult to find the studs. So if you’re planning on hanging any type of heavy shelving or artwork on your new brick wall, then go ahead and mark the studs now.
We knew that we were going to be hanging some DIY Farmhouse Wood Shelves on the whitewashed brick wall, so before we hung up the panels, we marked the studs so that we could later install the shelving.
Since you’ll be covering your wall completely, you’ll need to mark the location of your studs by placing a small pencil mark on the ceiling. Once you find a stud, use a level as a guide. Hold the level on the wall vertically where your stud is, and butt the end of it up against the ceiling. Then mark it for future reference.
Step 3: Attach faux brick panels to your wall.
Once you have an idea of how the wall panel pieces will fit together, it’s time to get them on the wall.
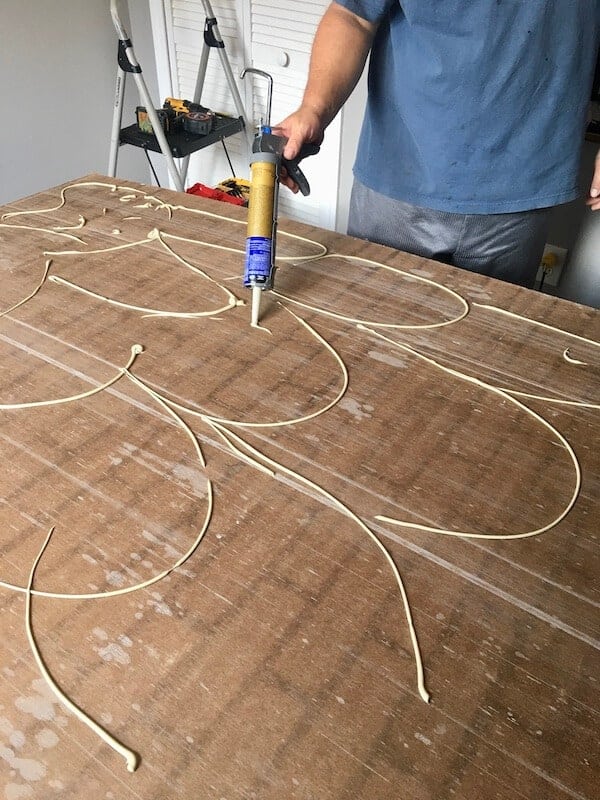
We applied one 10 oz bottle of Liquid Nails to the back of each 4′ x 8′ wall panel in a scallop shape pattern like this:
Then, we placed the brick panel on the wall, and I held it in place while my husband nailed it in with the nail gun.
This is definitely a two person job… The panels are rather heavy, and they will have a tendency to slip down the wall initially (because the Liquid Nails isn’t dry yet), so one person will probably have to hold them up against the wall from the bottom, pushing them up to the ceiling, while the other person nails the panels in to the wall.
Here’s what the first 3D faux brick panel looks like on the wall:
How to line up the seams of the wall panels:
Once you’ve installed the full 4′ x 8′ panels, you’ll need to “patch” in smaller pieces. We found it easiest to use a fresh 4′ x 8′ panel, rather than trying to piece together the scraps that remained from our 3rd panel.
We could have done the entire wall with just 3 brick panels, but for the extra $35, it saved us some work to just use a 4th panel.
We began by cutting a 12″ tall by 4′ wide panel piece, making sure that the top of the piece would line up perfectly with the bottom of the panels that were already installed on the wall. We lucked out because the bottom of the full sheet panels ended perfectly on a “grout line”, so the seam wasn’t visible after adding joint compound on top.
Then, for the other pieces that would go next to it, we lined them up like this and made a small pencil mark where we needed to cut the panel:
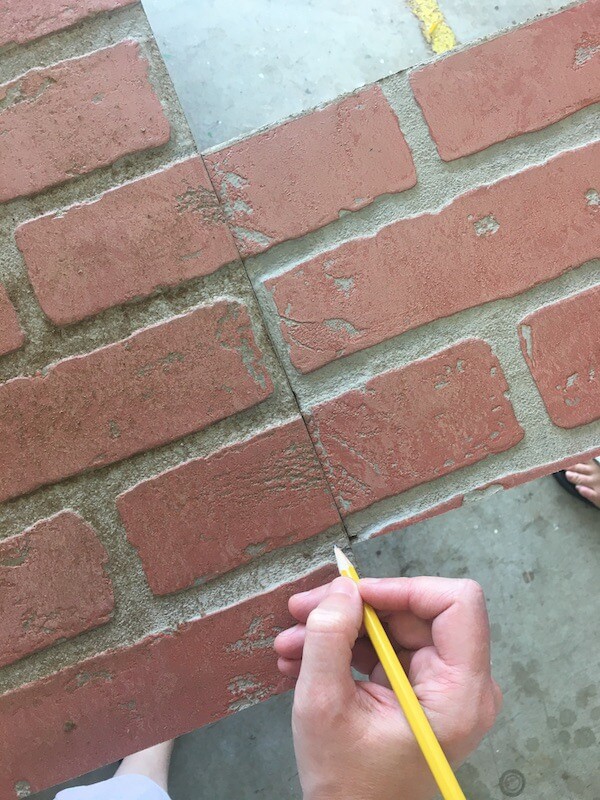
You can see from the picture above that we did have a few inches of waste on the bottom of the panel to get the seams of our DIY faux brick wall just right.
Here’s what the wall looks like with all of the full panels and cut pieces installed:
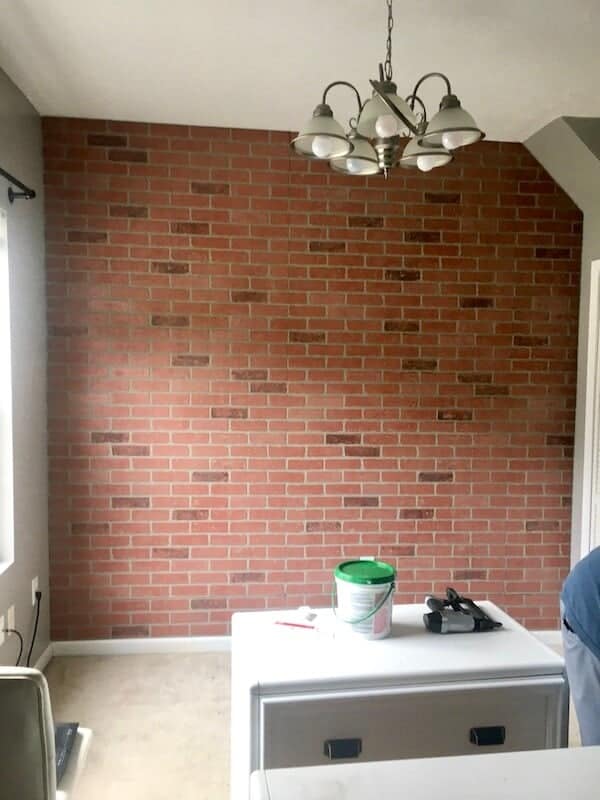
If you look really closely, you can see the smaller pieces on the bottom 12″ of the wall, but overall, the seams aren’t visible unless you’re really looking for them.
The 3D faux brick wall panels were just about PERFECT right off the shelf, as is, and they lined up really nicely on the wall with minimal effort.
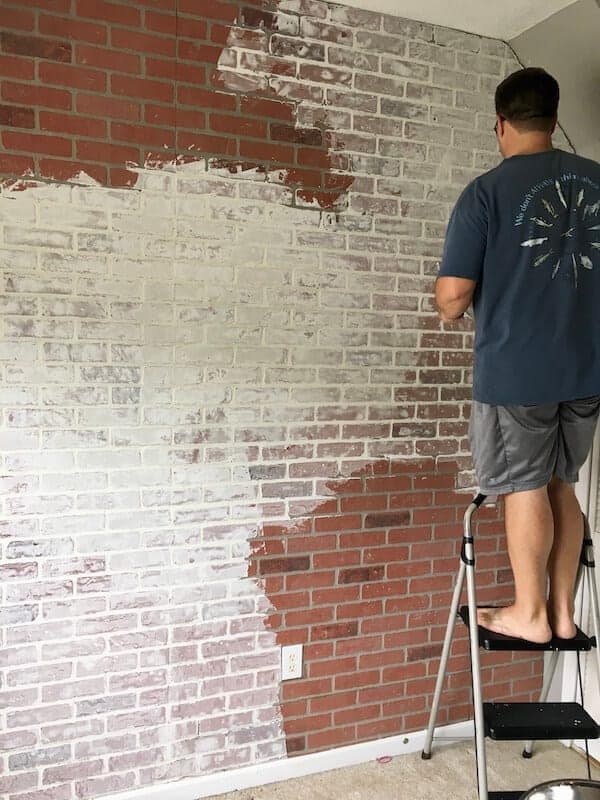
Step 3: Smear joint compound on top of the brick panels.
After you’ve got your brick wall panels installed, it’s time to “whitewash” them.
This is VERY easy, and doesn’t have to be precise at all. I actually like the variation on the wall where the joint compound is thicker in some areas and thinner in others, so don’t worry about getting a perfectly even layer.
Just load a large plastic trowel with compound, and smear it on the wall… Easy as that! If you hold the trowel flatter against the wall while smearing it on, the compound will be thicker. You’ll have to hold the trowel flatter to fill in the “grout lines” of the brick, or the areas where the panels are more recessed.
Scraping the trowel with it more perpendicular to the wall will leave a thinner layer of compound.
Don’t worry… it’s MUCH easier than it sounds! And this part went SUPER fast! In fact, I would rather do this DIY faux brick wall treatment than painting a wall any day.
Here’s what the DIY faux brick wall looks like at this point:
Step 4: Cover seams on your DIY faux brick wall with extra joint compound.
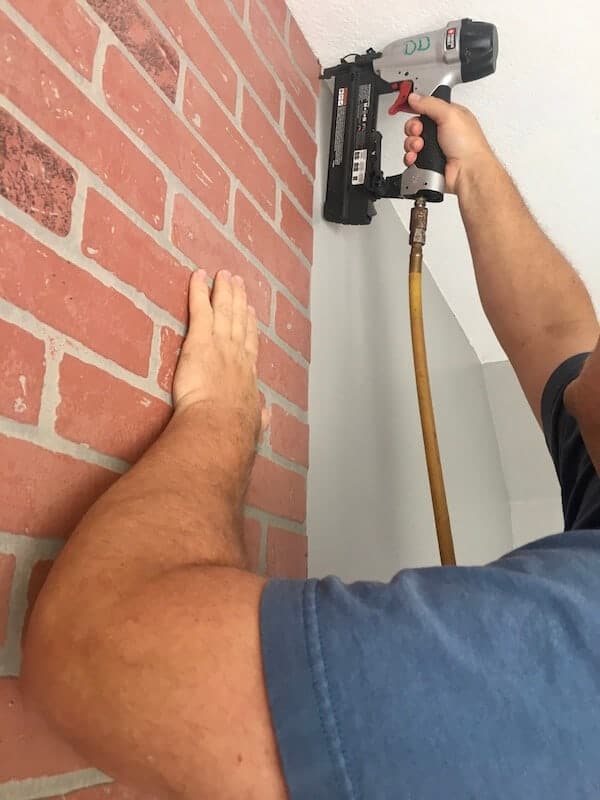
As you’re applying the joint compound, you may notice that the seams of the 3D brick wall panels are starting to become more visible. You can see the vertical lines right in the middle of the “bricks” under my hand in this photo:
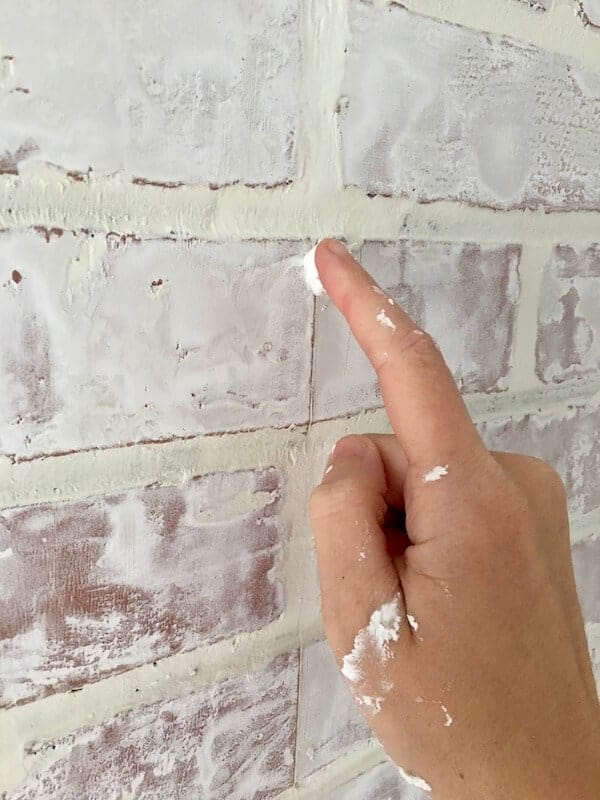
To fix that, I simply took a dab of compound on the tip of my finger and smoothed it over the seams. Did I mention that this project is a tad bit messy? You’ll definitely have spots of joint compound on your hands, so if that bothers you, be sure to wear gloves.
And here’s the finished DIY brick accent wall, “whitewashed” with joint compound:
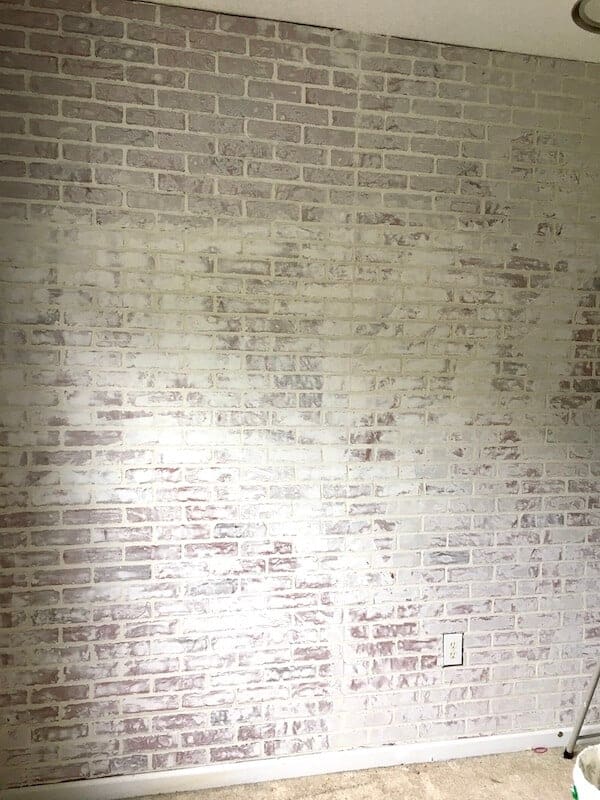
If you want a whiter look, with less brick color showing through, then just apply a thicker layer of joint compound.
We actually tried painting over the wall with watered-down white paint at this stage, but we IMMEDIATELY wiped it off because the white paint completely covered the rustic look of the bricks. And I personally prefer this look to the solid white brick wall look.
Step 5: Use extra joint compound to “caulk” the outer edges of the wall.
You will probably have some slight gaps where the faux brick wall panels meet the ceiling and the corners of the wall. You can barely see a gap at our ceiling in the photo above.
To fill in those gaps, we just took a bit of joint compound on a small trowel and used it as caulk. Just fill in the gaps with the compound, and then smooth your finger over top (just like you would with caulk) for a nice, finished look.
Of course, you can also use actual caulk if you prefer.
And that’s it!

I COULD NOT be happier with how this easy DIY wall treatment turned out! It was SO easy to do, and the result gives the perfect amount of subtle, rustic farmhouse texture to my office.
For about $150 and 4 hours of your time, you can’t beat this DIY faux brick wall!
Here’s another view:
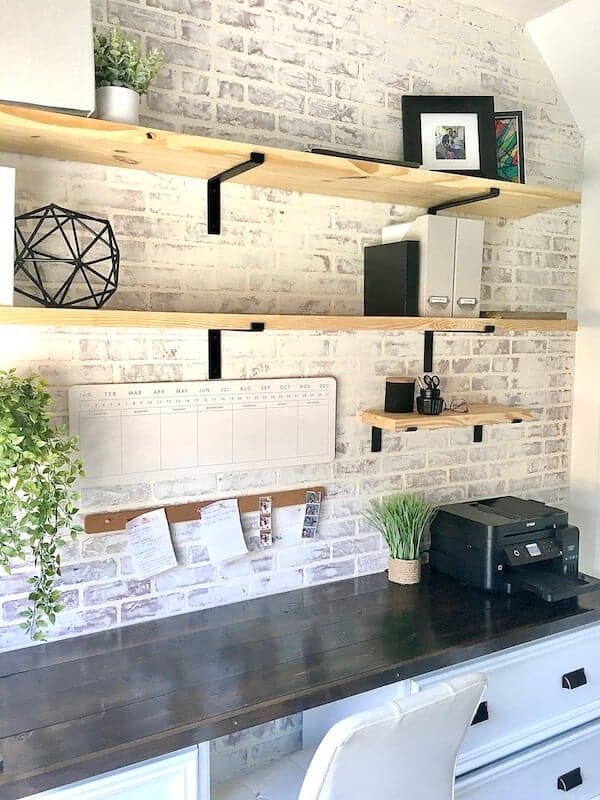
And here’s a close up view:

What do you think? Leave me a comment down below!
And check out House Beautiful for even more accent wall ideas!
Or check out some of my other DIY farmhouse decor ideas:
- DIY Reverse Shiplap Wall for Under $75
- DIY Large Wall Calendar – See All 12 Months at One Time!
- DIY Basket Labels for Pretty Organization
- Easy Large DIY Wall Art Using Drop Cloths
And happy nesting!

Comments & Reviews
It looks great. I need to do my walls as I have had the panels up for years! I feel intimidated. Do you need to seal the joint compound?
Hi Kristy! I have never sealed mine… over a year later and it still looks brand new and in great condition! 🙂
Looks amazing Amy! One quick question, do you have any advice about adding shelves? I noticed you have them there and they look great but I’m nervous about putting shelving there when the panels are essentially foam on top of drywall. Any tips would be really appreciated!
Hi Cameron! Great question! I actually found the studs in my wall before putting on the faux brick panels… I made a small pencil mark on the ceiling right above where the studs were so that it wasn’t covered up by the panels. Then, we drilled into the studs to hang the brackets for the shelves, so everything is very sturdy. I’ve got some pretty heavy stuff on my shelves right now, and they haven’t budged in the last year+ since we hung them. 🙂
This looks so so good!! I’m planning on doing this behind my toilet. Just was getting different ideas of how it was done!
I love how this turned out! Such an inspiration to me. I want to do the same to our 8ft tall bedroom walls but my hubby doesn’t think I can get the panels in my SUV without damage. I’m not giving up tho. Your wall has inspired me to give it a try. It really is beautiful and your tutorial makes it seem attainable. How is this holding up? Do you still love it as much as the day you’d completed it? Thanks so much for posting. 🤍
Hi Kelly! Yes, it’s holding up really well… looks the same as the day that we installed it, which was over a year ago. It’s still one of my favorite DIY projects that we’ve done, and it really is so easy to do also. It’s nice because it’s still what I would consider a “neutral” accent wall, but it adds a lot of interest to the room. 🙂
Thanks so much for sharing your work. I have already purchased my 3 brick panels and was wishing they were white and didn’t know what I was gonna do .. so thanks for sharing, I will send pictures when I get it done, it will be a few weeks I’m waiting on my son.
That’s awesome Carol! This is truly one of my favorite DIY projects that we’ve done… and it’s so incredible easy! I’d love to see how your faux brick wall turns out. 🙂
Love this! I am going to use this to do my own wall.
Thanks so much, Jen! It really is pretty easy to do, and I absolutely LOVE the end result. Good luck! 🙂
Hi Amy. How did you get the angles on your panels cut to fit the wall?
Absolutely love the way you did it!
Thanks so much Stacey! It really looks even better in person! 🙂
Looks great! Did you remove your baseboards before putting up the faux brick wall?
Hi Nora! Thanks so much! Nope, we kept the baseboards… The faux brick panels are thinner than our baseboard, so it looks just fine. And with a little caulk, the brick paneling and the top of the baseboard blends together nicely. Plus, a large portion of the wall is covered by my desk, so you don’t really even notice the lower part of the wall. 🙂
This came out nice. For me, I’m about ready to get mine now and I’m doing just a bit different. Instead of lining my seams up as you did, I am going to do mine more like a puzzle and cut the bricks out on one panel and then make the other panel fit into the ones I cut out in the first panel. This way, I will have no seam lines to deal with. I have a wall that I will be doing 8 panels on. Well 7 really but I’m buying 8 just because the cut out will take away from the full panel enough that I probably need the 8th one to make up for the cuts. Mine is going in the living room so I need it to be pretty darn perfect. Had it been a bedroom or something where it isn’t visible everyday then I would probably do it the way you did. You’ll did a really nice job!
Hi Shirley! That sounds like a GREAT idea to cut out the brick panels like a puzzle piece! Since I did my wall behind my desk and then hung shelves and decor on top, you really don’t notice the seams unless you’re actually looking for them. I’m sure your accent wall will be beautiful! Good luck! 🙂
Hey Amy! I love this tutorial on the brick accent wall! I’m planning on doing it in my living room but I’m actually commenting to ask about the desk and floating shelves! Did you make those too? If so, do you have a tutorial?
Hi Kaitlyn! Yes, the desk and shelves are DIY also! I still need to post a tutorial for the shelves, but they were super easy… I’ll try to put that on my to-do list for the next week. For the desk, we actually found 2 lateral filing cabinets on Facebook Marketplace for $75 total. Then, we painted them white and added the trim and drawer handles ourselves to make them look more like home office furniture instead of commercial office furniture. Then, we just stained 2 1″ x 6″ and 1 1″ x 8″ board and screwed them together with a Kreg Jig (pocket holes) to make the desk top. Good luck on the wall! That DIY brick panel wall is one of my absolute favorite projects that we’ve done! 🙂
Thanks so much, Amy!🙂 Can I ask how you secured the desk top to the drawers?
The desk top itself is one entire piece (it’s actually 4 1″ x 6″ all screwed together with pocket holes as I’m looking at it now), and then we just screwed up through the bottom (going through the top of the top filing drawer), into the bottom of the desk, so you don’t see any screws. And then when/if we want to move it, the top is easy to remove because it isn’t glued or nail-gunned down… We just have to unscrew a few screws and lift off the entire top.
Have you had any problems with the joint compound coming off if you rub against the wall?
Hi Christine! I have not, but only because the wall never gets rubbed against or touched really. It’s just a feature wall behind my desk, so it doesn’t get any wear and tear. If you rub your finger against it, it does feel “chalky” but it doesn’t really rub off. 🙂
Hello. Getting ready to try this in our master bedroom. Can you tell me the red brick panels you used from HD? I’m not finding them online. Thanks
Hi Christine! The panels actually came from Lowe’s… These look a little bit darker than what we used, but they could just look different in the pictures and actually be the same ones, because the price and size is the same: https://www.lowes.com/pd/47-75-in-x-7-98-ft-Embossed-Red-Brick-Wall-Panel/1015475 Hope that helps! Good luck!
Super!! Thanks for the link! We don’t have them in stock at our local Lowe’s but Home Depot has something similar called “1/4 in. x 48 in. x 96 in. HDF Kingston Brick Panel” I’m hoping this will be as efficient ??? 🙏
I just checked out that HDF Brick Panel on the Home Depot website, and it looks like it would definitely work… it’s hard to tell from the photos, but just make sure that it’s actually a 3D panel. That’s what makes it look so much like real brick. Good luck! 🙂
Could you please share the link for the wall panels?
Hi Brandy! This one looks a little bit darker than what we used, but it may be the same one… The ones we used were around $35.00 for a 4′ x 8′ panel, and these are the same size and a similar price, so maybe this is the new version that Lowe’s is carrying now: https://www.lowes.com/pd/47-75-in-x-7-98-ft-Embossed-Red-Brick-Wall-Panel/1015475 The darker color doesn’t really matter as much since you will be covering it with the compound anyway… you just want to make sure that it is textured and has a little bit of a 3D feel to it. Then, when you’re doing the joint compound you can kind of “carve out” around the bricks to make it look even more like real brick.
We’re about to do this in our master. We’ve got the panels ready to go. I was so hoping to be able to do it with just our nail gun and not liquid nails. Do you think that would be a disaster?
Hi Rachel! My question would be, why would you not want to use Liquid Nails? My only concern would be that the panels are so heavy… Are you planning on screwing shelves or something in to the wall like I did? That would give it extra support. If you do it without the Liquid Nails, let me know how it goes! 🙂
Did you seal it with anything so the joint compound wouldn’t resoften if it got wet? First time you try to clean it you will wipe everything back off.
I love the desk/drawers 💕 where did you purchase those? Thank you
Hi Lisa! Those are actually two ugly brown and HUGE lateral filing cabinets that I found on Facebook Marketplace. My husband has a TON of work invoices that he has to keep, so we need a bunch of filing storage space. We just painted them white (we used regular latex paint and primer, but next time I would use chalk paint), then added some simple trim, and screwed on the handles to make them look nicer for a home office. And he just made the desk top out of a few pieces of 1″ x 8″ boards that he stained and screwed together with a Kreg Jig. It’s the perfect desk if you need a lot of storage space, and it was pretty inexpensive also. The filing drawers were only $75 for the set.
Wow looks so good! Thank you so much for the easy instructions. I’m doing this in my camper now and hope it turns out as good as yours!
Yeah! I’m sure it will turn out great… that’s the great thing about this DIY brick wall – it’s pretty hard to mess it up. Haha! 🙂 Glad you enjoyed the tutorial!
LOVE it and the instructions!
Thanks so much Jenna! It was really SO easy to do… now I want to do another feature wall in my youngest daughter’s room. I would much rather do this than painting a wall any day of the week!